Create a PDF from a File in Acrobat Pro DC – Instructions
Create a PDF from a File in Acrobat Pro DC: Video Lesson
This video lesson, titled “Creating PDFs from a File,” shows you how to create a PDF from a file in Acrobat Pro DC. This video lesson is from our complete Acrobat tutorial, titled “Mastering Acrobat Made Easy v.Pro DC.”
Create a PDF from a File in Acrobat Pro DC: Overview
To create a PDF from a file in Acrobat Pro DC, select the “Create PDF” tool in the Tools Center. Acrobat then displays the “Create a PDF from any format” screen. By default, the “Single File” PDF creation option is selected. Click “Select a File.” Acrobat then launches the “Open” dialog box. Use it to navigate to find the file to convert into PDF.
When viewing the “Open” dialog box, Acrobat show all the file types you can convert into PDFs within it. To filter the file types shown in the “Open” dialog box, click the drop-down arrow to the right of the “All Supported Formats” choice in the lower-right corner of the dialog box to view a drop-down menu of file types and extensions to exclusively show in the “Open” dialog box. For example, to only show JPEG images in the “Open” dialog box, choose “JPEG” from the drop-down menu.
After finding the file to convert to a PDF, click it to select it and then click the “Open” button in the dialog box. The dialog box then closes, and Acrobat shows a thumbnail image of the file in the “Create PDF” screen. Then click the “Create” button. Depending on the file type you choose, your computer may open the program that created the original file. Acrobat converts the selected file into a PDF and shows it in the document window. You can see in the Title bar that the file extension for the new file is now .pdf.
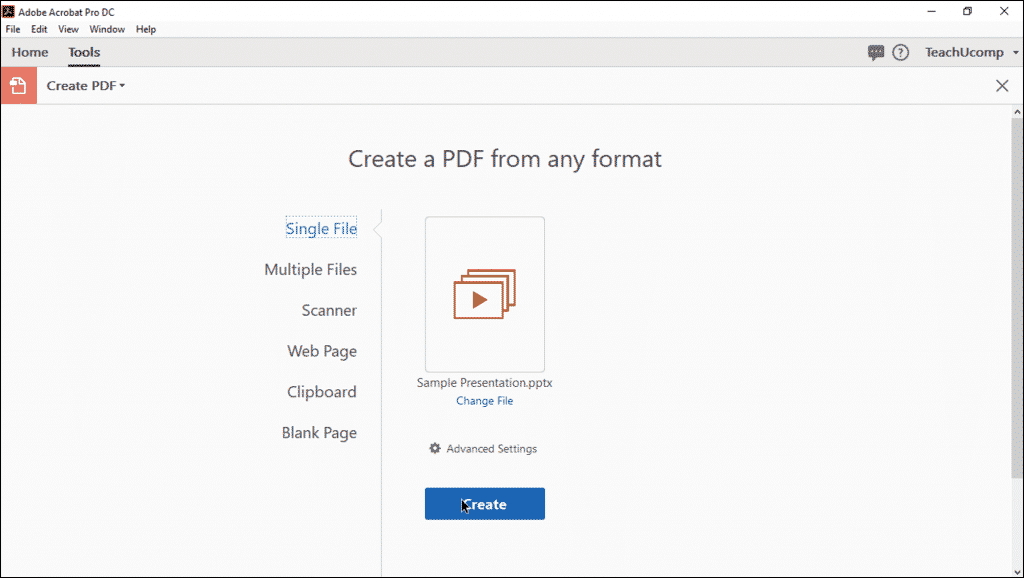
Create a PDF from a File in Acrobat Pro DC – Instructions: A picture of a user about to convert a selected file into a PDF within the “Create PDF” screen in Acrobat Pro DC.
If you close the PDF document window, Acrobat then prompts you to save the new PDF. Even though the content of the new PDF file looks the same as the original file and has the same basic name in the Title Bar, note that they are not the same file. This is a new PDF file created from the selected file. The original file still exists in its original folder and remains the same file type it always was. It is not affected by the actions in Acrobat in any way, whether you save the new PDF or close it without saving it.
Create a PDF from a File in Acrobat Pro DC: Instructions
- To create a PDF from a file in Acrobat Pro DC, select the “Create PDF” tool in the Tools Center.
- Acrobat then displays the “Create a PDF from any format” screen and selects the “Single File” PDF creation option, by default.
- Click “Select a File.”
- Use the “Open” dialog box that then appears to find the file to convert to a PDF.
- After finding the file to convert to a PDF, click it to select it and then click the “Open” button in the dialog box.
- The dialog box then closes, and Acrobat shows a thumbnail image of the file in the “Create PDF” screen.
- Then click the “Create” button.
- Acrobat converts the selected file into a PDF and shows it in the document window.
- Then save the new PDF file you have created.
