Sort a Table in Excel – Instructions and Video Lesson
Sort a Table in Excel: Video Lesson
This video lesson, titled “Sorting Data,” shows you how to sort a table in Excel. This video is from our complete Excel tutorial, titled “Mastering Excel Made Easy v.2019 and 365.”
Sort a Table in Excel: Overview
You can sort a table in Excel using any of the fields available. Sorting is one of the main reasons that you create tables in Microsoft Excel. It allows you to easily organize information in the table records. By default, Excel can sort alphabetically or numerically in either “ascending” (A-Z, 1-9) or “descending” (Z-A, 9-1) order. By default, you sort a table in Excel from top to bottom. However, you can also sort from left to right, if necessary. You can sort a table in Excel by the values within a single column. You can also sort a table in Excel by the values within multiple columns.
When you sort a table in Excel, you must choose the field to use to sort the data. You must also choose the order used to sort the data. For example, if you primarily sorted a table by the “LastName” field, there might be multiple entries with the same last name. That is when applying a secondary sort, by the “FirstName” field, for example, can help. The secondary sort ensures recording sorting in alphabetical order by last name, then by first name.
To sort a table in Excel by a single column, click into a cell within the column by which to sort the data. Then click the “Data” tab in the Ribbon. Then click either the “Sort A to Z” or “Sort Z to A” buttons in the “Sort & Filter” button group. Doing this sorts the table in either ascending or descending order by the column’s values.
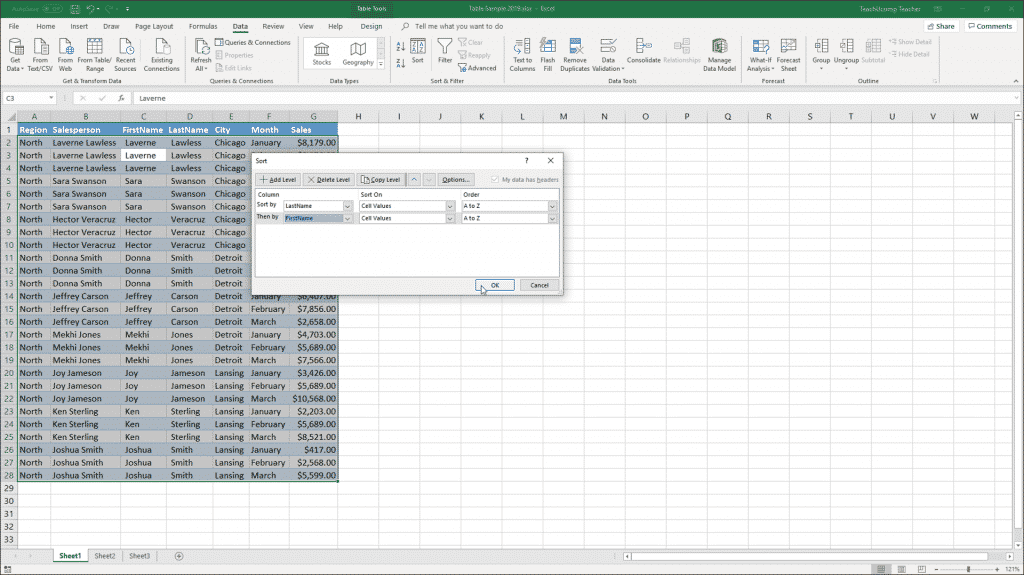
Sort a Table in Excel – Instructions: A picture of the “Sort” dialog box within Excel for Office 365.
To sort a table in Excel using multiple columns, first click into the table. Then click the “Sort” button in the “Sort & Filter” button group on the “Data” tab in the Ribbon. In the “Sort” dialog box that appears, use the first “Sort by” drop-down to select the name of the first column by which to sort a table in Excel. This is called the “primary sort” field. To the right of that, ensure you select “Values” from the “Sort On” drop-down. Then select the desired option for the primary sort order: “A to Z,” “Z to A,” or “Custom List…”
Optionally, to then add more sorting levels, click the “Add Level” button. You can then repeat the process using the next sorting row to create additional sorting levels, if desired. After adding all the desired sorting levels into this dialog box, click the “OK” button to apply the sorting you set. If you make a mistake after sorting data, you can undo it by clicking the “Undo” button in the Quick Access toolbar immediately after performing the sort.
To delete a sorting level applied to a table, click the “Data” tab in the Ribbon. Then click the “Sort” button in the “Sort & Filter” button group. Next, select the sorting level to delete from the “Sort” dialog box. Then click the “Delete Level” button in the “Sort” dialog box to delete the selected sorting level. Then click the “OK” button.
Sort a Table in Excel: Instructions
- To sort a table in Excel by a single column, click into a cell within the column by which to sort the data.
- To sort the table in either ascending or descending order by the column’s data values, click either the “Sort A to Z” or “Sort Z to A” buttons in the “Sort & Filter” button group on the “Data” tab in the Ribbon.
- Alternatively, to sort a table in Excel by multiple columns, click into the table.
- Then click the “Sort” button in the “Sort & Filter” button group on the “Data” tab in the Ribbon.
- In the “Sort” dialog box that appears, use the “Sort by” drop-down to select the name of the field by which to sort the data.
- To the right of that, ensure that the “Sort On” drop-down is set to “Values.”
- Then select the desired option for the primary sort order: “A to Z,” “Z to A,” or “Custom List…”
- To add more sorting levels, click the “Add Level” button and repeat steps 5 through 7 for the next “Then by” sorting row.
- To apply the sorting after adding all the desired sorting levels into this dialog box, click the “OK” button.
- If you want to undo a data sort, click the “Undo” button in the Quick Access toolbar immediately after performing the sort.
- To delete a sorting level applied to a table, click the “Data” tab in the Ribbon.
- Then click the “Sort” button in the “Sort & Filter” button group.
- Next, select the sorting level to delete from the “Sort” dialog box.
- Then click the “Delete Level” button in the “Sort” dialog box.
- Click the “OK” button.

