Add Bookmarks to a PDF in Acrobat – Instructions
Add Bookmarks to a PDF in Acrobat: Video Lesson
This video lesson, titled “Using Bookmarks in a PDF,” shows how to add bookmarks to a PDF in Acrobat Pro DC. This video is from our complete Acrobat tutorial, titled “Mastering Acrobat Made Easy v.Pro DC.”
Add Bookmarks to a PDF in Acrobat: Overview
You can easily add bookmarks to a PDF in Acrobat. Bookmarks are links that help to quickly navigate a PDF. You can use bookmarks in a PDF in many ways. The Bookmarks panel, in the Navigation Pane, contains text links to different PDF document locations. When you click a link in the Bookmarks panel, the main document window then shows the linked section of the PDF. You can also add bookmarks to a PDF in Acrobat that open external documents. Often, you link bookmarks to headings in the PDF text, sections of text, or the beginning of a chapter.
To add bookmarks to a PDF in Acrobat, open the Bookmarks panel by clicking the “Bookmarks” button in the Navigation Bar in the Navigation Pane. Then click the “New bookmark” button at the top of the panel to add a new, untitled bookmark to the panel. Type a name for the new bookmark. Then press the “Enter” key on your keyboard. The bookmark is then highlighted in the panel.
To set the bookmark’s destination, navigate through the PDF to find the location to which to link the bookmark. If desired, use the Page Thumbnails panel in the Navigation Pane to adjust the size of the link location, so the bookmark shows a very specific part of the PDF. The main document window displays the exact bookmark destination. After setting the size and location of the bookmark, click the “Options” button in the toolbar at the top of the Bookmarks panel. Then choose the “Set Bookmark Destination” command from the drop-down menu. Then click “Yes” in the pop-up message that appears to confirm the bookmark and apply it.
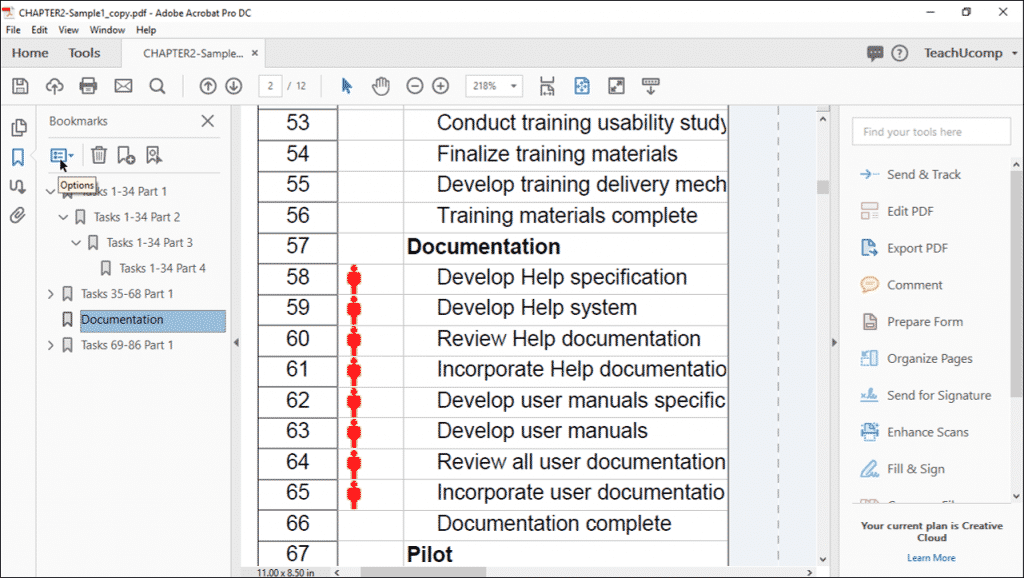
Add Bookmarks to a PDF in Acrobat – Instructions: A picture of a user about to click the “Options” button in the Bookmarks panel to set the destination for a selected bookmark.
You can repeat this process to add multiple bookmarks to a PDF. Don’t forget to save your PDF after adding bookmarks. When creating a PDF using an external application, such as Microsoft Word, note that the program may contain options for saving bookmarks created by the original authoring software. By keeping an eye out for this option when creating a PDF in an external application, you may save yourself the step of later adding the bookmarks in Acrobat.
To add bookmarks to a PDF in Acrobat that automatically name themselves and set their destinations, first choose the Selection Tool either from the Page Controls toolbar, if using Acrobat Pro DC, or from the Common Tools toolbar, if using Acrobat XI Pro. Then click and drag over the text to bookmark to select it. Then click the “New Bookmark” button at the top of the Bookmarks panel. A new bookmark then appears in the Bookmarks panel, with the highlighted text as both the name and destination of the bookmark.
Add Bookmarks to a PDF in Acrobat: Instructions
- To add bookmarks to a PDF in Acrobat, open the Bookmarks panel by clicking the “Bookmarks” button in the Navigation Bar in the Navigation Pane.
- Then click the “New bookmark” button at the top of the panel to add a new, untitled bookmark to the panel.
- Then type a name for the new bookmark and press the “Enter” key on your keyboard.
- The bookmark is then highlighted in the panel.
- To set a destination for the selected bookmark, navigate through the PDF to find the location to which to link the bookmark.
- If desired, use the Page Thumbnails panel in the Navigation Pane to adjust the size of the link location, so the bookmark shows a very specific part of the PDF.
- After setting the size and location of the bookmark, click the “Options” button in the toolbar at the top of the Bookmarks panel.
- Then choose the “Set Bookmark Destination” command from the drop-down menu that appears.
- Then click “Yes” in the pop-up message that appears to confirm the bookmark and apply it.
- To add bookmarks to a PDF in Acrobat that automatically name themselves and set their destinations, choose the Selection Tool either from the Page Controls toolbar, if using Acrobat Pro DC, or from the Common Tools toolbar, if using Acrobat XI Pro.
- Then click and drag over the text that to bookmark to select it.
- Then click the “New Bookmark” button at the top of the Bookmarks panel.
- A new bookmark then appears in the Bookmarks panel, with the highlighted text as both the name and destination of the bookmark.
