Adjust Skin Tone in Photoshop Elements – Instructions
How to Adjust Skin Tone in Photoshop Elements: Video
This video lesson, titled “Learn How to Adjust Skin Tone in Adobe Photoshop Elements 2023: A Training Tutorial,” shows how to adjust skin tone in Photoshop Elements. This video lesson is from our complete Photoshop Elements tutorial, titled “Mastering Photoshop Elements Made Easy v.2023.”
Overview of How to Adjust Skin Tone in Photoshop Elements:
You can adjust skin tone in Photoshop Elements within images. A variety of factors in photography can cause poor-looking skin tones in your subjects. Elements provides the “Adjust for Skin Tone” command that attempts to restore human skin tones to a more natural look.
You can adjust skin tone in Photoshop Elements for an entire layer or a selection. It’s usually a good idea to select just the areas of skin that you want to adjust using a selection tool. This helps you to not change the other elements of your image, unnecessarily.
After making your selection, choose “Enhance| Adjust Color| Adjust Color for Skin Tone…” from the Menu Bar. Then click into an area of skin you want to change. Then click around until you achieve your desired results.
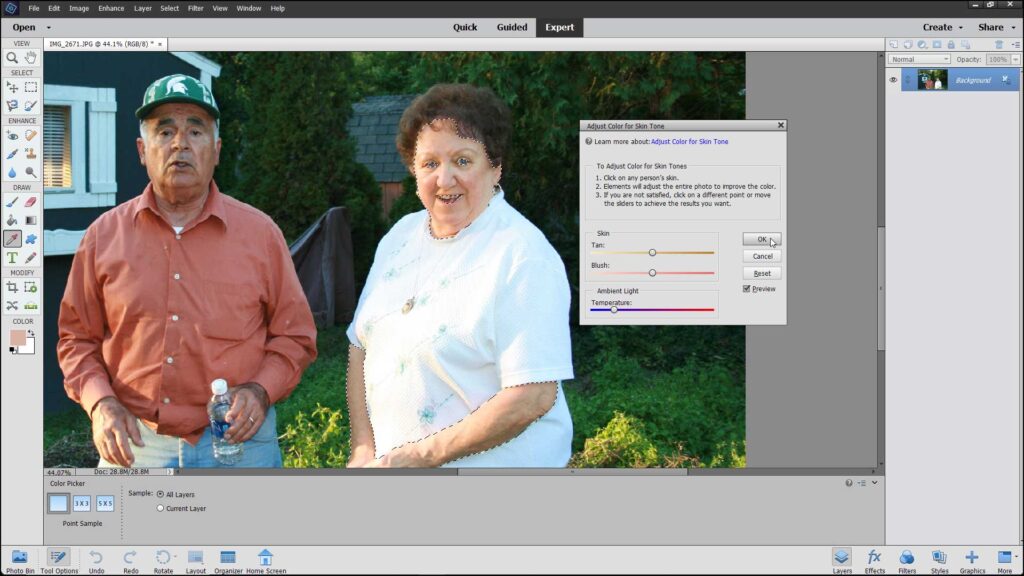
A picture showing how to adjust skin tone in Photoshop Elements.
You can also use the “Skin” and “Ambient Light” sliders to make further adjustments. Using the “Tan” slider adds and removes brown. The “Blush” slider adds and removes red. Using the “Temperature” slider changes the overall color by sliding to the right (warmer/red) or to the left (cooler/blue). Then click the “OK” button when you are done.
Instructions on How to Adjust Skin Tone in Photoshop Elements:
- To adjust skin tone in Photoshop Elements, select the areas of skin to adjust using a selection tool.
- Alternatively, select the layer to adjust.
- Then choose “Enhance| Adjust Color| Adjust Color for Skin Tone…” from the Menu Bar.
- Then click into the area of skin you want to change.
- Click around until you achieve your desired results.
- To make further adjustments, you can also use the “Skin” and “Ambient Light” sliders.
- Using the “Tan” slider adds and removes brown, while using the “Blush” slider adds and removes red.
- Using the “Temperature” slider changes the overall color by sliding to the right (warmer/red) or to the left (cooler/blue).
- Then click the “OK” button when finished.

