Apply a Multilevel List in Word- Instructions
Apply a Multilevel List in Word: Video Lesson
This video lesson, titled “Applying a Multilevel List,” shows how to apply a multilevel list in Word. This video on how to apply a multilevel list in Word is from our complete Word tutorial, titled “Mastering Word Made Easy v.2019 and 365.”
Apply a Multilevel List in Word: Overview
You can apply a multilevel list in Word to outline topics within a list. This list style lets you easily create an agenda or other formal outline. To apply a multilevel list in Word, type the first item within the list. Then press the “Enter” key on your keyboard when finished to move to the next item.
If the next item is a sub-point of the first item, press the “Tab” key on your keyboard to demote it. Then type the content of the line. When creating the outlined list, each “Tab” key character indicates a demotion of a line within the hierarchy of text.
After typing the items in the outline, click and drag over the content of the outlined list to select it. Then click the “Home” tab of the Ribbon. Then click the “Multilevel List” button in the “Paragraph” button group. Then select the style of multilevel list to apply from the drop-down menu of choices that appears. The outlined, multilevel list you created then appears.
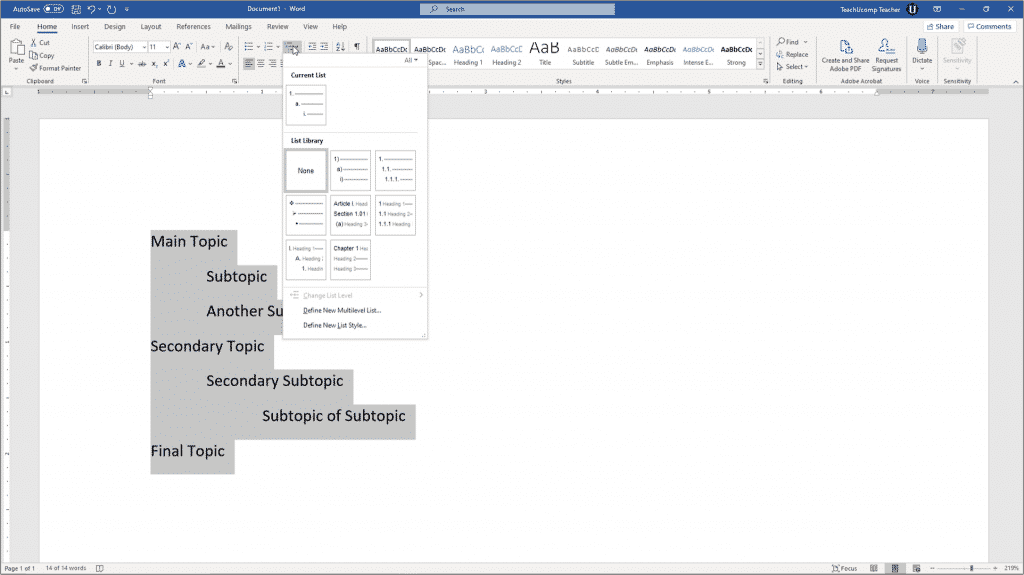
Apply a Multilevel List in Word- Instructions: A picture of a user applying a multilevel list format to an outlined list in a Word document.
To correct a mistake in the hierarchy of list items, click to place your insertion marker at the front of the line of text to promote or demote. To demote the selected line within the outline, press the “Tab” key on your keyboard. Alternatively, to promote the selected line, press the “Shift” + “Tab” keys on your keyboard.
Apply a Multilevel List in Word: Instructions
- To apply a multilevel list in Word, type the first item in the list and press the “Enter” key on your keyboard.
- If the next item is a sub-point of the first item, press the “Tab” key on your keyboard to demote it.
- Then type the content of the line.
- Each “Tab” key character indicates a demotion of a line within the hierarchy of text.
- Select the text of your outline after you have finished creating the list.
- Then click the “Home” tab of the Ribbon.
- Then click the “Multilevel List” button in the “Paragraph” button group.
- Then select the style of multilevel list to apply from the drop-down menu of choices that appears.
- The outlined, multilevel list you created then appears.
- To promote or demote lines in a multilevel list, place your cursor at the beginning of the line to change.
- To demote the selected line within the outline, press the “Tab” key on your keyboard.
- Alternatively, to promote the selected line, press the “Shift” + “Tab” keys on your keyboard.

