Automatically Correct Lens Distortions in Lightroom Classic CC- Instructions
Automatically Correct Lens Distortions in Lightroom Classic CC: Video Lesson
This video lesson, titled “Correcting Lens Distortion Automatically,” shows you how to automatically correct lens distortions in Lightroom Classic CC. This video lesson is from our complete Lightroom Classic CC tutorial, titled “Mastering Lightroom Classic Made Easy v.CC.”
Automatically Correct Lens Distortions in Lightroom Classic CC: Overview
You can automatically correct lens distortions in Lightroom Classic CC. Camera lenses can produce defects at certain f-stops, focal lengths, and focus distances. When this happens, lens distortions appear on photos. You should familiarize yourself with the following list of several common types of lens distortions.
“Vignetting” makes the corners and edges of a photo darker than the center of the photo. “Barrel distortion” makes straight lines appear unnaturally bowed outward. “Pincushion distortion” is like barrel distortion, but it makes straight lines appear unnaturally bent inward. “Chromatic aberration” shows color fringes along the edges of objects. You can automatically correct lens distortions in Lightroom Classic CC to fix these types of distortions.
To automatically correct lens distortions in Lightroom Classic CC, expand the Lens Corrections panel in the Develop module. If necessary, then click the word “Profile” at the top of the panel to display the Profile options. The profiles in the Lens Corrections panel are based on EXIF metadata, which contains information about the camera and lens that captured each photo. Each profile compensates for the specific distortions related to common lenses. The profiles available in the panel vary, depending on whether you’re adjusting a raw file or a non-raw file.
To automatically correct chromatic aberration, check the “Remove Chromatic Aberration” checkbox in the Lens Correction panel. When checked, it automatically corrects lateral chromatic aberration, visible as blue-yellow and red-green fringes along the edges of objects in some photos. To automatically correct vignetting, barrel distortion, and pincushion distortion, check the “Enable Profile Corrections” checkbox in the Lens Corrections panel.
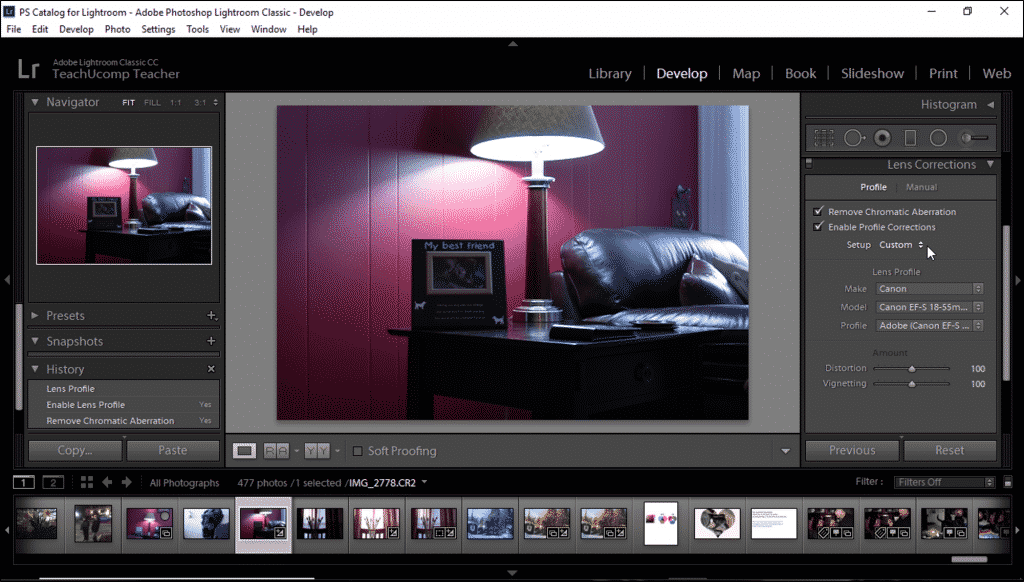
Automatically Correct Lens Distortions in Lightroom Classic CC- Instructions: A picture of the “Lens Correction” panel in Lightroom Classic CC.
To change the profile, use the “Make,” “Model,” or “Profile” drop-down menus. Note that some cameras have only one lens, and some lenses have only one profile. If necessary, you can then customize the correction prescribed by the profile. To do this, adjust the “Amount” sliders at the bottom of the panel.
When using the “Distortion” and “Vignetting” sliders, note that the default values for each are set at 100. This means that 100% distortion correction or 100% vignetting correction is applied, according to the profile. You can apply greater amounts of correction than the profile prescribes by moving either slider above 100. Likewise, you can apply less correction than the profile prescribes by moving the sliders below 100.
Automatically Correct Lens Distortions in Lightroom Classic CC: Instructions
- To automatically correct lens distortions in Lightroom Classic CC, open the photo to correct in the Develop module.
- Then expand the Lens Corrections panel at the right side of the Develop module.
- If necessary, then click the word “Profile” at the top of the panel to display the Profile options.
- To automatically correct chromatic aberration, check the “Remove Chromatic Aberration” checkbox in the Lens Correction panel.
- To automatically correct vignetting, barrel distortion, and pincushion distortion, check the “Enable Profile Corrections” checkbox in the Lens Corrections panel.
- If you want to change the active profile, use the “Make,” “Model,” or “Profile” drop-down menus. Note: some cameras have only one lens, and some lenses have only one profile.
- To then customize the correction prescribed by a profile, adjust the “Amount” sliders at the bottom of the panel.
