TeachUcomp, Inc.

 MY CART
  • VIDEO COURSES
    • All-Access Subscriptions
    • Business Licensing
    • Course List
      • Accounting
      • Adobe
        • Acrobat
        • Lightroom Classic
        • Photoshop
        • Photoshop Elements
      • Crystal Reports
      • Employment Skills
        • Interview Skills
        • Resume Skills
      • For Lawyers
        • Excel for Lawyers
        • Outlook for Lawyers
        • QuickBooks for Lawyers
        • Word for Lawyers
      • HTML
      • JavaScript
      • Microsoft Office
        • Access
        • Excel
        • Microsoft Office Suite
        • OneNote
        • Outlook
        • Outlook on the Web
        • PowerPoint
        • Publisher
        • Word
      • Microsoft Project
      • Microsoft Teams
      • QuickBooks Online
      • QuickBooks Pro
      • Sage
        • Peachtree
        • Sage 50
      • SQL
      • Windows
    • My Courses
    • Video Course Options
  • SUBSCRIPTIONS
  • MANUALS
    • Adobe
      • Acrobat
      • Lightroom Classic
      • Photoshop
      • Photoshop Elements
    • Crystal Reports
    • For Lawyers
      • Excel for Lawyers
      • Outlook for Lawyers
      • QuickBooks for Lawyers
      • Word for Lawyers
    • HTML
    • JavaScript
    • Microsoft Office
      • Access
      • Excel
      • OneNote
      • Outlook
      • Outlook on the Web
      • PowerPoint
      • Publisher
      • Word
    • Microsoft Project
    • Microsoft Teams
    • QuickBooks Online
    • QuickBooks Pro
    • Sage
      • Peachtree
      • Sage 50
    • SQL
    • Windows
  • BOOKS
    • QuickBooks Online
  • REFERENCE CARDS
    • Adobe
      • Acrobat
      • Lightroom Classic
      • Photoshop
      • Photoshop Elements 2026
      • Photoshop Elements 2025
      • Photoshop Elements 2024
      • Photoshop Elements 2023
      • Photoshop Elements 2022
      • Photoshop Elements 2021
      • Photoshop Elements 2020
      • Photoshop Elements 2019
      • Photoshop Elements 2018
      • Photoshop Elements 15
    • Chrome OS
      • Chrome OS Keyboard Shortcuts
    • FreshBooks
    • Google
      • Google Classroom for Teachers
      • Google Docs
      • Google Drive
      • Google Forms
      • Google Sheets
      • Google Slides
    • macOS
      • macOS Keyboard Shortcuts
      • macOS Tahoe
    • Microsoft Office
      • Excel Formulas and Functions
      • Excel Keyboard Shortcuts (macOS)
      • Excel Keyboard Shortcuts (PC/Windows)
      • Excel Tables PivotTables and Charts
      • Microsoft 365
        • Access for Microsoft 365
        • Excel for Microsoft 365
        • Microsoft Office 365
        • Outlook for Microsoft 365 Classic Edition
        • Outlook for Microsoft 365 (New Outlook)
        • PowerPoint for Microsoft 365
        • Publisher for Microsoft 365
        • Word for Microsoft 365
      • Microsoft Office 2021
        • Access 2021
        • Excel 2021
        • Microsoft Office 2021
        • OneNote for Windows 10
        • Outlook 2021
        • PowerPoint 2021
        • Publisher 2021
        • Word 2021
      • Microsoft Office 2019
        • Access 2019
        • Excel 2019
        • Microsoft Office 2019
        • Outlook 2019
        • PowerPoint 2019
        • Publisher 2019
        • Word 2019
      • Microsoft Office 2016
        • Access 2016
        • Excel 2016
        • Microsoft Office 2016
        • OneNote 2016
        • Outlook 2016
        • PowerPoint 2016
        • Publisher 2016
        • Word 2016
      • Microsoft Office 2013
        • Excel 2013
        • Microsoft Office 2013
        • OneNote 2013
        • Outlook 2013
        • PowerPoint 2013
        • Word 2013
      • Microsoft Office for iPad
        • Microsoft Office for iPad
      • Word Keyboard Shortcuts (PC/Windows)
    • Microsoft Teams
    • QuickBooks Online
    • QuickBooks Pro
      • QuickBooks Pro 2024
      • QuickBooks Pro 2023
      • QuickBooks Pro 2022
      • QuickBooks Pro 2021
      • QuickBooks Pro 2020
      • QuickBooks Pro 2019
      • QuickBooks Pro 2018
      • QuickBooks Pro 2017
      • QuickBooks Pro 2016
      • QuickBooks Pro 2015
      • QuickBooks Pro 2014
    • Sage 50 Accounting
    • SQL
    • Windows
      • Windows 11
      • Windows 11 and 10 Keyboard Shortcuts
      • Windows 10
  • STICKERS
    • Chrome OS
    • macOS
    • Microsoft Office
      • Word and Excel (Mac)
      • Word and Excel (PC/Windows)
    • QuickBooks Desktop
      • QuickBooks Desktop (PC/Windows) 2024
      • QuickBooks Desktop (PC/Windows) 2023
      • QuickBooks Desktop (PC/Windows) 2022-2015
    • QuickBooks Online
    • Windows
  • SUPPORT
    • Company
      • About Us
      • Blog
      • Contact Us
      • Our History
      • Our Philosophy
        • Customer Service
        • Mission
      • Policies
      • Testimonials
    • FAQ
      • Contact Us
    • Help
    • Lost Password
    • Register a Product
  • LOGIN
    • Manage My Account
    • Member Login
    • My Courses
Shop Now

Basic Tasks in Microsoft OneNote 2013

by Keeley Byrnes / Friday, August 09 2013 / Published in Latest, OneNote 2013

Opening a New Notebook

  1. By default, OneNote will open the notebooks you were working on when you last closed the program.
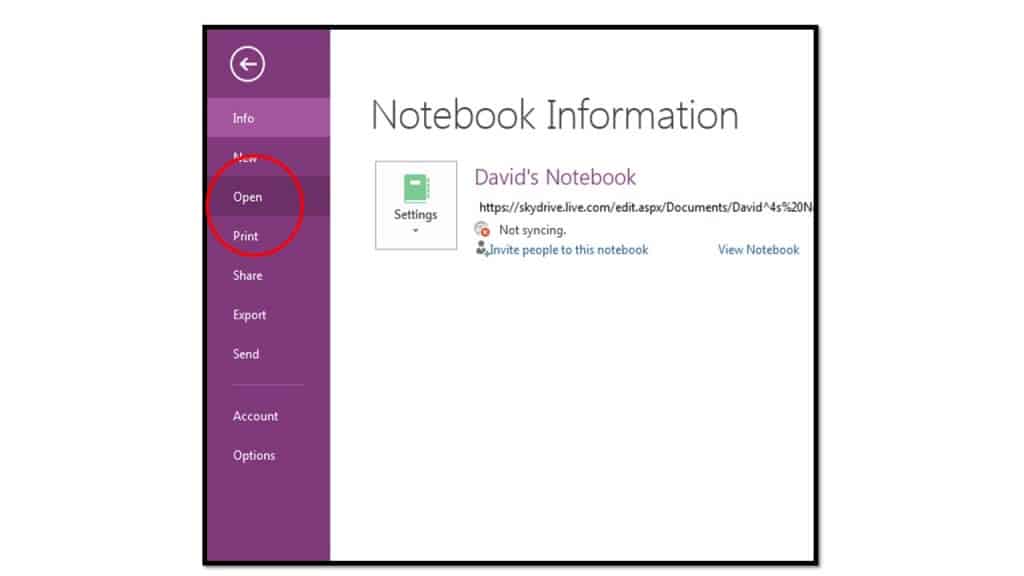
  2. If the notebook is not open and displayed in the Notebook drop-down, click the “File” tab in the Ribbon and click on “Open” in Backstage View. If the notebook is stored in the cloud, click the “Sign In” button to login with your Windows Live ID and retrieve the notebook.
  3. If the notebook is stored on your computer or server, click the “Computer” and “Browse” buttons under “Open from other locations.” In the “Open Notebook” dialog box, navigate to the location of the desired notebook and double-click on it, then click on “Open Notebook” and then “Open.”

Slide1

Creating a New Notebook

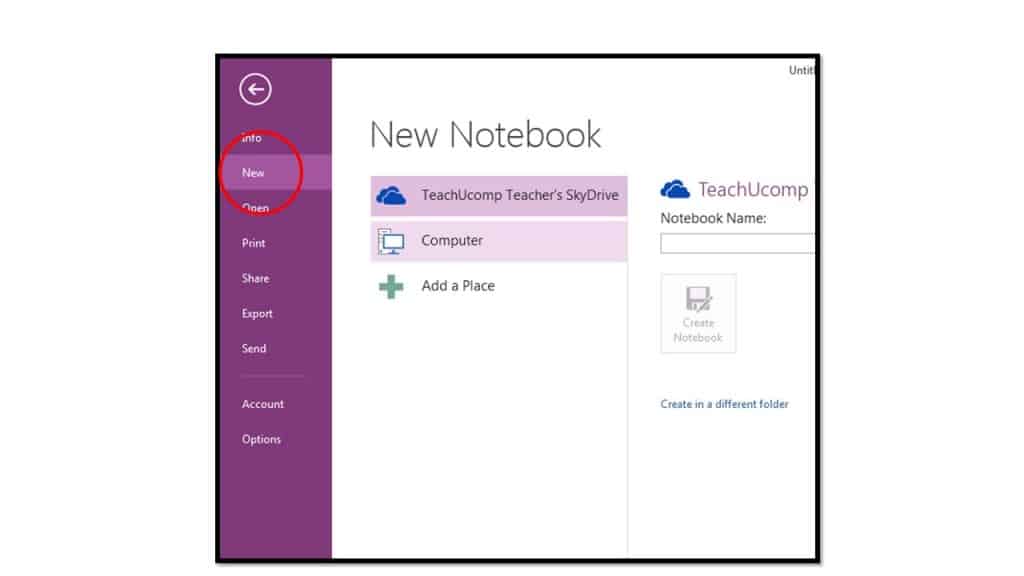
  1. Click the “File” tab in the Ribbon to open Backstage View.
  2. Click “New” in the menu on the left side of the screen.
  3. In the “New Notebook” section that appears to the right, select to save the notebook to “SkyDrive” or “Computer.”
  4. Enter a name for the notebook in the “Name” textbox.
  5. Either enter a “Web Location” by logging into your SkyDrive on your Windows Live account, or a network or computer location, if saving to your computer or a network.
  6. Click the “Create Notebook” button.

Slide2

Type/Write Notes

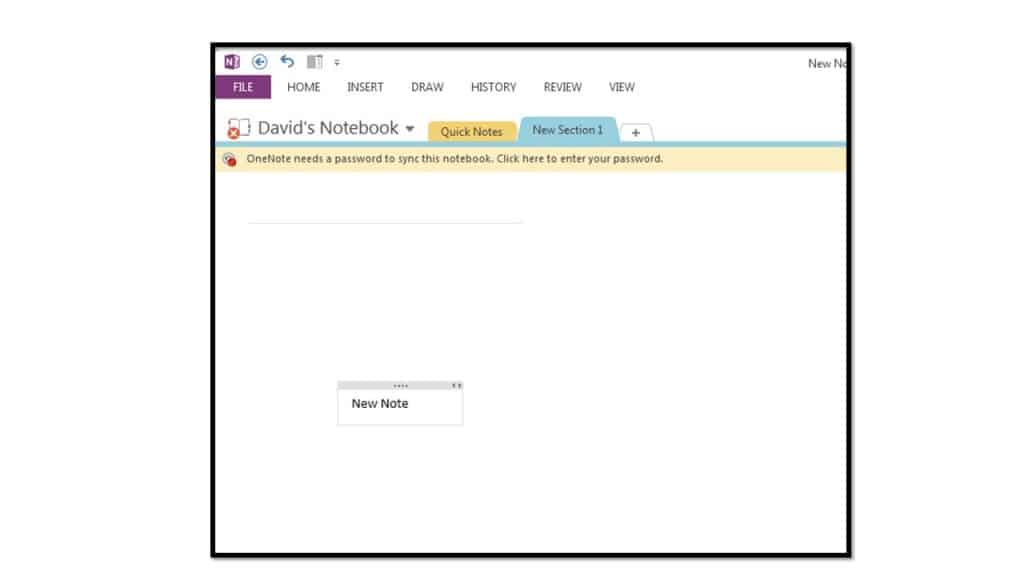
  1. To insert a note, click in any open area of a page and either type text or paste it from a different location.
  2. Hover your mouse pointer over the right side of the note container until a double-sided arrow appears. Click and drag the note’s edge to expand it horizontally.
  3. You can move the note container by hovering your mouse over the top edge of the container until a four-sided arrow appears. Click and drag the container to a new location.

Slide3

Inserting Files into Notes

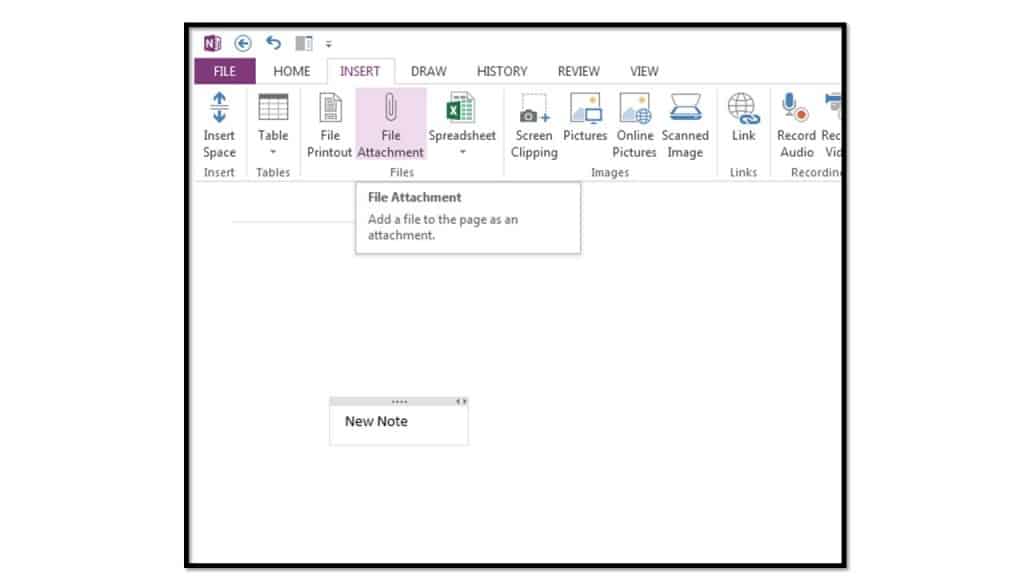
  1. To insert another type of file, such as a Word document, navigate to the page and click in the area where you want to insert the file..Click the insert tab in the Ribbon and then select the “File Attachment” (“Attach File” in 2010) button.
  2. Click the insert tab in the Ribbon and then select the “File Attachment” (“Attach File” in 2010) button.
  3. In the “Choose a file or set of files to insert” dialog box, navigate to and click to select the file.
  4. Click the “Insert” button.
  5. You can open the file at any time by double-click the file’s icon in the OneNote page.
Slide4

Insert Pictures into Notes

  1. To add a picture to a page, navigate to the page into which you wish to insert an image.
  2. Click the “Insert” tab in the Ribbon and then select the “Pictures” button in the “Images” group.
  3. In the “Insert Picture” dialog box, navigate to the location of the image you want to insert and click to select it.
  4. Click the “Insert” button to insert the picture.
  5. To move the image on the page, click to select it. Move your mouse over an edge and not on a resizing handle, until your cursor turns into a four-sided arrow.
  6. Click, drag and release to move the image.
  7. You can also use the re-sizing handles to re-size the image to your liking by hovering over a re-sizing handle until your cursor turns into a double-sided arrow. Click and drag the handle to change the picture’s size.


Slide5

Tagged under: 2013, basic, file, help, how-to, insert, microsoft, note, notebook, office, one, onenote, open, picture, save, skills, training, tutorial

About Keeley Byrnes

Keeley is our Director of Marketing and has been with TeachUcomp since 2010. Keeley manages all aspects of our Marketing Department, acts as liaison for our reseller and affiliate partners and also authors courses in software and taxation.
Sale! One Year Online Entire Library $29. Click here to see the deals.


Categories

  • GET SOCIAL

© 2001-2026 Copyright TeachUcomp, Inc. All rights reserved.

TOP
SALE! $29 All-Access 2 Days 12 Hours 7 Minutes 36 Seconds      $199 $29 Entire Library!
See Deal