
Creating A New Document
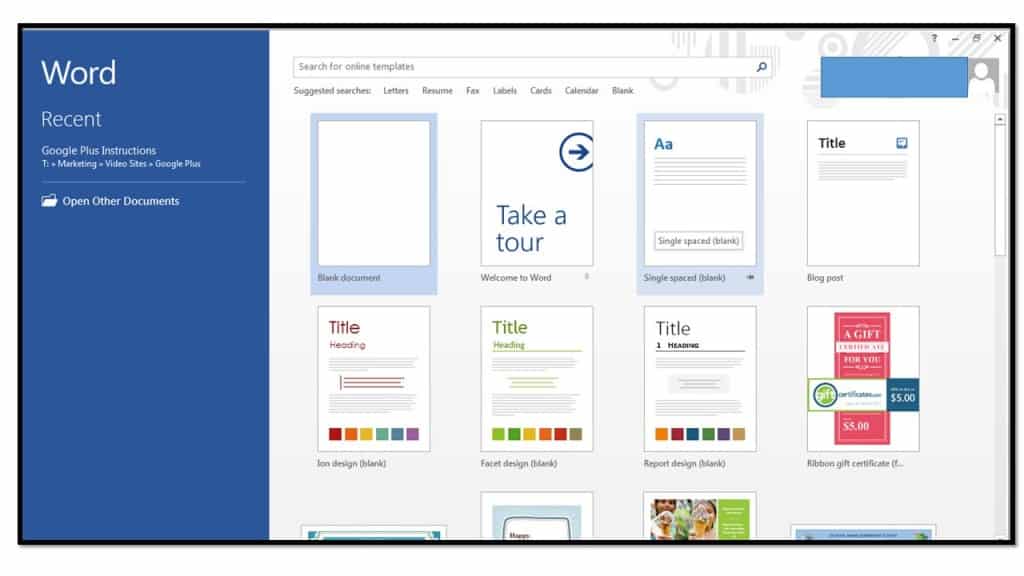
- When you first open Word 2013, you will see a startup screen that allows you to create a new document. Simply click the type of document that you want to create within the listing of available templates that appears at the right side of the startup screen.
- If you already have opened a document in Word 2013 or Word 2010, you can view a similar screen by clicking the “File” tab within the Ribbon and then selecting the “New” command at the left side of the backstage view.
- In the listing of available templates that appears to the right in the backstage view, you can choose to start a new document from one of the many templates available or you can choose to simply create a new blank document by clicking the desired template choice.
- You can then click either the “Create” or “Download” buttons that appear to create a new document based on the selected template.
- If you want to create a new blank document in Word 2013, click the “Blank Document” choice in the section at the right. If using Word 2010, then click the “Create” button in the lower right corner.
Saving a Document
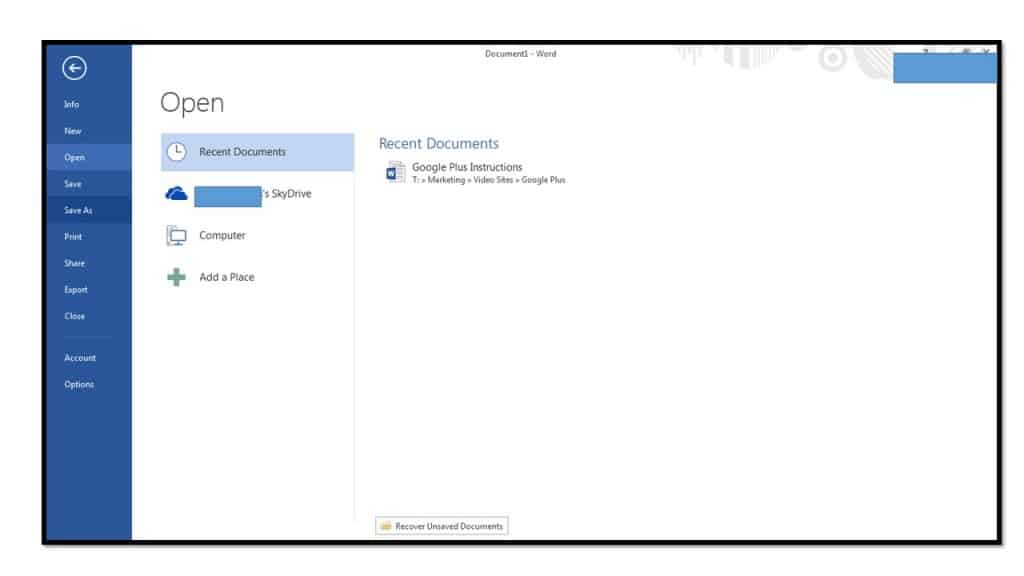
- To save a document for the first time, click the “File” tab within the Ribbon.
- Click the “Save As” command in the command panel shown at the left side of the backstage view.
- To the right of the command panel, under the “Places” section, you will see the places that are available for you to save the file. These include your “SkyDrive” folder for Microsoft user accounts and your “Computer.” If you save to your SkyDrive folder, the documents will be saved on an online computer that you can access from any computer that you can access with your Microsoft user account. If you select the “Computer” choice, the file will be saved locally on the computer at which you are working.
- If you are signed into your computer and Microsoft Office 2013 by using a Microsoft user account, then you can click the “SkyDrive” choice under the “Places” section to save to your online SkyDrive folders.
- After selecting this choice, you will see any recently selected SkyDrive folders shown to the right under the “Recent Folders” section. You can click on a recently accessed folder to select it as the save location.
- At that point a “Save As” dialog box will appear.
- If you have no folders listed in the “Recent Folders” section, then instead click the “Browse” button to open a “Save As” dialog box where you can then select the desired folder within the SkyDrive to use for the save operation.
- Alternately, you can choose to save the file to your computer versus the SkyDrive. You may choose to do this if you are not signed into Microsoft Office 2013 using a Microsoft user account, or if you know that you will not need to access the file on any other computers. If this is the case, then you can select the “Computer” choice under the “Places” section.
- You can select a recently used folder on your computer from the “Recent Folders” section or click the “Browse” button in order to open the “Save As” dialog box.
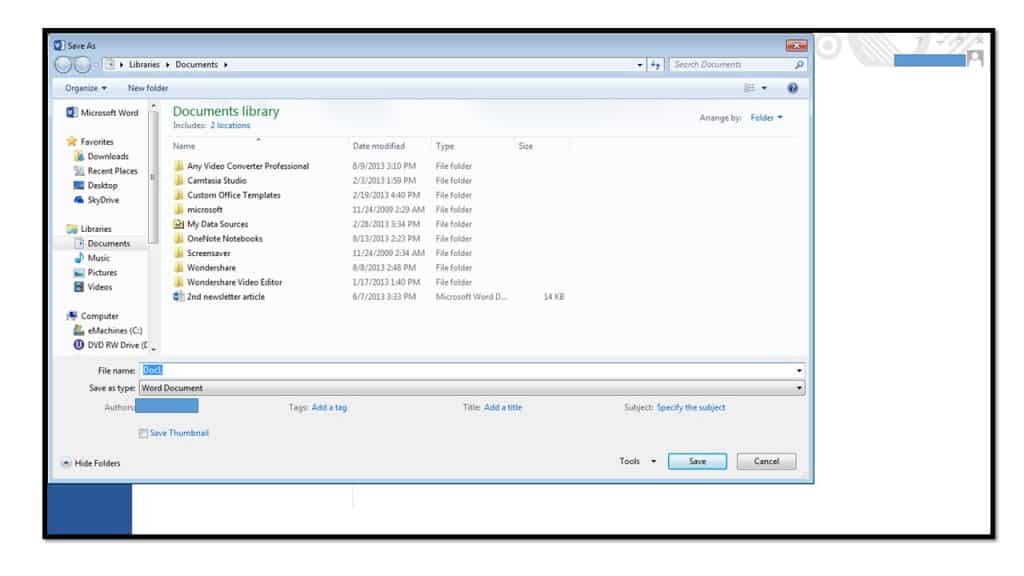
- After selecting a location to save the document file, the “Save As” dialog box appears.
- In the “Save As” dialog box, enter a file name into the “File name” field. Give it a name that you will remember, and be sure to remember to which folder you saved it. This latter step is often more crucial. People will often remember what they called a file, but can’t remember into which folder they saved it.
- Once you have entered the file name and noted the save location, click the “Save” button within the “Save As” dialog box to finish saving the file.
- When you make changes in the future that you want to save, you can just click the “Save” button in the Quick Access toolbar, or click the “File” tab in the Ribbon and then click the “Save” command. You will not have to re-enter the file name and select a location. Word will save the changes automatically to the existing file.
Inserting Text Into a Document
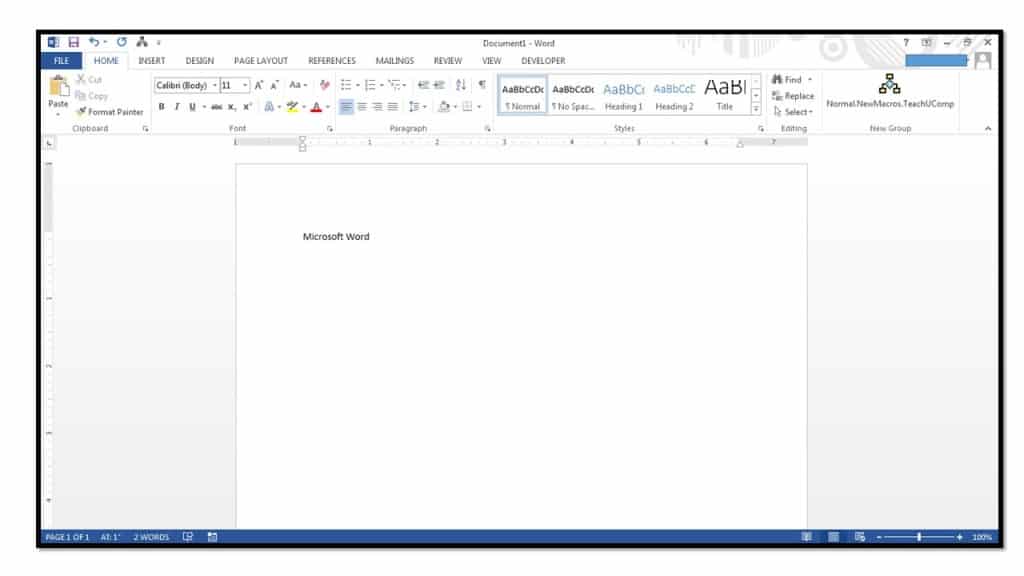
- When you open a new document, the insertion point cursor appears in the upper left corner of the document. This insertion point cursor identifies where text that you type with your keyboard will appear.
- When you want to insert a new line or end a paragraph, press “Enter” on your keyboard.
- Pressing “Backspace” on your keyboard will delete the previous characters behind the cursor.
- Pressing “Delete” or “Del” on your keyboard will delete characters in front of your cursor.
- Pressing “Tab” will indent lines.
- In Word, text will wrap automatically when it comes to the end of a line. You do not need to press “Enter;” only press “Enter” to finish a paragraph.
- If you see a red wavy line under your text as you type, Word is alerting you that it believes that words are misspelled. If you see a green wavy line under your text as you type, Word is indicating to you that it believes the sentence or phrase is grammatically incorrect. Don’t worry, as these wavy lines don’t print. These lines are simply the default proofing tools at work, alerting you to things you may want to review.