Change the Color Saturation in Lightroom Classic CC – Instructions
Change the Color Saturation in Lightroom Classic CC: Video
This video lesson, titled “Adjusting Overall Color Saturation in the Basic Panel,” shows how to change the color saturation in Lightroom Classic CC. This video lesson is from our complete Lightroom Classic CC tutorial, titled “Mastering Lightroom Classic Made Easy v.CC.”
Change the Color Saturation in Lightroom Classic CC: Overview
You can change the color saturation in Lightroom Classic CC to adjust a photo’s overall color saturation. Color saturation in photography describes the intensity of a color. It is expressed as the degree to which the color differs from white.
To change the color saturation in Lightroom Classic CC, display a photo in the Develop module. Then expand the Basic panel. In the “Presence” section of the panel, sliders for “Clarity,” “Dehaze,” “Vibrance,” and “Saturation” appear. You use the “Clarity,” “Vibrance,” and “Saturation” sliders, in combination, to adjust the photo’s overall color saturation.
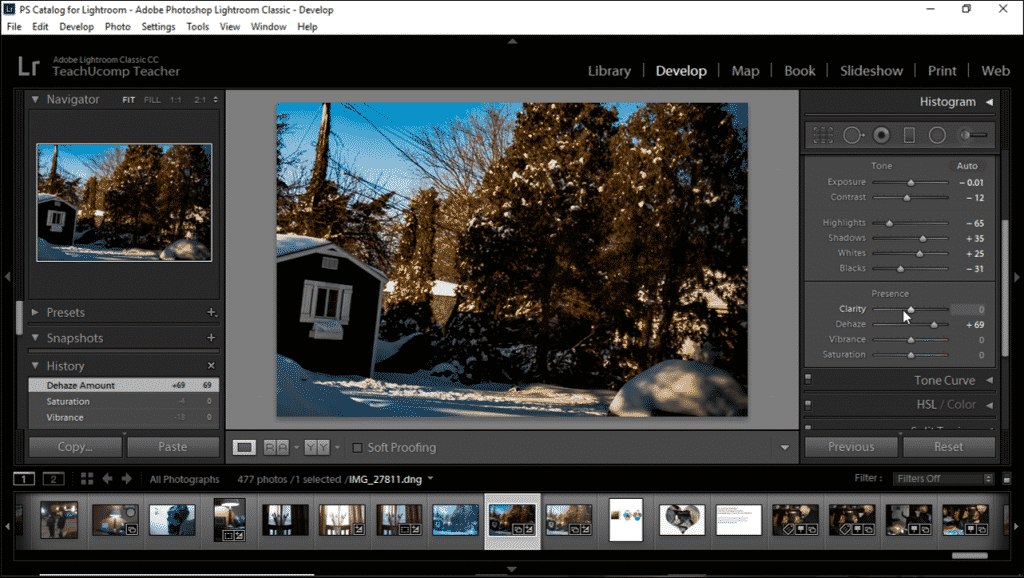
Change the Color Saturation in Lightroom Classic CC – Instructions: A picture of a user changing the color saturation of an image in Lightroom Classic CC by using the sliders at the bottom of the “Basic” panel in the Develop module.
The “Clarity” slider increases local contrast to add depth to an image. When using the “Clarity” slider, it’s a good idea to zoom in to at least 100% of the image size. To get the best results from this control, keep increasing the setting until you see halos near the edge details in the photo. Then slightly reduce the setting.
The “Vibrance” slider adjusts saturation in a way that minimizes clipping as colors approach full saturation. This effect adjusts the saturation of all lower-saturated colors in the image, while applying little adjustment to highly-saturated colors. The “Vibrance” control works to prevent colors from becoming overly-saturated.
The “Saturation” slider equally adjusts the saturation of all colors in an image. When you move the slider into lower values, color saturation is reduced. When you move the slider into higher values, color saturation increases. A value of -100 removes all color from the image. A value of +100 doubles the color saturation.
While you can increase a photo’s saturation by adjusting only the “Saturation” slider, you’ll probably get better results using the “Clarity,” “Vibrance,” and “Saturation” sliders in combination.
Change the Color Saturation in Lightroom Classic CC: Instructions
- To change the color saturation in Lightroom Classic CC, display a photo in the Develop module.
- Then expand the Basic panel.
- Then adjust the “Clarity,” “Vibrance,” and “Saturation” sliders in the “Presence” section of the panel.
- If you want to adjust local contrast and depth of an image, use the “Clarity” slider.
- To adjust saturation in a way that minimizes clipping as colors approach full saturation, use the “Vibrance” slider.
- To equally adjust the saturation of all colors in an image, use the “Saturation” slider.
