Connect to Database Files in Crystal Reports 2013- Tutorial
Connect to Database Files in Crystal Reports 2013: Video Lesson
This video lesson, titled “Database Files,” shows you how to connect to database files in Crystal Reports 2013. This video is from our complete Crystal Reports 2013 tutorial, titled “Mastering Crystal Reports Made Easy v.2013-2011.”
Connect to Database Files in Crystal Reports 2013: Overview
If you click the small plus sign next to the “Database Files” folder in the “Create New Connection” section of the “Database Expert,” you will be presented with the “Open” dialog box. You use this dialog box to create a data connection to one of the many types of available databases in Crystal Reports. Once again, you can use the “Look in:” drop-down to select the folder within which you wish to look for the database or tables. You can also use the “Files of type:” drop-down to filter for a particular type of data file. Select the desired file from the list and then click “Open” to attempt to create a data source connection. If you cannot create a data connection using this “type,” try using another (more specific) data connection type instead.
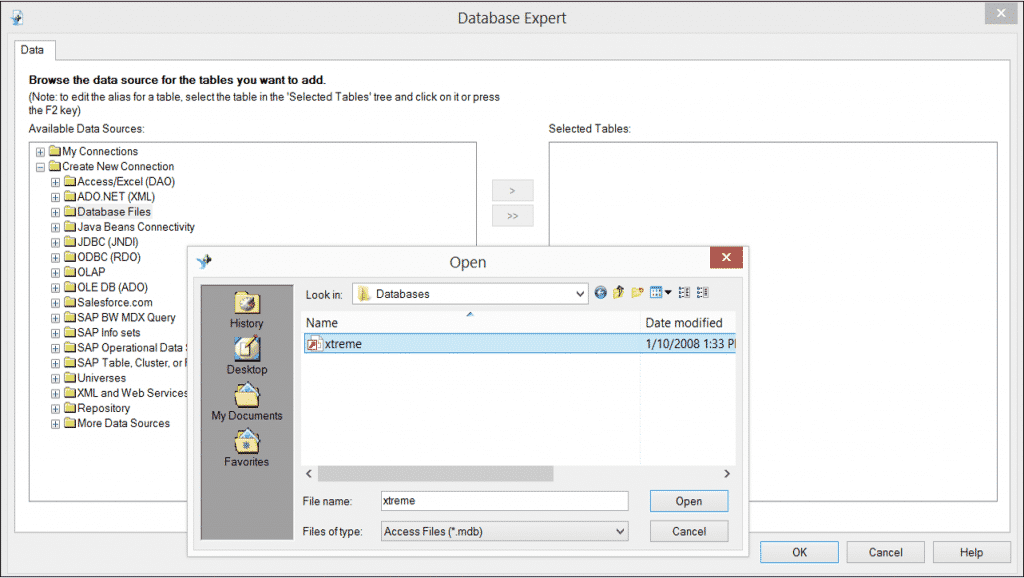
Connect to Database Files in Crystal Reports 2013- Tutorial: A picture of a user connecting to a database file in Crystal Reports 2013.
Connect to Database Files in Crystal Reports 2013: Instructions
- Click the “Blank Report” hyperlink in the “Start Page,” or select “File| New| Blank Report…” from the Menu Bar to launch the “Database Expert” dialog box.
- If necessary, you can invoke the “Database Expert” by clicking the button of the same name in the Experts toolbar.
- The “Create New Connection” folder displays a listing of the various types of data source connection types. You can click the folder of the type of connection that you want to create/use to make a connection or access a connection that you have created.
- Click the small plus sign next to the “Database Files” folder to create the initial connection, or double-click the “Make New Connection” icon under that folder to create a new connection if there are already pre-existing connections of that type established.
- In the “Open” dialog box, use the “Look in:” drop-down to select the folder within which you wish to look for the database or tables.
- You can also use the “Files of type:” drop-down to filter for a particular type of data file.
- Once again, select the desired file from the list and click “Open” to create a data source connection.
