Copy and Paste List Data from Excel into QuickBooks Pro- Instructions
Copy and Paste List Data from Excel into QuickBooks Pro: Video
This video lesson, titled “How to Add Multiple List Entries from Excel in Intuit QuickBooks Desktop Pro 2024,” shows how to copy and paste list data from Excel into QuickBooks Pro. This video lesson is from our complete QuickBooks tutorial, titled “Mastering QuickBooks Desktop Pro Made Easy v.2024.”
Overview of How to Copy and Paste List Data from Excel into QuickBooks Pro:
A feature that improves the speed of company file creation is the ability to copy and paste list data from Excel into QuickBooks Pro. You can copy and paste list data from Excel into QuickBooks Pro to add it into the “Customers,” “Vendors,” “Service Items,” “Inventory Part,” and “Non-inventory Part” lists.
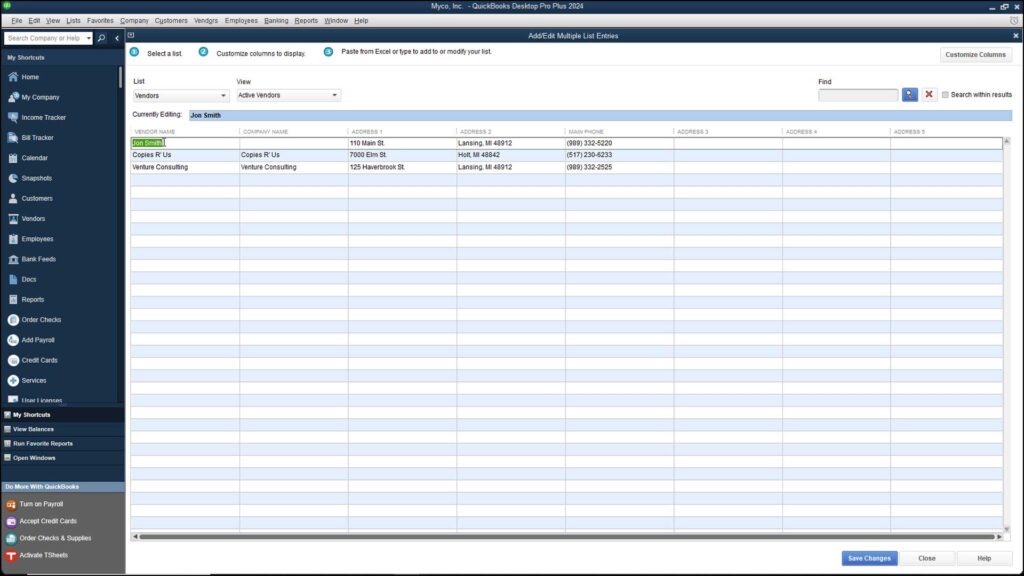
To copy and paste list data from Excel into QuickBooks Pro, select “Lists| Add/Edit Multiple List Entries” from the Menu Bar. Doing this then opens the “Add/Edit Multiple List Entries” window. The information at the top of this window shows that to copy and paste list data from Excel into QuickBooks Pro is a three-step process.
First, use the “List” drop-down at the top of the window to select the list into which you would like to copy the Excel data. After selecting a list, the list’s columns appear at the bottom of the window. All lists contain the “Name” column, which identifies items in the list.
Next, customize the list’s columns to match the columns within the Excel worksheet. To do this, click the “Customize Columns” button in the upper-right corner of the window. In the “Customize Columns” window that appears, select column names from the “Available Columns” and “Chosen Columns” lists. Then click either the “Add >” or “< Remove” buttons to add or remove the desired columns.
To reorganize their display, select the name of a column shown in the “Chosen Columns” list. Then click the “Move Up” or “Move Down” buttons to move the selected fields up or down in the list. The order they appear from top to bottom in the “Chosen Columns” list is the order they appear from left to right in the window after you click the “OK” button to approve your changes.
After the desired columns appear in the correct order within the “Add/Edit Multiple List Entries” window, scroll down the list and click into the next available blank row. Then copy the data from your Microsoft Excel worksheet. Then paste it into the columns shown within the “Add/Edit Multiple List Entries” window. After you copy and paste list data from Excel into QuickBooks Pro, click the “Save Changes” button to save your new list entries.
Instructions on How to Copy and Paste List Data from Excel into QuickBooks Pro:
- To copy and paste list data from Excel into QuickBooks Pro, select “Lists| Add/Edit Multiple List Entries” from the Menu Bar.
- Then use the “List” drop-down at the top of this window to select the list into which to copy data from your Excel worksheet.
- To customize the columns shown in this window to match the columns in your Excel worksheet, click the “Customize Columns” button that appears in the upper-right corner of the window.
- In the “Customize Columns” window, select column names from the “Available Columns” and “Chosen Columns” lists.
- To add or remove the columns, then click either the “Add >” or “< Remove” buttons.
- To reorganize their display, select the name of a column in the “Chosen Columns” list.
- Then click the “Move Up” or “Move Down” buttons to move the selected field up or down within the list.
- The order shown from top to bottom within the “Chosen Columns” list is the order they will appear from left to right in the window after you click the “OK” button.
- After you have the desired columns in the correct order within the “Add/Edit Multiple List Entries” window, scroll down the list and click into the next available blank row.
- Then copy the data from your Microsoft Excel worksheet.
- Then paste it into the columns shown within the “Add/Edit Multiple List Entries” window.
- Click the “Save Changes” button to save your new list entries.