Create a Channel in Microsoft Teams – Instructions
Create a Channel in Microsoft Teams: Video Lesson
This video lesson, titled “Creating Channels,” shows you how to create a channel in Microsoft Teams. This video lesson is from our complete Teams tutorial, titled “Mastering Teams Made Easy.”
Create a Channel in Microsoft Teams: Overview
You can create a channel in Microsoft Teams to compartmentalize information within a team. Channels are dedicated sections of a team where conversations and collaboration happen between team members. Channels contain the conversations, meetings, and files the members of the channel share with one another.
Each team you create is assigned a default “General” channel. However, you can create channels for any topic, department, project, or group you want. When you create a new channel, you decide if the channel is a “Standard” or “Private” channel. Standard channels are open to everyone on the team. Everything posted or shared in the channel is searchable by others, even if they are not a member of the channel. Private channels restrict accessibility to the channel’s content to its members. Once you create a channel, you cannot convert it from “Standard” to “Private” or vice versa.
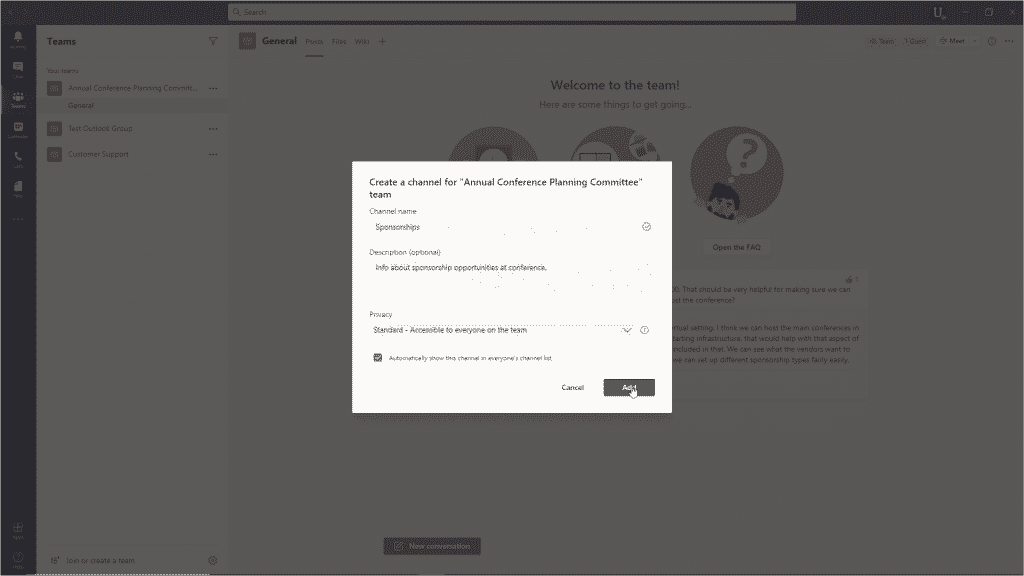
Create a Channel in Microsoft Teams – Instructions: A picture of a user creating a new channel for a team in Microsoft Teams.
To create a channel in Microsoft Teams, click the “Teams” button in the app bar. Click the “More options” ellipsis to the right of the team name. Then select “Add channel” from the menu that appears. In the “Create a channel” dialog box, enter a name for the channel into the “Channel name” field. You can add an optional description for the channel in the “Description” field, if desired. Then select either “Standard” or “Private” from the “Privacy” drop-down. If creating a Standard channel, you can check the “Automatically show this channel in everyone’s channel list” checkbox so it automatically appears in every team member’s channels list. If creating a Standard channel, then click the “Add” button to finish.
If creating a Private channel, instead click “Next” to then add members now or later, as desired. To add members later, click the “Skip” button to finish. To add members now, type their name or email into the “Add members” dialog box and select them from the resulting list. To remove someone you’ve added to the list, click the “Remove” button, which looks like an “X,” to the far-right of their name. After selecting members, click the “Add” button. Then use the “Role” drop-down to the right of the members’ names to assign them as an “Owner” or “Member” of the channel. When finished, click the “Done” button.
Create a Channel in Microsoft Teams: Instructions
- To create a channel in Microsoft Teams, click the “Teams” button in the app bar.
- Click the “More options” ellipsis to the right of the team name and select “Add channel” from the menu.
- In the “Create a channel” dialog box, enter a name for the channel into the “Channel name” field.
- You can add an optional description for the channel in the “Description” field, if desired.
- Select either “Standard” or “Private” from the “Privacy” drop-down.
- If creating a Standard channel, you can check the “Automatically show this channel in everyone’s channel list” checkbox so the new channel automatically appears in every team member’s channel list.
- To finish, if creating a Standard channel, then click the “Add” button.
- Alternatively, if creating a Private channel, click “Next” to then add members now or later, as desired.
- To add members later, click the “Skip” button to finish.
- Alternatively, to add members now, type their name or email into the “Add members” dialog box and then select them from the resulting list.
- To remove someone you’ve added to the list, click the “Remove” button to the far-right of their name, which looks like an “X.”
- After selecting members, click the “Add” button.
- Then use the “Role” drop-down to the right of the members’ names to assign them as an “Owner” or “Member” of the channel.
- When finished, click the “Done” button.