Create a Contact Group in Outlook- Instructions
Create a Contact Group in Outlook: Video Lesson
This video, titled “Creating Contact Groups,” shows how to create a contact group in Outlook. This video is from our complete Outlook tutorial, titled “Mastering Outlook Made Easy v.2019 and 365.”
Create a Contact Group in Outlook: Overview
You can create a contact group in Outlook to email several contacts at once. Contact groups are handy for sending emails only to a selected group of people in your Contacts folder. Therefore, before you can create a contact group in Outlook, you must create the contacts in the Contacts folder and ensure they have valid email addresses.
To create a contact group in Outlook, open the Contacts folder. Then click the “Home” tab in the Ribbon. Then click the “New Contact Group” button in the “New” button group to open the “Contact Group” window.
Type a name for the contact group into the “Name:” field at the top of the window. Next, click the “Add Members” button in the “Members” button group on the “Contact Group” tab of the Ribbon in this window. Then select the “From Outlook Contacts” command from the drop-down menu to open the “Select Members” dialog box.
The names of the contacts within your “Contacts” folder appear in this window. Select any contact from this list and then click the “Members” button at the bottom of the dialog box to move them into the field that lists the names of the contact group members. Repeat this process, as needed, until you have added all the contacts to the contact group. Then click the “OK” button in the “Select Members” dialog box.
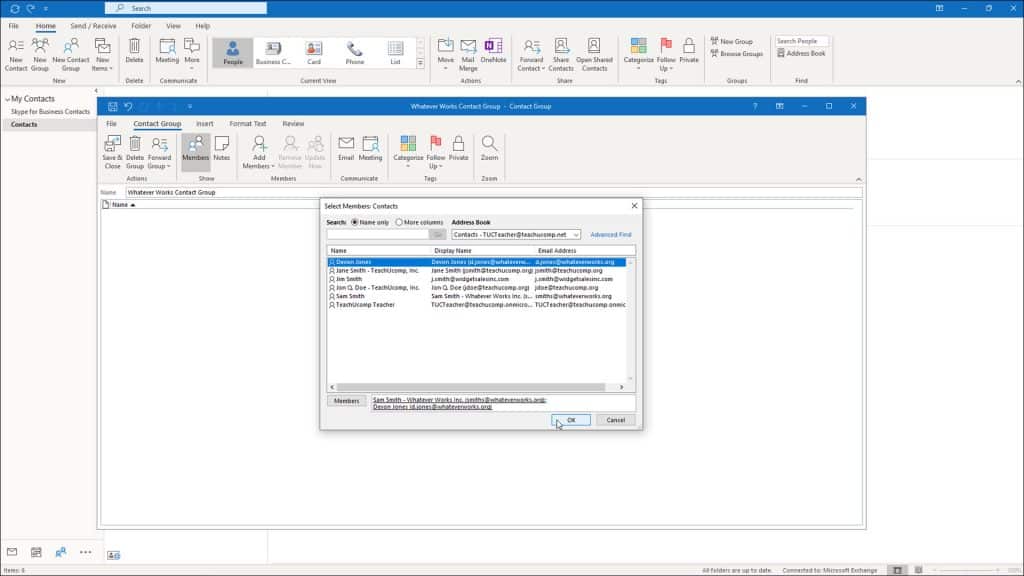
Create a Contact Group in Outlook – Instructions: A picture of the “Select Members” window within the “Contact Group” window in Outlook.
The names of the contact group members then appear in the “Contact Group” window. To save the contact group, click the “Save and Close” button in the “Actions” button group on the “Contact Group” tab of the Ribbon of the “Contact Group” window. The contact group name then appears in your “Contacts” folder.
Create a Contact Group in Outlook: Instructions
- To create a contact group in Outlook, open the Contacts folder.
- Then click the “New Contact Group” button in the “New” button group on the “Home” tab of the Ribbon to open the “Contact Group” window.
- In this window, type a name for the contact group into the “Name:” field at the top of the window.
- Next, click the “Add Members” button in the “Members” button group on the “Contact Group” tab of the Ribbon in this window.
- Then select the “From Outlook Contacts” command from the drop-down menu that appears to open the “Select Members” dialog box.
- In this dialog box, the names of the contacts in your “Contacts” folder then appear.
- Select any contact from this list and then click the “Members” button at the bottom of the dialog box to move them into the field that lists the names of the contact group members.
- Repeat this process, as needed, until you have added all the contacts to the contact group.
- Then click the “OK” button in the “Select Members” dialog box.
- The names of the contact group members then appear in the “Contact Group” window.
- To save the contact group, click the “Save and Close” button in the “Actions” button group on the “Contact Group” tab of the Ribbon of the “Contact Group” window.