Create a Data Model from External Relational Data in Excel – Instructions
Create a Data Model from External Relational Data in Excel: Video
This video lesson, titled “Creating a Data Model from External Relational Data,” shows how to create a data model from external relational data in Excel. This video lesson is from our complete Excel tutorial, titled “Mastering Excel Made Easy v.2016-2013.”
Create a Data Model from External Relational Data in Excel: Overview
You can create a data model from external relational data in Excel. Data models in Excel let you store multiple tables of information. They can then be used a data source for PivotTables, PivotCharts, and Power View reports.
The choice to add a selected table to a data model occurs when manually creating a PivotTable in Excel. This lets you use a relational data source in Excel. Starting in Excel 2016, Excel automatically creates relationships between tables in the data model when your analysis requires linking two or more tables together. However, you can also manually create relationships between the data within the table fields in Excel. This lets you relate them as needed for your reports. The tables saved into the data model within an Excel workbook can be tables within Excel worksheets or external data tables.
This lesson shows how to create a data model from external relational data in Excel, like a Microsoft Access database. If you import multiple tables from an existing relational data source, the data model is created automatically.
To import multiple tables from an external relational data source, click the “Data” tab within the Ribbon. Then click the desired button within the “Get External Data” button group. For example, to add tables from an Access database to the data model in Excel, click the “From Access” button in the “Get External Data” button group on the “Data” tab within the Ribbon. In this case, the “Select Data Source” dialog box appears. Use this dialog box to navigate to and then select the desired Access database file to open. Then click the “Open” button to continue.
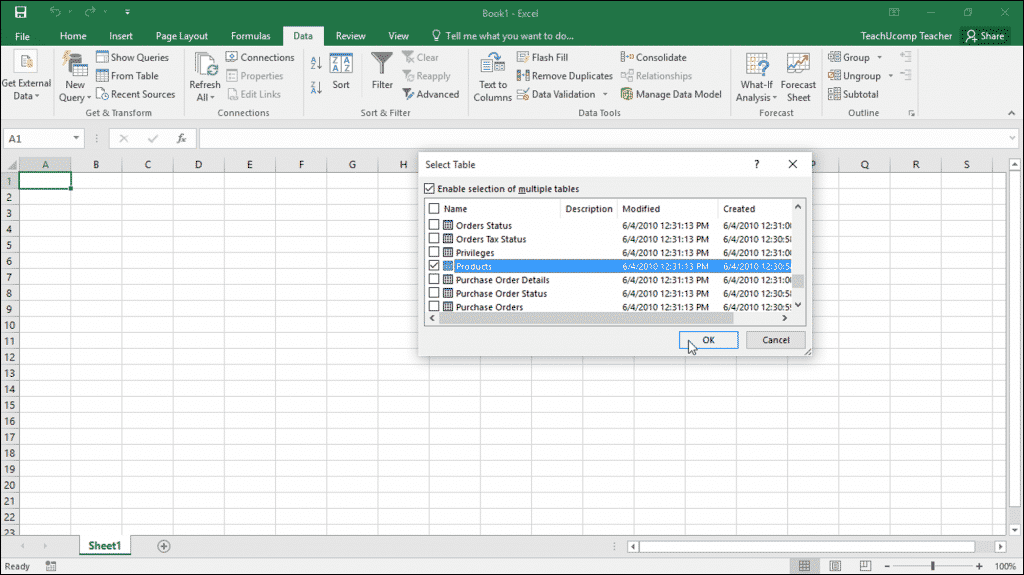
Create a Data Model from External Relational Data in Excel – Instructions: A picture of a user selecting the external relational data tables to add to the data model in an Excel workbook by using the “Select Table” dialog box.
Next, the “Select Table” dialog box appears. To enable the selection of multiple tables from the database file, check the “Enable selection of multiple tables” checkbox at the top of this dialog box. Then check the checkboxes next to the tables to add to the data model in the Excel workbook. Then click the “OK” button to continue.
The “Import Data” dialog box then appears in Excel. Choose the option you prefer within the “Select how you want to view this data in your workbook” section. Then choose where to place the imported data by selecting an option within the “Where do you want to put the data?” section. Depending on the choice made in the first section, not every option is necessarily available in the latter section. After deciding where to place the type of data to import, click the “OK” button to finish.
At that point, Excel creates the data connection and imports the necessary data into the data model within Excel. It also creates any visual representation of the data you imported and places it into the selected location.
Create a Data Model from External Relational Data in Excel: Instructions
- To import multiple tables from an external relational data source, click the “Data” tab in the Ribbon.
- Then click the button associated with the data type to import in the “Get External Data” button group.
- The “Select Data Source” dialog box then appears.
- Use this dialog box to navigate to and then select the desired database file to open.
- Click the “Open” button to continue.
- To enable the selection of multiple tables from the database file, check the “Enable selection of multiple tables” checkbox at the top of the “Select Table” dialog box that appears.
- Check the checkboxes next to the tables to add to the data model.
- Click the “OK” button to continue.
- The “Import Data” dialog box then appears within Excel.
- Choose the preferred option within the “Select how you want to view this data in your workbook” section.
- Then choose where to place the imported data by selecting an option within the “Where do you want to put the data?” section.
- Depending on the choice made in the first section, not every option is necessarily available in the second section.
- Click the “OK” button to finish.
