Create a Delegate in Outlook – Instructions
Create a Delegate in Outlook: Video Lesson
This video lesson, titled “Creating a Delegate” shows you how to create a delegate in Outlook. This video lesson is from our complete Outlook tutorial, titled “Mastering Outlook Made Easy v.2019 and 365.”
Create a Delegate in Outlook: Overview
You can create a delegate in Outlook to let another user send and receive email for you. The delegate can also schedule items and tasks on your behalf. When you create a delegate in Outlook for your account, that person can then access your Outlook account. They can then perform the actions you let them perform.
To use the delegate features, you must be using an Exchange Server Account within Outlook. In addition, both you and your delegate must be using the same version of Outlook. To create a delegate in Outlook, click the “File” tab in the Ribbon. If needed, click the “Info” command at the left side of the Backstage view. Then click the “Account Settings” drop-down button to the right. Then select the “Delegate Access” command from the button’s drop-down menu to open the “Delegates” dialog box.
Click the “Add” button in the “Delegates” dialog box to then open the “Add Users” dialog box. Here you select the name of the individual to whom to grant delegate access. Then click the “Add” button at the bottom of the dialog box to add them to the list. When finished, click the “OK” button.
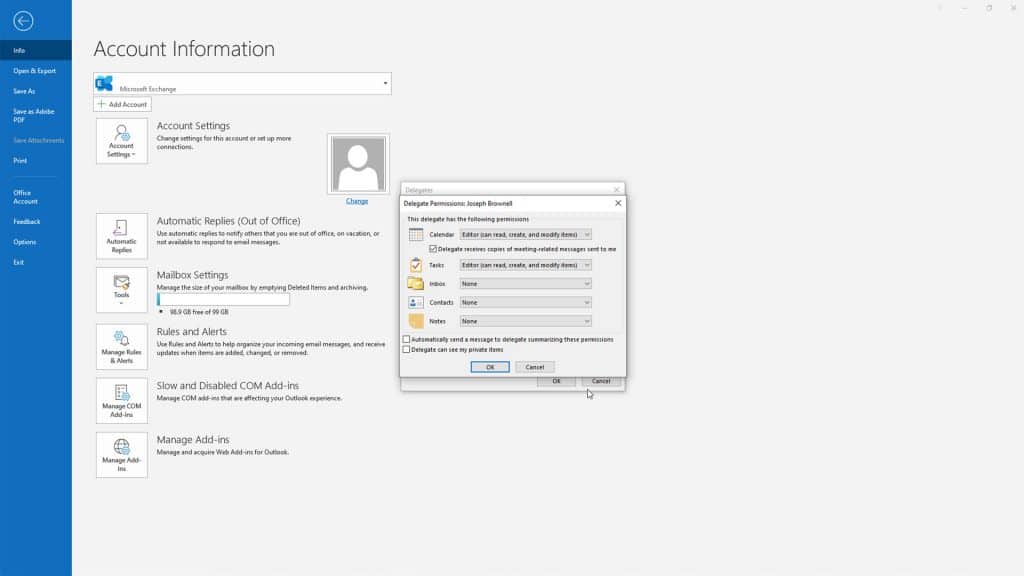
Create a Delegate in Outlook – Instructions: A picture of a user setting a delegate’s permission levels in Outlook.
Then set the delegate’s permission levels in the “Delegate Permissions” dialog box that opens. For each folder in your Outlook account you want the delegate to access, use the drop-down to the right of each folder’s icon to set the level of access to grant. If you want to email a summary of these permissions to the delegate when finished, check the “Automatically send a message to delegate summarizing these permissions checkbox. If you want to let the delegate see your private Outlook items, check the “Delegate can see my private items” checkbox. Then click the “OK” button when you are done to then return to the “Delegates” dialog box.
At the bottom of this dialog box, select the option button that corresponds to how you want Outlook to handle meeting requests sent to your account and meeting request responses sent to your account with your delegates. Then click the “OK” button to create the delegate or delegates in Outlook.
Create a Delegate in Outlook: Instructions
- To use the delegate features, you must be using an Exchange Server Account within Outlook.
- In addition, both you and your delegate must be using the same version of Outlook.
- To create a delegate in Outlook, click the “File” tab in the Ribbon to open the Backstage view.
- If needed, click the “Info” command at the left side of the Backstage view.
- Then click the “Account Settings” drop-down button to the right.
- Then select the “Delegate Access” command from the button’s drop-down menu to open the “Delegates” dialog box.
- Click the “Add” button in the “Delegates” dialog box to then open the “Add Users” dialog box, where you can select the name of the individual to whom to grant delegate access.
- Then click the “Add” button at the bottom of the dialog box to add them to the list.
- When finished, click the “OK” button.
- Then set their permission levels in the “Delegate Permissions” dialog box that opens.
- For each folder in your Outlook account you want the delegate to access, use the drop-down to the right of each folder’s icon to set the level of access to grant.
- If you want to email a summary of these permissions to the delegate when finished, check the “Automatically send a message to delegate summarizing these permissions checkbox.
- If you want to let the delegate see your private Outlook items, check the “Delegate can see my private items” checkbox.
- Then click the “OK” button when you are done to then return to the “Delegates” dialog box.
- At the bottom of this dialog box, select the option button that corresponds to how you want Outlook to handle meeting requests sent to your account and meeting request responses sent to your account with your delegates.
- Then click the “OK” button to create the delegate or delegates in Outlook.