Learn How to Create a New Base Calendar in Project: Video Lesson
This video lesson, “titled Creating New Base Calendars,” shows you how to create a new base calendar in Project 2013. This video is from the complete Microsoft Project 2013 training tutorial named “Mastering Project Made Easy v.2013-2010” by TeachUcomp, Inc.
Learn How to Create a New Base Calendar in Project: Overview
In Microsoft Project, base calendars, such as the “Standard” calendar or the “Night Shift” calendar, are the calendars you select when initially creating your project file to choose a default work availability schedule for the project. Sometimes, you may need to create a new base calendar for ease of use within your project file.
For example, you may choose to use the “Standard” calendar for your project file since the majority of your work resources will use that as their default work availability schedule. However, assume that you also used a pool of part time people (work resources) who only had a Monday, Wednesday, and Friday 8AM TO 5PM work schedule availability at all times. In this case, you may want to create a new base calendar you can assign to these work resources when entered into the “Resource Sheet,” so you will not have to individually adjust each resource’s work schedule availability. This can be a real time saver, as you can select a base calendar directly from the “Resource Sheet” view for any work resources that you enter. That way, you will not need to adjust each resource’s work schedule individually.
Learn How to Create a New Base Calendar in Project: Instructions
You can create a new base calendar by clicking the “Change Working Time” button in the “Properties” button group on the “Project” tab in the Ribbon to open the “Change Working Time” dialog box. This dialog box allows you to change the working time for selected resources or change the default base calendar used for the current project, as well as create a new base calendar.
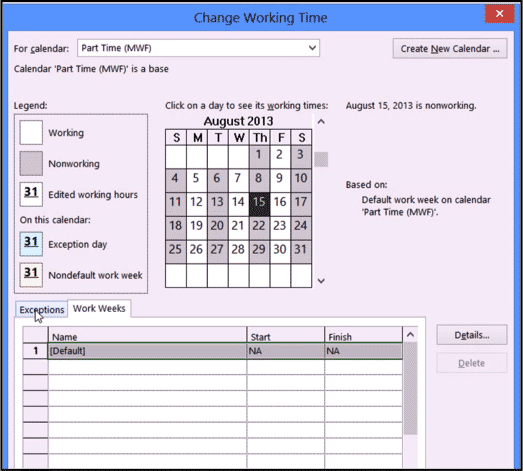
Create a New Base Calendar in Microsoft Project: A picture of the “Change Working Time” dialog box in Project 2013 being used to create a new base calendar.
To create a new base calendar, click the “Create New Calendar…” button shown within the dialog box. Doing this will open the “Create New Base Calendar” dialog box, where you enter the name you want to give to this calendar into the “Name:” text box. Either you can select to create an entirely new base calendar or you can modify an existing base calendar as the basis for your new base calendar. If you choose to use a copy of another calendar as the basis for your new calendar, select the name of the calendar to copy from the drop-down. When you have made your choices, click the “OK” button to continue.
In the “Change Working Time” dialog box, you are now viewing the base calendar just created. You should see its name in the “For calendar” box at the top of this dialog box. Next, use the “Work Weeks” tab to set the new default work week schedule for this base calendar. You can also set any base days off on the “Exceptions” tab, if necessary. After you have edited the work availability schedule for the calendar, click the “OK” button in the “Change Working Time” dialog box to save the new base calendar. At this point, you can then select the name of this calendar from the “Base Calendar” drop-down wherever that choice appears in your project file, such as within the “Resource Sheet” view.