Create a Note in OneNote – Tutorial and Instructions
Create a Note in OneNote: Video Lesson
This video, titled “Creating a Basic Note,” shows you how to create a note in OneNote 2016. This video lesson is from our complete OneNote training, titled “Mastering OneNote Made Easy v.2016-2013.”
Create a Note in OneNote: Overview
This lesson shows you how to create a note in OneNote. You can create a note in OneNote to store virtually any type of electronic information in a notebook This includes text, graphics, photos, web pages, audio clips, video clips, Excel spreadsheets and hyperlinks.
When you insert content into your notebook pages, each piece of information exists within a note container. A note container consists of a frame with a move handle and a resizing handle. Each object placed in the note container, like text or images, has an object selector that appears to the left.
The frame of the active note container is visible. However, the frames around the other containers on the page are not. Hovering your mouse over a container displays its frame. Hovering your mouse over the content of a note container displays the object’s container and selector.
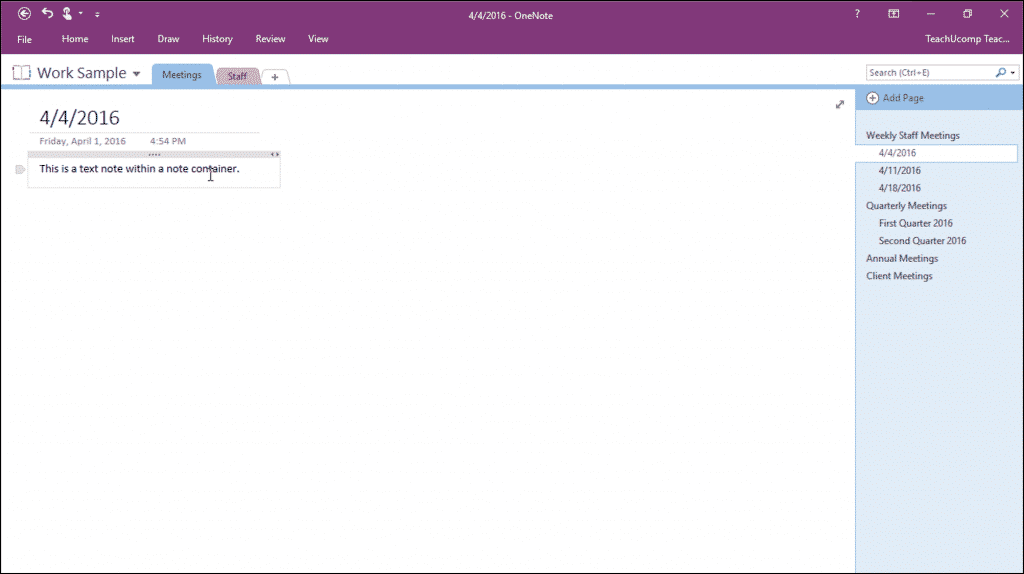
Create a Note in OneNote – Tutorial: A picture of a user hovering over a note in a notebook page within OneNote 2016.
To create a note in OneNote, click into the page in the location where you want the container to appear. Then type the text or paste content you copied from another location. You can continue adding other note containers in this same manner.
If you click too closely underneath an existing note container, OneNote may place the insertion marker into the bottom of the note container above it. Typing at this point simply adds your text into the existing container. This is helpful when you want to continue adding text to the same note container.
However, to create a separate note container, click further down the page and away from the container above. Alternatively, click to the right of the existing container to create a separate container. Then move the new container under the existing container.
The most basic and common type of information entered into a container is text. You can enter text by typing it directly into the container or by pasting it from a different source. As you type, OneNote will automatically grow the container to accommodate the information.
You can resize the container horizontally. To do this, hover your mouse over the right side of the container until a double-pointed arrow appears. Then click and drag to resize the container horizontally.
You can also move a note container to another location on the page. To do this, hover your mouse over the top edge of the container until a four-pointed arrow appears. Click and drag when you see that arrow appear to move the container to a new location.
Create a Note in OneNote: Instructions
- To create a note in OneNote, click into the page in the location where you want the container to appear.
- Then either type text or paste it from a different location.
- To add content to an existing note container, click directly underneath the container to place the insertion marker into the bottom of the container above it.
- Then add your text into the existing container.
- To create a separate note container, instead, click further down the page and away from any existing container above.
- Alternatively, click to the right of the existing container to create a separate container.
- To resize a note horizontally, hover your mouse over the right side of the note until a double-pointed arrow appears.
- Then click and drag left or right to resize it.
- To move a note container, hover your mouse over the top edge of the note until a four-pointed arrow appears.
- Then click and drag the container to a new location.
