Create Building Blocks in Publisher – Instructions
Create Building Blocks in Publisher: Video Lesson
This video lesson, titled “Creating Building Blocks,” shows you how to create building blocks in Publisher. This video lesson is from our complete Publisher tutorial, titled “Mastering Publisher Made Easy v.2019 and 365.”
Create Building Blocks in Publisher: Overview
You can create building blocks in Publisher to make reusable content you can insert into your publication pages. For example, you could save your company’s logo and name as a custom building block. Later, you could insert it into future publications without recreating all its content and formatting. The content you can save as a building block can range in complexity from simple text entries to complex logos and watermarks. The building block content is saved into and organized by galleries.
You can create your own custom building blocks, or you can use one of the available options found in the “Building Block Library” in Publisher. First, you must create the content in a publication to save as a building block. Often, you will group the content together by using the “Group” command before saving it. After creating the grouped content, you then need to select it.
After selecting the content to save, then click the “Insert” tab in the Ribbon. Then click the “Page Parts” button in the “Building Blocks” button group. From the drop-down menu of choices, choose the “Add Selection to Page Parts Gallery” command. Doing this then opens the “Create New Building Block” dialog box. Here, you give Publisher the information it needs to store and organize the content for later use.
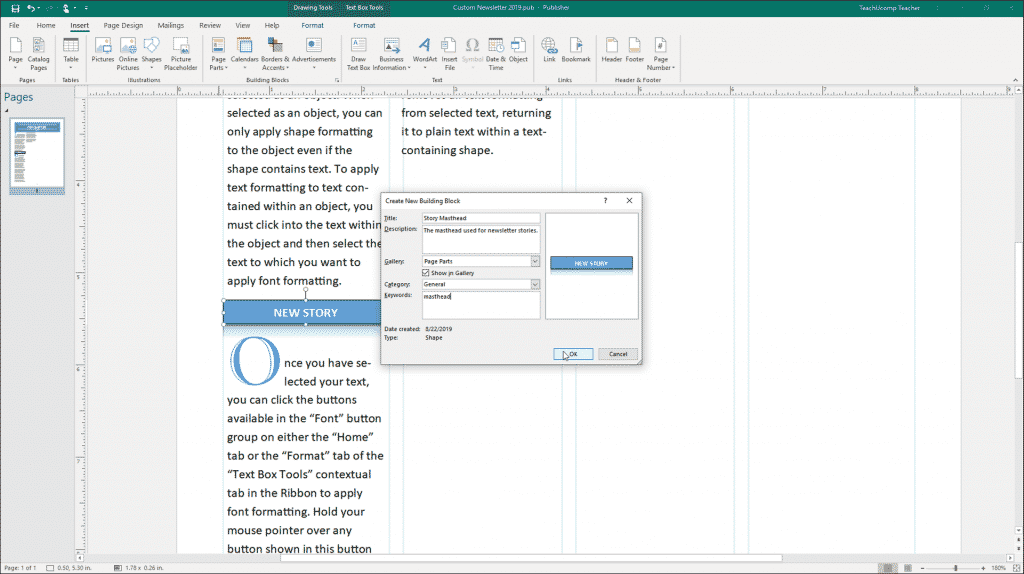
Create Building Blocks in Publisher – Instructions: A picture of the “Create New Building Block” dialog box in Microsoft Publisher.
Enter a name for the building block into the “Title:” field. Enter a brief text description of the content into the “Description:” field. Use the “Gallery:” drop-down to choose the type of gallery into which to save the content. To ensure the content is available in the gallery, check the “Show in Gallery” checkbox. Use the “Category:” drop-down to either choose an existing classification category or create a new category. You can enter keywords into the “Keywords:” text box that let users search for the part by keyword, if desired. After entering the information, click the “OK” button to save the selected content as a building block into the selected template.
Create Building Blocks in Publisher: Instructions
- To create building blocks in Publisher, first create the content in a publication to save and reuse as a building block.
- To group the content together so it acts as a single object, select the objects and use the “Group” button in the “Arrange” button group on the “Home” tab.
- Then select the content you just created and click the “Insert” tab in the Ribbon.
- Then click the “Page Parts” drop-down button in the “Building Blocks” button group.
- Select the “Add Selection to Page Parts Gallery” command from the button’s drop-down menu to open the “Create New Building Block” dialog box.
- In the “Create New Building Block” dialog box, enter a name for the building block into the “Title:” field.
- Enter a brief text description of the content into the “Description:” field.
- Use the “Gallery:” drop-down to choose the type of gallery into which to save the content.
- To ensure the content is available in the gallery, check the “Show in Gallery” checkbox.
- Use the “Category:” drop-down to either choose an existing classification category or create a new category.
- Optionally, enter keywords into the “Keywords:” text box that let users search for the part by keyword.
- To save the selected content as a building block into the selected template, click the “OK” button.