Change Item Prices in QuickBooks Desktop Pro – Instructions
How to Change Item Prices in QuickBooks Desktop Pro: Video
This video lesson, titled “How to Change Item Prices in Intuit QuickBooks Desktop Pro 2024,” shows how to change item prices in QuickBooks Desktop Pro. This video lesson is from our complete QuickBooks tutorial, titled “Mastering QuickBooks Desktop Pro Made Easy v.2024.”
Overview of How to Change Item Prices in QuickBooks Desktop Pro:
One way to change item prices in QuickBooks Desktop Pro for individual items in the Item List is by opening an item’s “Edit Item” window. Then directly change the item’s price in that window. Alternatively, to change item prices in QuickBooks Desktop Pro for many items in the Item List at once, select “Customers| Change Item Prices” from the Menu Bar. Doing that then opens the “Change Item Prices” window.
In this window, use the “Item Type” drop-down to filter the list to show only items in the Item List that match the item type you select. You can choose either the “Service,” “Inventory Part,” “Non-inventory Part,” or “Other Charge” option.
To then mark the items for which to change the prices, click into the leftmost column next to those items to mark them with a check. You can check or uncheck the “Mark All” checkbox at the bottom of the window to help you select the items, if needed.
After selecting the items for which to adjust the prices, type either an amount or a percentage (in which case you must also type a percent sign) into the “Adjust prices of marked items by (amount or %)” field. Then use the adjacent drop-down to select whether you are marking the prices up based on the “Unit Cost” or the “Current Price.”
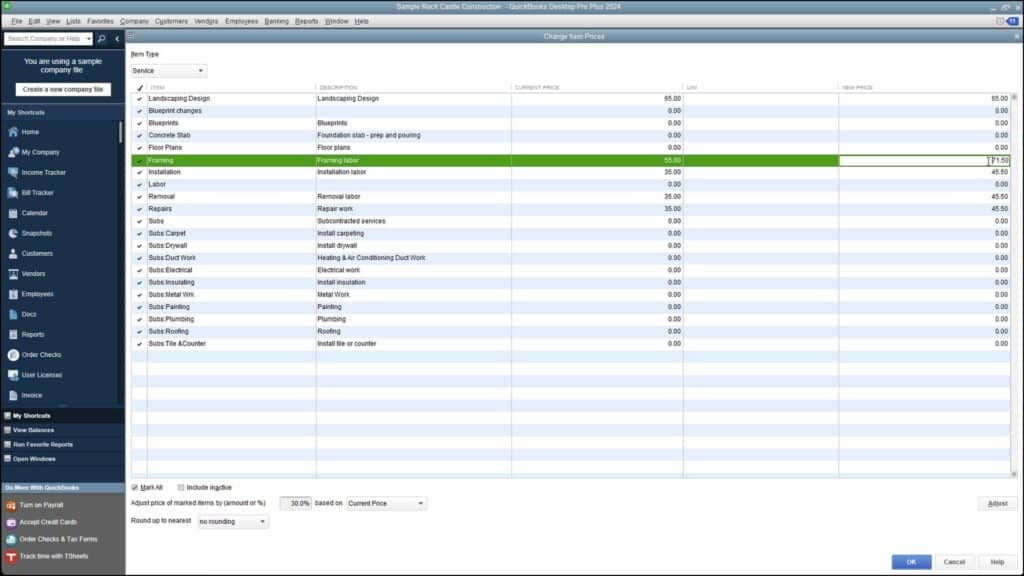
Below that, you can use the “Round up to nearest” drop-down to select how to round the calculated amounts. You can select a choice from the listing or enter your own rounding specifications. To actually adjust the item prices, click the “Adjust” button to adjust the pricing of the selected items. After that, the new prices then appear in the “New Price” column. Notice that this is a white column, so you can also click into the column for any item and type a new price, if needed.
To set the new prices for the selected items shown in the “New Price” column, click the “OK” button at the bottom of this window. Doing that closes the window and saves your pricing changes.
Instructions on How to Change Item Prices in QuickBooks Desktop Pro:
- To change multiple item prices at once in QuickBooks Desktop Pro, select “Customers| Change Item Prices” from the Menu Bar to open the “Change Item Prices” window.
- Use the “Item Type” drop-down to filter the list and only show items within the Item List that match the item type you select: “Service,” “Inventory Part,” “Non-inventory Part,” or “Other Charge.”
- To mark the items for which to adjust the prices, click into the leftmost column next to the items to mark them with a check.
- You can check or uncheck the “Mark All” checkbox at the bottom of the window to assist you in making item selections, if needed.
- After selecting the items to adjust, type either an amount or a percentage (in which case you must type a percent sign) into the “Adjust prices of marked items by (amount or %)” field.
- Use the adjacent drop-down to select whether to mark the prices up based on the “Unit Cost” or the “Current Price.”
- If needed, to round the calculated amounts, use the “Round up to nearest” drop-down below that to select a choice from the drop-down menu or enter your own rounding specifications.
- To actually adjust the item prices, click the “Adjust” button to adjust the pricing of the selected items.
- After that, the new prices then appear in the “New Price” column.
- If needed, to adjust any calculated price, you can also click into the “New Price” column for any item and type a new price.
- To set the new prices for the selected items, as shown in the “New Price” column, click the “OK” button at the bottom of this window.