Dehaze a Photo in Lightroom Classic CC- Instructions
Dehaze a Photo in Lightroom Classic CC: Video Lesson
This video lesson, titled “Applying the Dehaze Effect,” shows you how to dehaze a photo in Lightroom Classic CC. This video lesson is from our complete Lightroom Classic CC tutorial, titled “Mastering Lightroom Classic Made Easy v.CC.”
Dehaze a Photo in Lightroom Classic CC: Overview
You can dehaze a photo in Lightroom Classic CC to improve the photo’s sharpness. This effect lets you adjust the amount of haze or fog in a photograph. You can remove haziness in a photo to increase clarity. Alternatively, you can also add haze to create an artistic effect. To dehaze a photo in Lightroom Classic CC, first open the selected photo in the Develop module.
In previous versions of Lightroom Classic, the “Dehaze” slider appears in the “Effects” panel. In the most recent versions of Lightroom Classic CC, the slider moves to the “Basic” panel. To access the “Dehaze” slider in Lightroom Classic CC, expand the Basic panel in the Develop module.
The “Dehaze” slider then appears in the “Presence” section of the Basic panel. To add or remove haze, then click and drag to adjust the slider. Moving the slider to the left, into negative values, increases the level of haze. Moving the slider to the right, into positive values, decreases the level of haze. To reset your adjustments, if needed, double-click the slider to return it to its default setting.
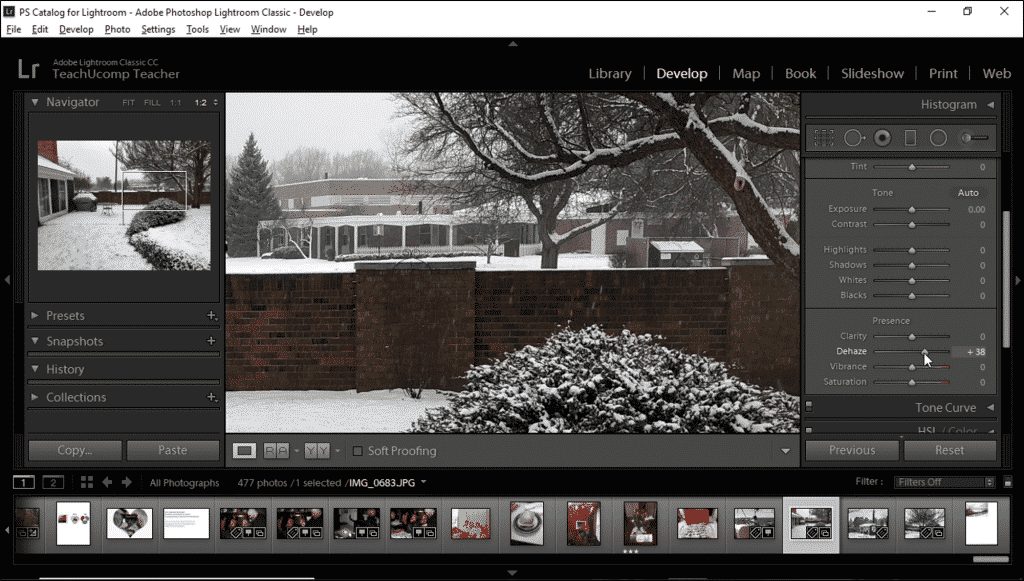
Dehaze a Photo in Lightroom Classic CC- Instructions: A picture of a user removing haze from a photo in Lightroom Classic CC.
Also note that the “Dehaze” option is available as a local adjustment. If you use the “Radial Filter,” “Graduated Filter,” or “Adjustment Brush” tools, then you can adjust the “Dehaze” slider to apply the effect to specific areas of a photo, too.
Dehaze a Photo in Lightroom Classic CC: Overview
- To dehaze a photo in Lightroom Classic CC, open the photo from which to remove haze in the Develop module.
- Then expand the Basic panel.
- Then click and drag the “Dehaze” slider in the “Presence” section of the “Basic” panel left or right.
- To increase the haze, then move the slider to the left, into negative values.
- To decrease the haze, then move the slider to the right, into positive values.
- If needed, to reset your adjustment, double-click the slider to return it to its default setting.
