Enter Time in QuickBooks Online – Instructions
How to Enter Time in QuickBooks Online: Video Lesson
This video lesson, titled “How to Manually Record Time in QuickBooks Online,” shows how to manually enter time in QuickBooks Online Plus when used with a subscription to Payroll Premium and/or QuickBooks Time. This video on how to enter time in QuickBooks Time is from our complete QuickBooks Online tutorial, titled “Mastering QuickBooks Online Made Easy.”
Overview:
This lesson shows you how to manually record time in QuickBooks Online Plus when used with a subscription to Payroll Premium and/or QuickBooks Time. The process for recording time in QuickBooks Online varies, depending on the related subscription. So, to see how to manually record time in QuickBooks Online without a QuickBooks Payroll Premium or QuickBooks Time subscription, please review the earlier lesson titled “Basic Time Tracking” in this chapter, instead.
You can use a different process to manually record time if using QuickBooks Time via a Payroll Premium subscription or as a stand-alone subscription. While QuickBooks Time isn’t the focus of this course, it helps to know how to manually create time entries in that program, if needed. QuickBooks Time has many robust time tracking features that let users enter their own time, and many other features. QuickBooks Time and QuickBooks Online should automatically sync information, so the employees you enter in QuickBooks Online should automatically appear within QuickBooks Time.
How to Open QuickBooks Time from QuickBooks Online Plus:
To open QuickBooks Time if you have a subscription through QuickBooks Online, click the “Overview” link under the “Time” app in the “All apps” bar. Then click the “Go to classic QuickBooks Time” link in the upper-right corner of the “Overview” page to open a new browser tab for the QuickBooks Time application.
How to Manually Sync in QuickBooks Time and View the Sync Log:
If needed, to manually force a sync in QuickBooks Time, click the “QuickBooks” or “QuickBooks Payroll” button in the toolbar at the top of the QuickBooks Time window to show a drop-down menu of commands. Then click the “Import” command in the drop-down menu to manually sync.
To view the sync log when you are finished, click the “QuickBooks” or “QuickBooks Payroll” button in the toolbar at the top of the QuickBooks Time window to show a drop-down menu of commands. Then click the “View Sync Log” command in the drop-down menu to show the sync logs. You can click the “X” button in the upper-right corner of the sync report window to close it, when finished.
How to Manually Record Time for QuickBooks Online in QuickBooks Time:
Select the Employee or Vendor:
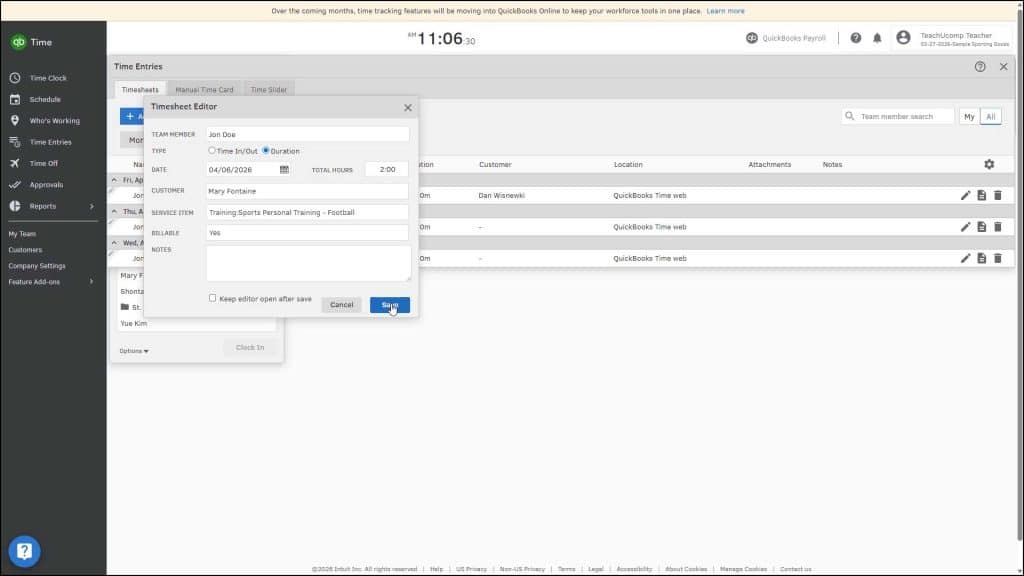
To manually add time for an employee, click the “Time Entries” link in the Navigation Bar at the left side of the QuickBooks Time window. Then click the “+ Add Time” button at the top of the “Timesheets” tab to open the “Timesheet Editor” window. To select the employee for whom to record time, delete your name from the “Team Member” field and then start typing the employee’s name. Then select it from the drop-down menu that appears after you start typing to select them.
Enter the Time Duration:
To select whether to record in/out times or a duration, select either the “Time In/Out” or “Duration” option button for the “Type” setting. If you select “Time In/Out,” then use the three fields to the right of the “Time In” and Time Out” settings to select a date, enter a time value, and select either “am” or “pm” for the time value. The total hours then appear to the right. Alternatively, if you select “Duration,” then select the date from the “Date” calendar selector and enter the desired duration into the “Total Hours” field.
Optionally, Assign the Customer or Project:
To assign the time to a customer or project, click the “Customer” field and then select them from the “Select Customer” window that then opens. The selected entry then appears in the “Customer” field and the “Select Customer” window closes.
Select the Service, Billing Info, and Any Optional Info:
To select a service item, select a choice from the “Service” drop-down. To indicate whether this time is billable, select either “Yes” or “No” from the “Billable” drop-down. If needed, to enter a billable rate, type it into the “Billable rate” field. If enabled, select the class from the “Class” drop-down and/or the location from the “Location” drop-down. To enter any notes, type them into the “Notes” field. To change the time zone, if needed, select a choice from the “Time Zone” drop-down.
Save the Time Entry:
To keep the time editor open after saving the entry to continue entering time entries without closing and reopening the window, check the “Keep editor open after save” checkbox. To close it, instead, uncheck the checkbox. To save the time entry, then click the “Save” button. Alternatively, to cancel the time entry, click the “Cancel” button. To create additional entries, simply repeat the process.