Export Data from Access – Instructions
Export Data from Access: Video
This video lesson, titled “Exporting Data,” shows you how to export data from Access. This video on how to export data from Access is from our complete Access tutorial, titled “Mastering Access Made East v.2019 and 365.”
Overview of Exporting Data from Access
You can easily export data from Access to a wide variety of formats that are available. You can also export other database objects, like forms and reports. However, there are more limitations on the formats to which these types of objects can be exported.
To export data from Access, first select the table or other database object to export in the Navigation Pane. Next, click the “External Data” tab in the Ribbon. In the “Export” button group, then click the button for the file format to which to export the selected object.
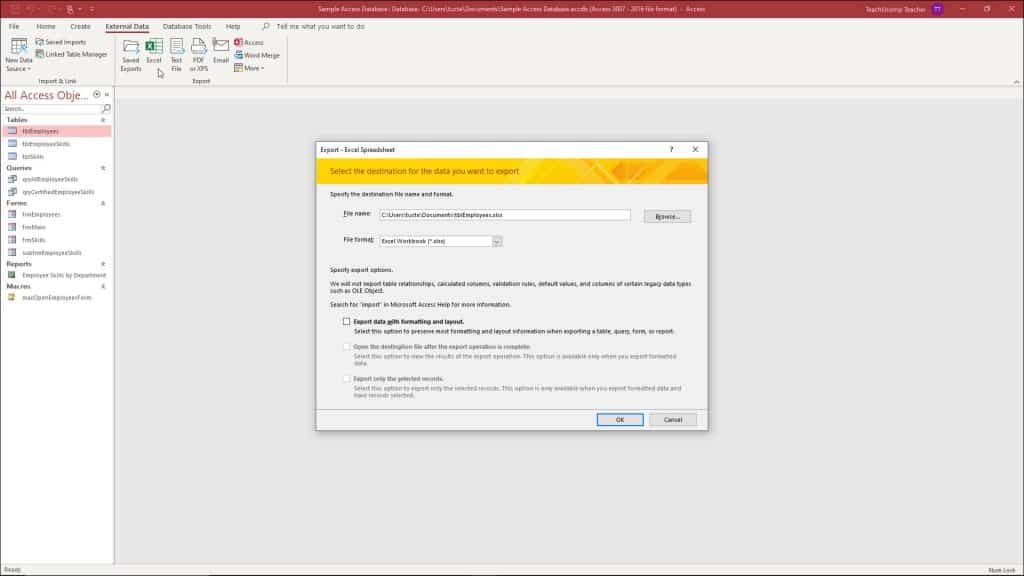
A picture that shows how to export data from Access for Microsoft 365 to Excel.
Doing this then opens the “Export” wizard for the type of export you selected. The specific steps shown in each wizard will vary slightly, depending on the file type to which you are exporting. Most of the time, you must select a name and file location for the exported object. You will also often need to set additional parameters for the export routine. Just as when you import data, you will also be prompted to save your export routine, if desired.
Instructions on How to Export Data from Access
- To export data from Access, first select the table or other database object to export in the Navigation Pane.
- Then click the “External Data” tab in the Ribbon.
- Then click the button in the “Export” button group for the file format to which to export the object.
- Doing this then opens the “Export” wizard for the type of export you want to perform.
- The specific steps shown in each wizard will vary slightly, depending on the file type to which you are exporting. Most of the time, you must select a name and file location for the exported object. You also often need to set additional parameters for the export routine.
- You will also be prompted to save your export routine, if desired.