 MY CART
How to Add a Device in Windows 11: Video Lesson
This video lesson, titled “How to Add a Device in Windows 11: A Windows 11 Training Tutorial,” shows you how to manually add a device in Windows 11. This video lesson is from our complete Windows tutorial, titled “Mastering Windows Made Easy.”
Overview:
About Adding a Device to Windows 11:
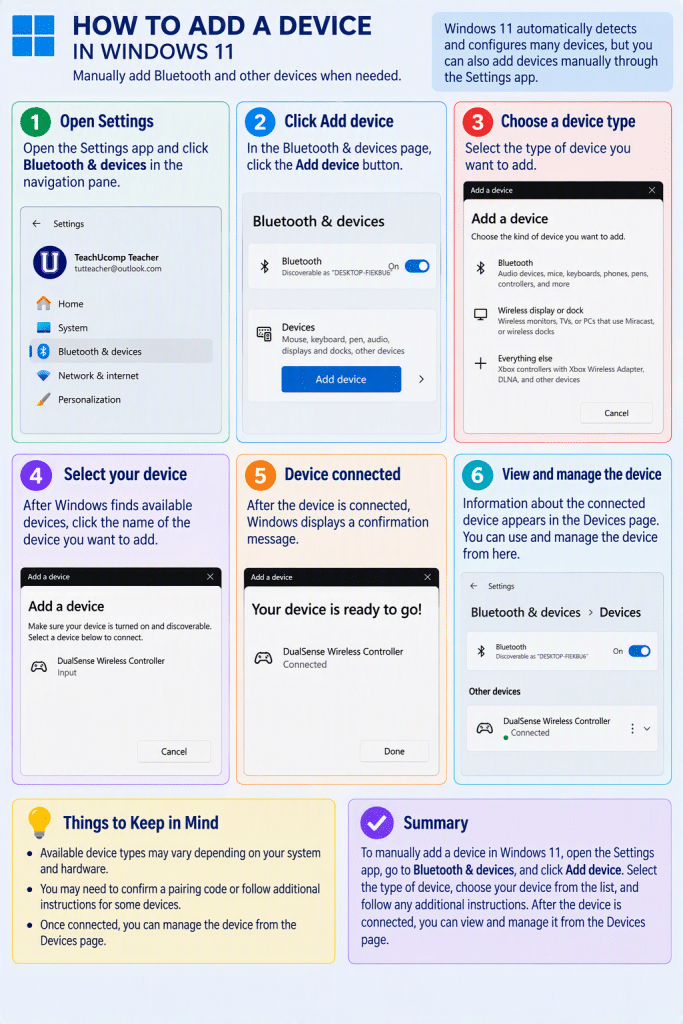
Windows 11 automatically detects and configures many devices that are connected by using USB, wireless connections, or Bluetooth. However, you can also manually add devices when needed.
How to Manually Add a Device in Windows 11:
To add a device in Windows 11, open the “Settings” app and then click the “Bluetooth & devices” category in the navigation pane. In the “Bluetooth & devices” settings page, click the “Add device” button. Windows then opens the “Add a device” window.
In the “Add a device” window, select the type of device to add. Available choices may include “Bluetooth,” “Wireless display or dock,” and “Everything else.” The “Bluetooth” option is used to connect Bluetooth devices such as speakers, headphones, phones, keyboards, mice, pens, and game controllers. The “Wireless display or dock” option is used to connect compatible wireless displays, televisions, and docking stations. The “Everything else” option is used to connect supported devices that use other connection methods.
After selecting a device type, Windows searches for available devices that match the selected category. When the device you want to add appears in the list, click its name to begin connecting it to your computer. Depending on the type of device, you may need to confirm a pairing code or follow additional on-screen instructions to complete the connection.
Where to Find Information about the Connected Devices to Windows 11:
After Windows successfully connects to the device, information about the device appears within the “Devices” page in the “Bluetooth & devices” settings. You can then use the device and manage its settings through Windows.