How to Customize a Report in QuickBooks Online – Instructions
How to Customize a Report in QuickBooks Online: Video
This video lesson, titled “How to Do Basic Standard Report Customization in QuickBooks Online,” shows you how to customize a report in QuickBooks Online. This video lesson is from our complete QuickBooks Online tutorial, titled “Mastering QuickBooks Online Made Easy.”
Overview:
To Change the Most Common General Report Settings, Change the Values in the Report Customization Section at the Top of the Report:
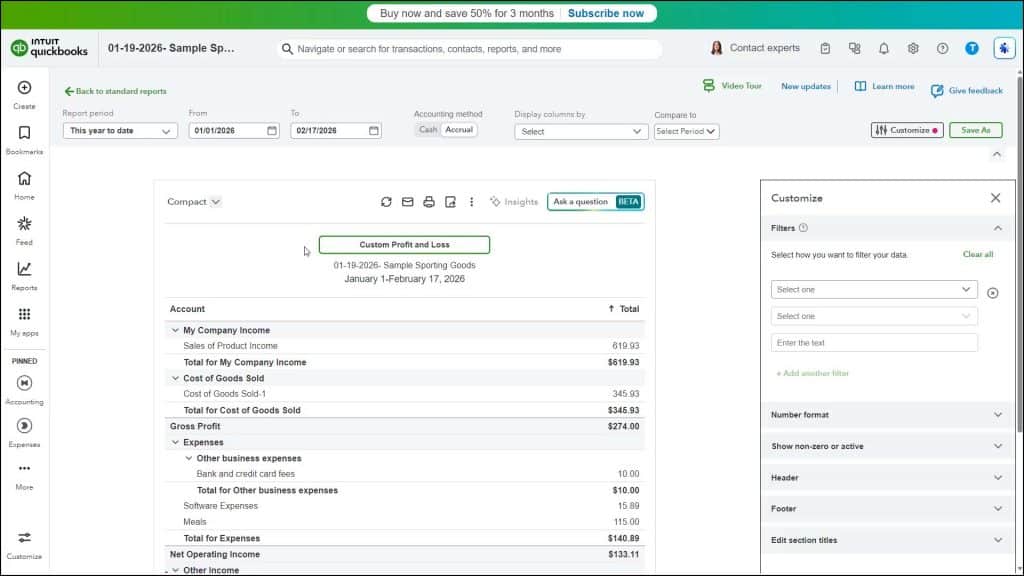
QuickBooks Online has introduced new, unified report customization options that combine elements of both its previous classic view and modern view report customization options. To customize a standard report in QuickBooks Online after running it to change its general report settings, simply change the options shown in the customization settings section at the top of the report.
The general report settings available in this report customization settings section change for each report. These are also not all the customization options available, just the most common general settings. To collapse and expand this section, click the arrow in the lower-right corner of the report customization section.
How to Change Report Line Spacing and Collapse or Expand Subaccounts:
Some minor report customization options also appear directly within the standard reports in QuickBooks Online. To show report lines with either normal or compact vertical spacing, click the drop-down in the upper-left corner of the report and select “Compact View” or “Normal View,” as desired. To collapse or expand all accounts that show subaccounts in a report, click the same drop-down in the upper-left corner of the report and then choose either “Expand All” or “Collapse All,” as desired. However, note you can also click the expand/collapse arrow next to any account that shows subaccounts within a report to collapse or expand a single report line, if desired.
How to Sort Report Data:
To sort by column values in a standard report, if available, click the sort arrow button next to the column heading containing the values by which to sort the report to show an upward or downward pointing arrow, which shows the direction of the sorting applied to that column’s values. An upward-pointing arrow means the values are sorted in ascending order (A-Z or 1-9) and a downward-pointing arrow means the values are sorted in descending order (Z-A or 9-1). To reverse the current sort order on the column, click its arrow again.
How to Add a Note to a Report:
To add notes to the bottom of a standard report, click the “Add note” button at the bottom of the report, type the note into the box that then appears at the bottom of the report, and then click outside of the note box to set it.
How to Rename the Default Sections in a Balance Sheet or Profit and Loss Report:
If needed, to rename the default report sections for balance sheet and profit & loss reports, click the “Customize” button in the report customization section to show the “Customize” pane at the right side of the report. Then scroll down and click the “Edit section titles” section in the “Customize” pane to expand it and show its settings. Then enter the new titles for the report’s existing report sections into the fields in this section of the pane. The fields update their information in the report when you exit the field in the pane.
How to Change a Report’s Title:
To customize the report title, hover over the current report’s title and then click the “Edit” icon that appears and which looks like a pencil. Then change the report’s title in the report title field that appears. Then click outside the field to set its new value.
How to View All Available Report Customization Settings:
To fully customize a standard report in QuickBooks Online after opening it to see all its customization options, click the “Customize” button in the report customizations section above the report to open a “Customize” pane at the right side of the report window. The “Customize” pane lets you access all the report’s customization options within its settings sections. You can click the title of any report settings section in the “Customize” pane to collapse or expand its individual settings.
The available report settings sections can change, depending on the report. For example, all the aging reports include an “Aging” report settings section that doesn’t appear in most reports. However, there are many report settings sections that appear in most reports, including “Filters,” “Columns” for detail reports, “Number format,” “Header,” and “Footer.”
To close the “Customize” pane without changing its options, click the “X” button in its upper-right corner. The next several lessons in this chapter of the QuickBooks Online tutorial look at what you can expect to customize in the most common settings sections of the “Customize” pane, as well as the general report settings in the report customization section.


