 MY CART
How to Enable Bluetooth in Windows 11: Video Lesson
This video lesson, titled “How to Enable Bluetooth in Windows 11: A Windows 11 Training Tutorial,” shows you how to enable or disable Bluetooth in Windows 11. This video lesson is from our complete Windows tutorial, titled “Mastering Windows Made Easy.”
Overview:
What Does Bluetooth Do in Windows 11?
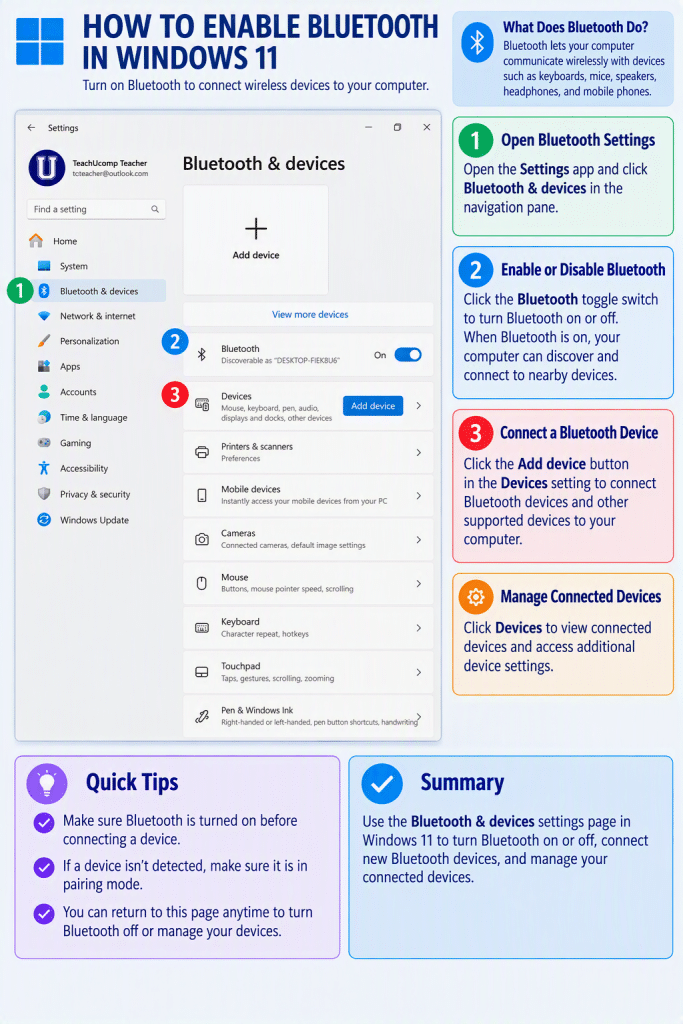
Bluetooth lets your computer communicate wirelessly with devices such as keyboards, mice, speakers, headphones, and mobile phones. Before you can connect Bluetooth devices, Bluetooth must be enabled on your computer.
How to Enable Bluetooth in Windows 11:
To enable Bluetooth in Windows 11, open the “Settings” app and then click the “Bluetooth & devices” category in the navigation pane. In the “Bluetooth & devices” settings page, locate the “Bluetooth” setting and then click its toggle switch to turn Bluetooth on. When Bluetooth is enabled, Windows can discover and connect to nearby Bluetooth devices, depending on your device’s configuration.
How to Disable Bluetooth in Windows 11:
To disable Bluetooth, return to the “Bluetooth & devices” settings page and click the “Bluetooth” toggle switch again to turn it off. When Bluetooth is disabled, your computer can no longer communicate with Bluetooth devices until Bluetooth is turned on again.
How to Connect a Bluetooth Device and View Connected Devices:
The “Bluetooth & devices” settings page also contains a “Devices” setting with an “Add device” button that lets you connect Bluetooth devices and other supported devices to your computer. If you click the “Devices” settings, it shows the “Devices” page. Additional device settings appear within this page and can be used to manage connected devices and related hardware settings.