Import Photos from a Scanner in Photoshop Elements- Instructions
Import Photos from a Scanner in Photoshop Elements: Video
This video lesson, titled “How to Import Photos from a Scanner in the Organizer in Adobe Photoshop Elements 2023: A Tutorial,” shows you how to import photos from a scanner in Photoshop Elements. This video lesson is from our complete Photoshop Elements tutorial, titled “Mastering Photoshop Elements Made Easy v.2023.”
Overview of How to Import Photos from a Scanner in Photoshop Elements:
You can also import photos from a scanner in Photoshop Elements directly into the Organizer. To import photos from a scanner in Photoshop Elements, first ensure your scanner is correctly connected and configured to work with your computer. This often involves downloading the most recent scanner driver available for your particular type of scanner.
After you have correctly connected the scanner to your computer, then open the Photoshop Elements Organizer window. Then select “File| Get Photos and Videos| From Scanner…” from the Menu Bar. Alternatively, click the “Import” drop-down button at the left end of the Shortcuts Bar. Then select the “From Scanner…” command to open the “Get Photos from Scanner” dialog box.
Use the “Scanner” drop-down to select the scanner from which to import the photo. If you see the words “None Detected” in this drop-down, then double-check that your scanner is properly connected to your computer and turned on. The default folder into which the scanned photos are saved appears below the “Save Files In” label. To change this location, click the adjacent “Browse…” button to open a “Browse for Folder” dialog box. Then use this dialog box to navigate to, and select, the folder into which to save the scanned image. Then click the “OK” button in the “Browse for Folder” dialog box to set your new folder destination.
Use the “Save As” drop-down to then select which file format type to use to save the scanned image. If you select the “jpeg” choice from this drop-down menu, then use the adjacent slider to set the quality of the image. Drag the slider left to decrease the quality. You can also drag it right to increase the quality.
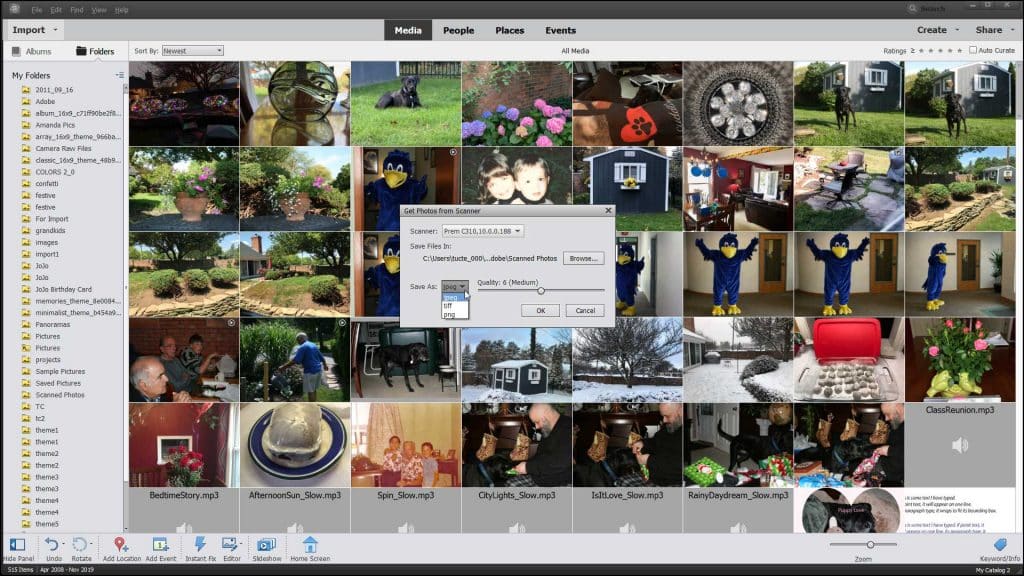
A picture showing how to import from a scanner in Photoshop Elements by using the “Get Photos from Scanner” dialog box.
To scan the image and import it into the Organizer, click the “OK” button at the bottom of the “Get Photos from Scanner” dialog box. At this point, depending on the installed scanner driver, you may see another scanner-dependent dialog box appear. If it appears, you can then specify any additional scanner settings shown. Follow the instructions in any dialog boxes that appear to finish scanning the image and importing it into the Organizer window.
Instructions on How to Import Photos from a Scanner in Photoshop Elements:
- To import photos from a scanner in Photoshop Elements directly into the Organizer, ensure your scanner is correctly connected and configured for your computer. This often involves updating your scanner driver.
- Open the Photoshop Elements Organizer window.
- Then select “File| Get Photos and Videos| From Scanner…” from the Menu Bar.
- Alternatively, click the “Import” drop-down at the left end of the Shortcuts Bar.
- Then select the “From Scanner…” command from the drop-down menu.
- In the “Get Photos from Scanner” dialog box, the “Scanner” drop-down to select the scanner from which to import the photo.
- If the words “None Detected” appear in this drop-down list, double-check that your scanner is connected to your computer and turned on.
- The default folder into which to save the scanned photos appears below the “Save Files In” label.
- To change this location, click the adjacent “Browse…” button to open a “Browse for Folder” dialog box.
- Use this dialog box to navigate to, and select, the folder into which to save the scanned image.
- Click the “OK” button in the “Browse for Folder” dialog box to set the new folder destination.
- Use the “Save As” drop-down to select which file format to use to save the scanned image.
- If you select the “jpeg” choice, use the adjacent slider to set the image quality.
- Drag the slider left to decrease the quality or right to increase the quality.
- To scan the image and import it, click the “OK” button at the bottom of the “Get Photos from Scanner” dialog box.
- Depending on the scanner driver installed, another scanner-dependent dialog box may appear and let you specify more scanner settings.
- Follow the instructions in any dialog boxes that appear to finish.

