Import Preferences in Lightroom Classic CC- Instructions
Import Preferences in Lightroom Classic CC: Video Lesson
This video lesson, titled “Setting Import Preferences,” shows you how to set import preferences in Lightroom Classic CC. This video lesson is from our complete Lightroom Classic tutorial, titled “Mastering Lightroom Classic Made Easy v.CC.”
Import Preferences in Lightroom Classic CC: Overview
In addition to providing many importing options, you can also set many import preferences in Lightroom Classic CC. You set import preferences in Lightroom Classic CC within the “Preferences” dialog box. To open the “Preferences” dialog box, select “Edit| Preferences” from the Menu Bar.
You can set several import preferences on the “General” tab in this dialog box. To allow the import dialog box to automatically open after you connect a camera or memory card to your computer, check the “Show import dialog when a memory card is detected” checkbox. To open imported photos in a collection after completing an import operation, check the “Select the Current/Previous Import collection during import” checkbox. If you want to prevent Lightroom Classic CC from using folder names created by your camera during the import process, check the “Ignore camera-generated folder names when naming folders” checkbox. To import photos as both raw and standalone JPEG images that are separately editable, check the “Treat JPEG files next to raw files as separate photos” checkbox.
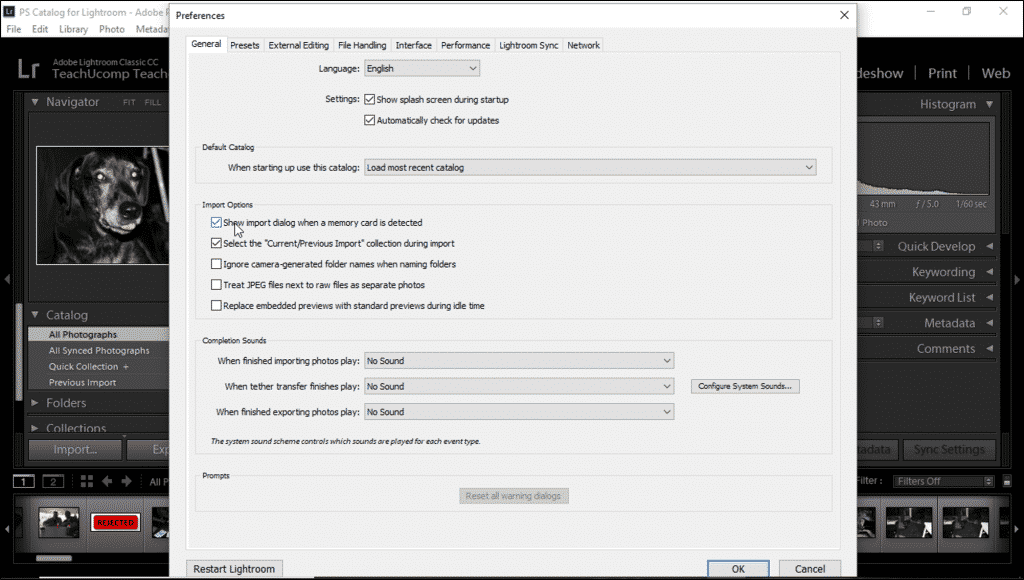
Import Preferences in Lightroom Classic CC- Instructions: A picture of the “General” tab in the “Preferences” dialog box in Lightroom Classic CC.
Then click the “File Handling” tab of the “Preferences” dialog box to set other import preferences in Lightroom Classic CC. You can choose preferences for importing DNG files in the “Import DNG Creation” section of the “File Handling” tab. You can also select options to recognize specific characters between keywords in the “Reading Metadata” section of the tab. The “File Name Generation” section lets you specify illegal characters and spaces in filenames and choose how to replace them.
After setting the import preferences in Lightroom Classic CC in the “Preferences” dialog box, click the “OK” button to save the preferences and close the dialog box.
Import Preferences in Lightroom Classic CC: Instructions
- To set import preferences in Lightroom Classic CC, select “Edit| Preferences” from the Menu Bar to open the “Preferences” dialog box.
- Then click the “General” tab in the “Preferences” dialog box to set general import preferences.
- To let the import dialog box automatically open after connecting a camera or memory card to your computer, check the “Show import dialog when a memory card is detected” checkbox.
- To open imported photos in a collection after completing an import operation, check the “Select the Current/Previous Import collection during import” checkbox.
- If you want to prevent Lightroom Classic CC from using folder names created by your camera during the import process, check the “Ignore camera-generated folder names when naming folders” checkbox.
- To import photos as both raw and standalone JPEG images that are separately editable, check the “Treat JPEG files next to raw files as separate photos” checkbox.
- Next, click the “File Handling” tab in the “Preferences” dialog box.
- To set the preferences for importing DNG files, change the settings in the “Import DNG Creation” section.
- If you want to select options to recognize specific characters between keywords, change the options in the “Reading Metadata” section.
- To specify illegal characters and spaces in filenames and choose how to replace them, change the settings in the “File Name Generation” section.
- To save your preferences and close the “Preferences” dialog box, click the “OK” button.
