Overview of How to Inactivate List Items in QuickBooks Desktop Pro:
This lesson shows you how to inactivate list items in QuickBooks Desktop Pro. In QuickBooks Desktop Pro, you can only delete list items you have not used in any transactions. If you try to delete a list item you used in a transaction, QuickBooks Desktop Pro warns you that it cannot be deleted. If you don’t want to use a list item but you can’t delete it, you can make it inactive, instead. Doing this then hides its display within the list.
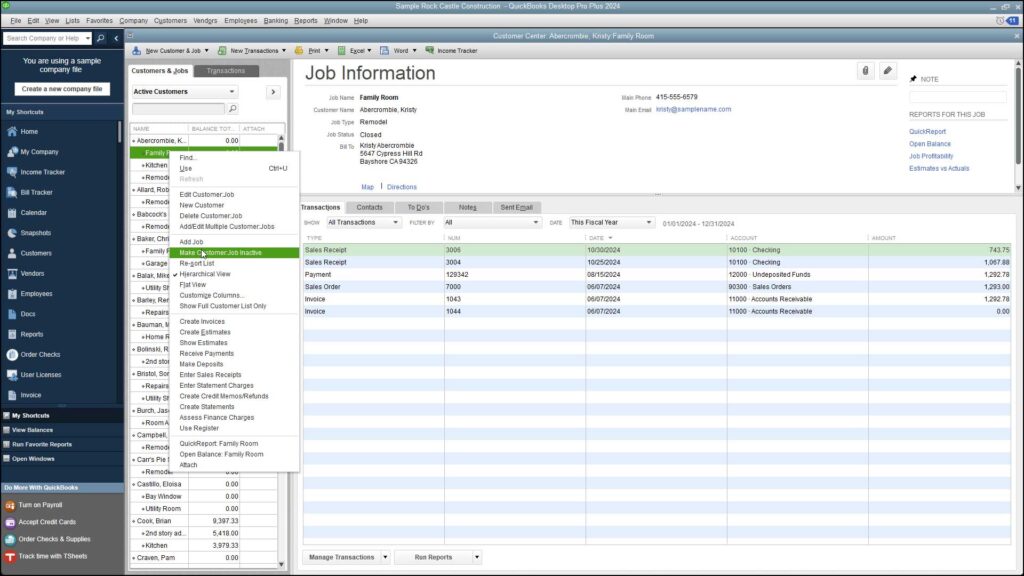
To inactivate an item in QuickBooks Desktop Pro, right-click the item to inactivate in the desired list. Then select the “Make Inactive” command from the pop-up menu that appears. This inactivates the selected list item and hides its display.
To see inactive list items within a list, click the “Include Inactive” checkbox at the bottom of the list window. You can use this method to view inactive list entries in all lists except the “Customers & Jobs,” “Vendors,” and “Employees” lists. In these lists, you can view all items by using the “View” drop-down in the tab above the list. Select “All [item type]” from this drop-down to see the inactive items.
After you do this, a new column appears at the left side of the list. This column shows inactive items, which appear with an “X” next to their names. You can then click any of these “X” symbols to make that list item active again.
Step-by-step Instructions:
- To inactivate list items in QuickBooks Desktop Pro, right-click the item to inactivate.
- Select the “Make Inactive” command from the pop-up menu that appears.
- To show inactive list items within a list that is NOT within a Center, click the “Include Inactive” checkbox at the bottom of the list window.
- To show inactive list items within a list that IS within a Center, click the “View” drop-down in the tab above the list.
- Then select “All ” from the drop-down menu.
- When viewing inactive list items, a new column appears at the left side of the list.
- This column shows the inactive items, which appear with an “X” symbol next to their names.
- To reactivate an inactive list item, click the “X” symbol next to the name of the list item to reactivate.
Video Lesson:
This video lesson, titled “How to Inactivate and Reactivate List Items in Intuit QuickBooks Desktop Pro 2024,” shows how to inactivate and reactivate items in QuickBooks. This video lesson is from our complete QuickBooks tutorial, titled “Mastering QuickBooks Desktop Pro Made Easy v.2024.”