Insert a Column Break in Word – Instructions
Insert a Column Break in Word: Video Lesson
This video lesson, titled “Creating Column Breaks,” shows you how to insert a column break in Word. This video lesson is from our complete Word tutorial, titled “Mastering Word Made Easy v.2019 and 365.”
Insert a Column Break in Word: Overview
This lesson shows you how to insert a column break in Word. This is helpful when creating a document that contains columns, like a newsletter. When using columns in a Microsoft Word document, text flows automatically from one column to the next. You may find you need to stop the text in one column and start it again in the next column. To do this, you can insert a column break in Word.
To insert a column break in Word, place your cursor in the column where you want to insert the break. Then click the “Layout” tab in the Ribbon. Then click the “Breaks” drop-down button in the “Page Setup” button group. Finally, select “Column” from the list of options shown in the drop-down menu that appears. Doing this then adds a column break at your cursor’s current location. The column break causes any text entered after the break to appear in the next column.
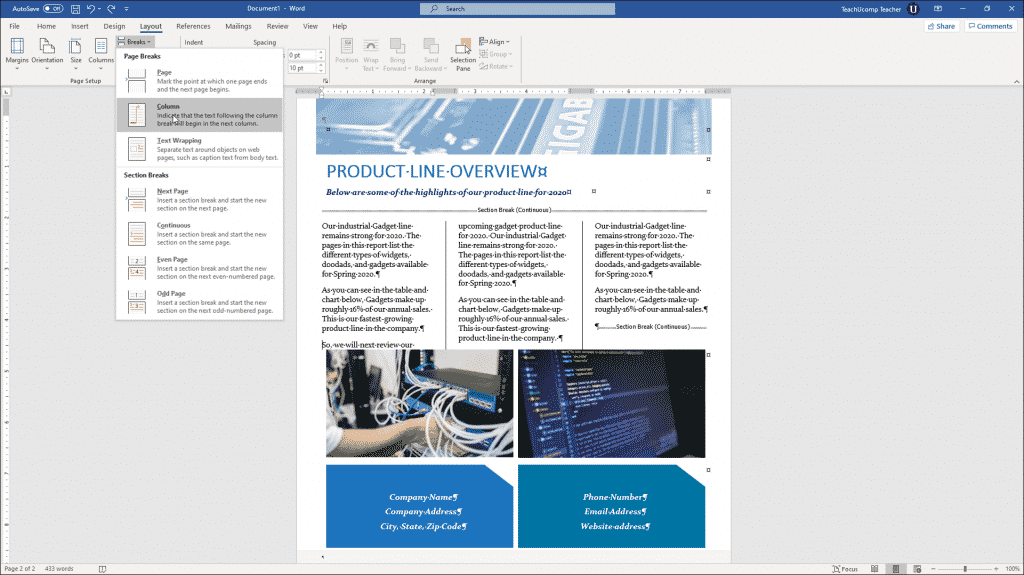
Insert a Column Break in Word – Instructions: A picture of a user adding a column break to columns in a Word document.
Insert a Column Break in Word: Instructions
- To insert a column break in Word, place your cursor in the column where you want to insert the break.
- Then click the “Layout” tab in the Ribbon.
- Then click the “Breaks” drop-down button in the “Page Setup” button group.
- Finally, select “Column” from the list of options shown in the drop-down menu that appears.

