Insert Equations in Word – Instructions and Video Lesson
Insert Equations in Word: Video Lesson
This video lesson, titled “Inserting Equations,” shows you how to insert equations in Word. If you’d like to learn more, this video lesson is from our complete Word tutorial, titled “Mastering Word Made Easy v.2019 and 365.”
Insert Equations in Word: Overview
This lesson shows you how to insert equations in Word within a document. This lesson covers inserting a preset equation and also manually entering an equation.
To insert equations in Word from one of the preset equations, first place your cursor at the insertion point in your document where you want the equation to appear. Then click the “Insert” tab in the Ribbon. At the right end of the tab is the “Symbols” button group. Click the drop-down arrow on the “Equation” button in this button group to then open the menu of choices.
Scroll through the “Built-In” section to view the available preset equations. If you don’t see what you want, then hover over the “More Equations from Office.com” command to see a new side menu of choices. After finding the preset equation to insert, then click it in either of these areas to insert it into your document.
Alternatively, you can insert equations in Word by manually entering an equation. You can do this if you don’t see the equation you want in the list of preset equations. To manually insert an equation in Word, first place your cursor at the insertion point in your document where you want the equation to appear. Then click the “Insert” tab in the Ribbon. Then click the “Equation” button in the “Symbols” button group. A blank equation is then inserted into your document.
At that point, then either an “Equation” contextual tab or a “Design” tab of an “Equation Tools” contextual tab appears in the Ribbon, depending on your Office version. On this contextual tab, then click the buttons in the “Symbols” and “Structures” button groups, in conjunction with any symbols or numbers you need to enter using your keyboard keys, to enter your desired equation into the equation field.
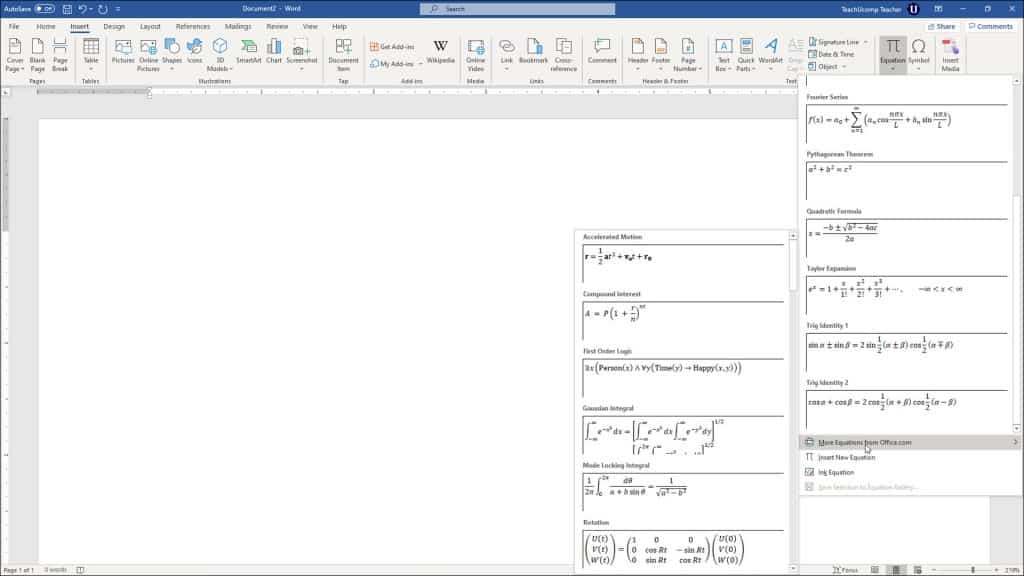
Insert Equations in Word – Instructions: A picture that shows how to insert a preset equation into a Word document.
After you insert equations in Word using either option, you can click the drop-down arrow in the equation field to see a menu of options. Selecting the “Save as New Equation…” option from the menu adds the equation to the drop-down menu of the “Equation” button. You can also choose how the equation looks by selecting the “Professional” or “Linear” options. The next options, “Change to Inline” or “Change to Display,” set how to insert the equation into the document. Selecting “Display” lets you adjust the equation’s justification by using the options in the drop-down menu under the “Justification” option. Selecting “Inline” locks the equation to its original insertion point.
You can also use the buttons in the “Equation” contextual tab in the Ribbon to edit any equation you have inserted. To delete an equation, select it in your document. Then press the “Delete” or “Del” key on your keyboard.
Insert Equations in Word: Instructions
How to Insert Preset Equations in Word:
- To insert a preset equation in Word, place your cursor at insertion point in your document where you want the equation to appear.
- Then click the “Insert” tab in the Ribbon.
- Then click the “Equation” button in the “Symbols” button group on the right end of the tab.
- Scroll through the “Built-In” section to view the available preset equations.
- Hover over the “More Equations from Office.com” option to see a new side menu of choices.
- Then click an equation to insert it into your document.
How to Manually Insert Equations in Word:
- Alternatively, to manually insert and create an equation in Word, place your cursor at the insertion point in your document.
- Then click the “Insert” tab in the Ribbon.
- Then click the “Equation” button in the “Symbols” button group.
- Word then inserts a blank equation field into your document.
- Then either an “Equation” contextual tab or a “Design” tab of an “Equation Tools” contextual tab appears in the Ribbon, depending on your Office version.
- To enter an equation into the blank field, use the “Symbols” and “Structures” button groups on this contextual tab, in conjunction with your keyboard keys.
How to Set Options for Equations in Word:
- To set options for your equation, click the drop-down arrow in the equation field.
- To add the equation to the list of equations in the “Equation” drop-down menu, choose the “Save as New Equation…” command from the drop-down menu.
- To choose how the equation appears in the document, choose either the “Professional” or “Linear” options from the drop-down menu.
- To determine how the equation is inserted into the document, choose the “Change to Inline” or “Change to Display” option.
- After selecting an option, the other option then appears in the drop-down menu.
- To set the justification of the equation field, select the “Change to Display” option.
- Then use the “Justification” option in the equation field drop-down to set the justification.
- Alternatively, select “Inline” to lock the justification to the original insertion point.
How to Edit Equations in Word:
- To edit an equation in Word, select the equation field.
- Then use the buttons in the “Equation” contextual tab in the Ribbon to edit the equation.
How to Delete Equations in Word:
- To delete an equation in Word, select it in the document.
- Then press the “Delete” or “Del” key on your keyboard.

