Invoicing from Time Data in QuickBooks Online- Instructions
How to Invoice from Time Data in QuickBooks Online: Video Lesson
This video lesson, titled “How to Invoice from Time Data in QuickBooks Online,” shows how to perform invoicing from time data in QuickBooks Online Plus. This video lesson is from our complete QuickBooks Online tutorial, titled “Mastering QuickBooks Online Made Easy.”
Overview:
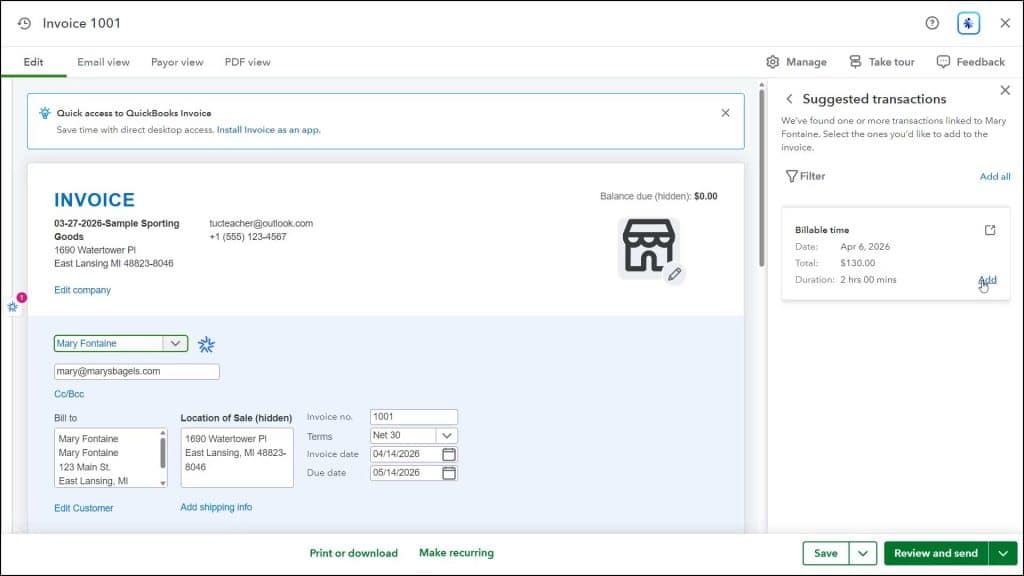
To add billable time to invoices in QuickBooks Online, hover over the “+ Create” button in the Navigation Bar and then click the “Invoice” link under the “Customers” heading in the menu to open the “Invoice” window. Then select the name of the customer or project for whom you entered the billable time to invoice from the “Customer” drop-down.
Then a “Suggested transactions” pane appears at the right side of the invoice window. This pane lists all billable time and expenses for the selected customer or project. Click the “Add” link in the desired “Billable time” to add it to the invoice. Alternatively, to add all billable time and expense entered for the selected customer or project, click the “Add all” link in this pane to add all the items in this pane to the invoice. After adding the billable costs, enter any other invoice information you need. Then click a “Save” button choice in the toolbar at the bottom of the “Invoice” window to save it.