Manage Storage Space in Windows 10 – Tutorial
Manage Storage Space in Windows 10: Video Lesson
This video lesson, titled “Manage Storage Space in Windows 10,” shows you how to manage storage space in Windows 10. This video lesson is from our complete Windows 10 training, titled “Mastering Windows Made Easy v.10.”
Manage Storage Space in Windows 10: Overview
To manage storage space in Windows 10 for your Windows 10 device, open the “Settings” window and click the “System” button in the middle of the screen to display system settings for your device. Then click the “Storage” category at the left side of this window to view storage and save options in the area to the right.
Under the “Storage” section, you can click a hard drive that is shown to see what is taking up space on the drive in the “Storage usage” screen that appears. In this screen, the items are broken down into categories. You can click any category shown to see the items that can be removed from the hard drive, if possible, in a new window. If you open a storage category window, you can click the “Back” button to return to the “Storage usage” screen, where you can then click the “Back” button in the upper-left corner again to return to the “Storage” settings window.
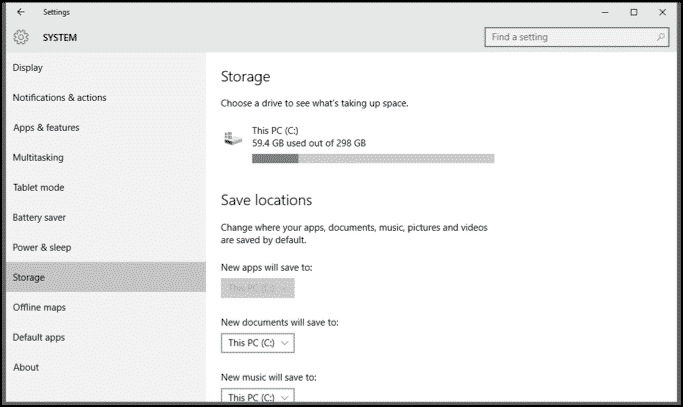
Manage Storage Space in Windows 10 – Tutorial: A picture of the “Storage” settings in Windows 10.
Under the “Save locations” section, you can use the drop-downs under the options shown to select to which hard drive various types of items will be saved by default. The options shown are “New apps will save to,” “New documents will save to,” “New music will save to,” “New pictures will save to,” and “New videos will save to.”
Manage Storage Space in Windows 10: Instructions
- To manage storage space in Windows 10 for your Windows 10 device, open the “Settings” window and click the “System” button in the middle of the screen to display system settings for your device.
- Click the “Storage” category at the left side of this window to view storage and save options in the area to the right.
- Under the “Storage” section, you can click a hard drive that is shown to see what is taking up space on the drive in the “Storage usage” screen that appears.
- In this screen, the items are broken down into categories. You can click any category shown to see the items that can be removed from the hard drive, if possible, in a new window.
- If you open a storage category window, you can click the “Back” button to return to the “Storage usage” screen, where you can then click the “Back” button in the upper-left corner again to return to the “Storage” settings window.
- Under the “Save locations” section, you can use the drop-downs under the options shown to select to which hard drive various types of items will be saved by default. The options shown are “New apps will save to,” “New documents will save to,” “New music will save to,” “New pictures will save to,” and “New videos will save to.”
