Video Lesson on How to Void a Check in Sage 50 Accounting:
This video lesson, titled “How to Void Checks in Sage 50 Accounting,” shows how to void a check in Sage 50 Accounting. This video lesson is from our complete Sage 50 tutorial, titled “Mastering Sage 50 Made Easy.”
Overview of Voiding Checks in Sage 50 Accounting:
You can easily void checks in Sage 50. When you void a check, a new transaction is created that has a check number consisting of the original check number followed by the letter “V.” This new entry reverses the entries made to the General Ledger by the original check. Both still appear in reports and in the “Account Reconciliation” window when you reconcile your accounts.
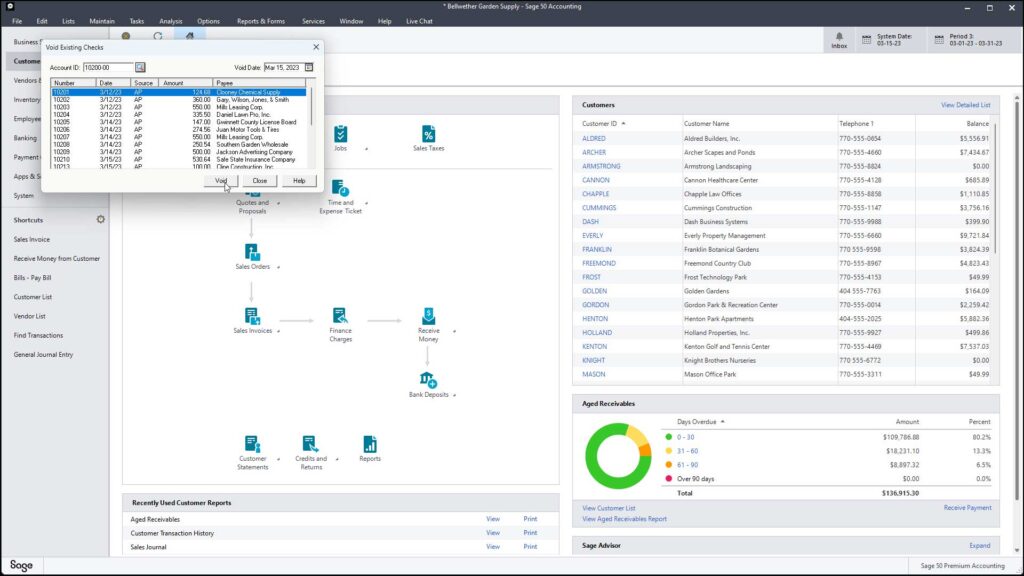
To void a check in Sage 50 Accounting, select “Tasks| Void Checks…” from the Menu Bar to open the “Void Existing Checks” window. Then use the “Account ID” drop-down to select the account that contains the check to void. Use the “Void Date” drop-down to select the date as of which to void the check.
In the “Void Existing Checks” window, select the check to void in the list of checks that appears. Then click the “Void” button. A prompt then appears, asking if you really want to void the check. Click “Yes” if you do or click “No” if you don’t. To finish, then click the “Close” button.