Master Pages in Publisher – Instructions
Master Pages in Publisher: Video Lesson
This video lesson, titled “Using Master Pages,” shows you how to use master pages in Publisher. This video lesson is from our complete Publisher tutorial, titled “Mastering Publisher Made Easy v.2019 and 365.”
Master Pages in Publisher: Overview
You can use master pages in Publisher to change the default appearance of pages in a publication. Master pages in Publisher contain the default page layout objects and content to apply to a publication page. When you add pages to a publication, they are formatted to the master page’s specifications. You can have several master pages in Publisher within a single publication. You can create and customize your own master pages in Publisher. If desired, you can then save them as custom templates for future use.
To display the “Master Page” view, click the “View” tab in the Ribbon. Then click the “Master Page” button in the “Views” button group. The current publication’s master pages then appear in the Navigation Pane at the left side of the window. The currently selected master page in this pane appears for editing in the main window. The “Master Page” tab also appears in the Ribbon. Use the buttons on this tab to manipulate the master pages in Publisher within the publication.
To add a new master page, click the “Add Master Page” button in the “Master Page” button group. In the “New Master Page” dialog box that opens, enter a master page identifier into the “Page ID (1 character):” field. Typically, you identify master pages in Publisher in alphabetical order. Then enter a description of the master page into the “Description:” field. To create a two-page master page, check the “Two-page master” checkbox. When finished, then click the “OK” button.
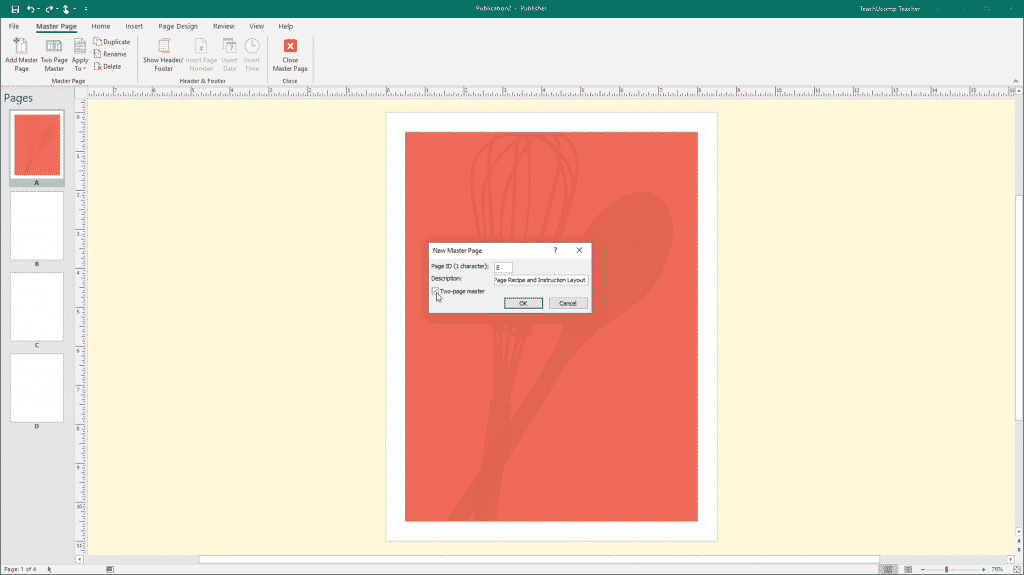
Master Pages in Microsoft Publisher – Instructions: A picture of a user creating a new master page in Publisher.
To customize a master page in Publisher, first select it in the Navigation Pane. Then add any content to show in your publication pages by default into the selected master page. This is a great place to add building block content to display on your pages. You can also apply any other design items for the publication pages that are associated with the selected master page. You cannot edit the master page’s content when it is applied to the actual publication pages. However, it is an excellent place to insert content that will not change. This includes page numbers, design elements, and custom header and footer information.
To access the selected master page’s header and footer, click the “Show Header/Footer” button in the “Header & Footer” button group. Your insertion marker is placed at the left edge of the header or footer each time you click this button. Then use the “Tab” key on your keyboard to move to the center or right tab within the header or footer, if desired.
After the insertion marker is at the desired location, click the “Insert Page Number” button in the “Header & Footer” button group to insert a page number into the text box. You can also click the “Insert Date” or “Insert Time” buttons in the “Header & Footer” button group to insert date or time stamps into the text box at the indicated locations. You can also simply type your own custom header and footer information, if desired. After entering your custom header and footer information, click into the page area to quit editing the headers and footers.
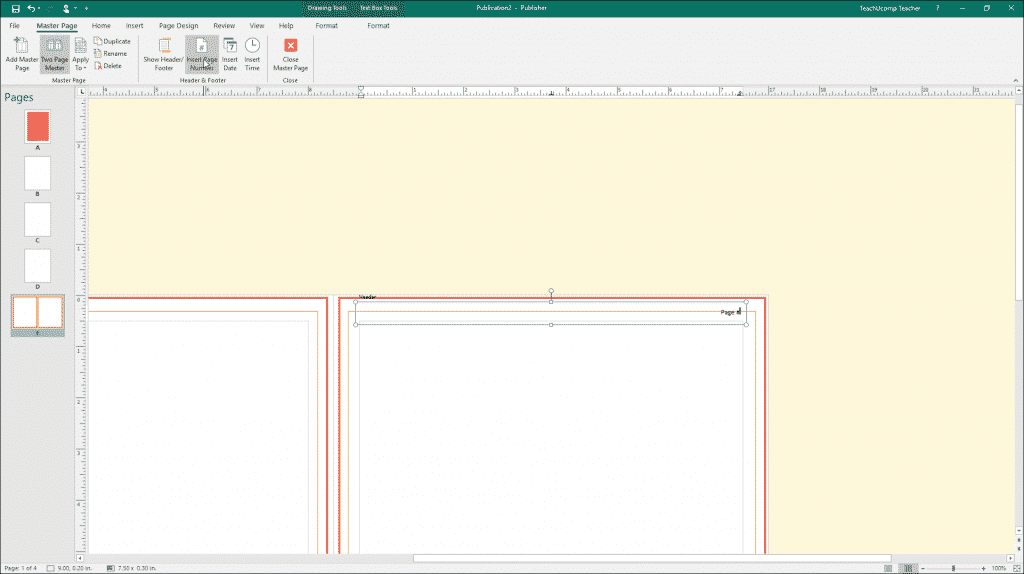
Master Pages in Publisher – Instructions: A picture of a user editing the header and footer of a master page in Publisher.
Back in the “Master Page” button group, you can click the “Two Page Master” button to switch the currently selected master page between a two-page and one-page layout. If you click this button when you have a two-page master page selected, Publisher warns you that all objects on the left master page will be deleted and replaced by the objects on the right master page. You must click the “OK” button in the confirmation dialog box to continue.
To apply the currently selected master page to publication pages, click the “Apply To” drop-down button. From the drop-down, you can select the “Apply to All Pages” command to apply the selected master page to all the publication pages. Select “Apply to Current Page” to apply the master page to the currently selected publication page. You could also select the “Apply Master Page…” command to open the “Apply Master Page” dialog box. This dialog box lets you apply the master page to all publication pages, the current page, or a page range. If you select the “Pages” option, enter the page range into the adjacent fields. Then click the “OK” button to finish.
To duplicate the selected master page, click the “Duplicate” button in the “Master Page” button group. Then enter an ID and description for the duplicate into the “Duplicate Master Page” dialog box that appears. Then click the “OK” button to finish.
To rename a selected master page, click the “Rename” button in the “Master Page” button group. In the “Rename Master Page” dialog box that opens, then enter a new ID and description for the master page. Then click the “OK” button to finish.
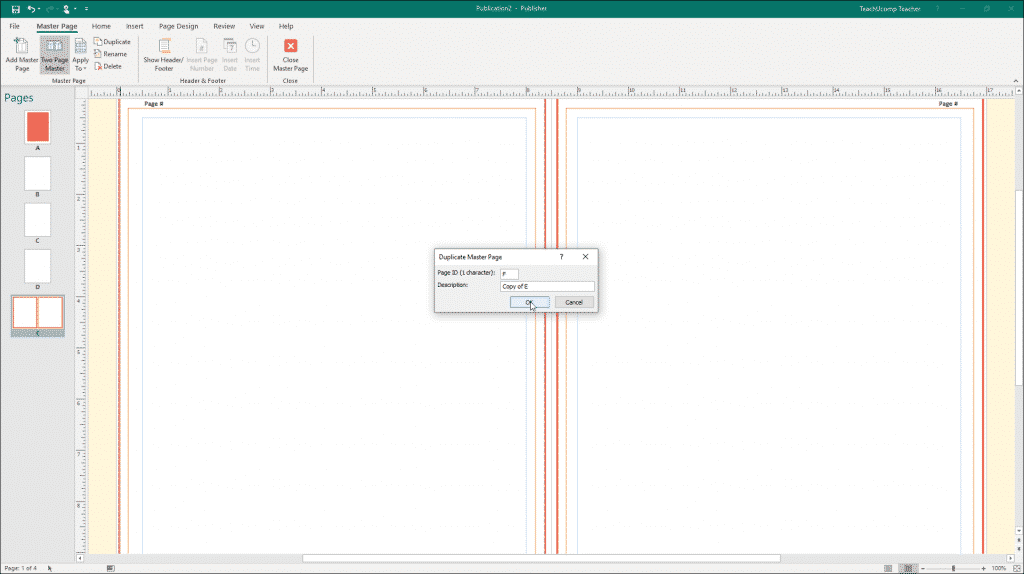
Master Pages in Publisher – Instructions: A picture of a user duplicating a master page in Publisher.
To delete the currently selected master page from your publication, click the “Delete” button in the “Master Page” button group. If you do this, Publisher warns you that if the master page has been applied to any pages in your publication, the first master page will be substituted in its place. If this is fine, then click the “Yes” button.
After customizing master pages in Publisher, click the “Close Master Page” button in the “Close” button group on the “Master Page” tab in the Ribbon to close the master page view.
Master Pages in Publisher: Instructions
- To display the “Master Page” view, click the “View” tab in the Ribbon.
- Then click the “Master Page” button in the “Views” button group.
- Master pages in Publisher appear in the Navigation Pane at the left side of the window.
- The currently selected master page in the Navigation Pane appears for editing in the main window. Also, a new “Master Page” tab appears within the Ribbon.
- To add a new master page, click the “Add Master Page” button in the “Master Page” button group to open the “New Master Page” dialog box.
- Then enter an identifier for the master page into the “Page ID (1 character):” text box.
- Then enter a description of the master page into the “Description:” text box.
- To create a two-page master page, check the “Two-page master” checkbox.
- When finished, click the “OK” button.
- To customize a master page, first select it in the Navigation Pane.
- Then add any content to show in your publication pages by default into the selected master page. This content is not editable when applied to the actual pages in your publication.
- To access the header and footer in your selected master page, click the “Show Header/Footer” button in the “Header & Footer” button group.
- Your insertion marker is then placed at the left edge of the header or footer each time you click this button.
- You can then use the “Tab” key on your keyboard to move to the center or right tab within the header or footer, if desired.
- To insert a page number into the text box once your insertion marker is at the desired location, then click the “Insert Page Number” button in the “Header & Footer” button group.
- To insert date or time stamps into the text box at the indicated locations in the header or footer, then click the “Insert Date” or “Insert Time” buttons in the “Header & Footer” button group.
- You can stop editing the headers and footers by clicking into the main page area
- To switch the currently selected master between a two-page and a one-page layout, click the “Two Page Master” button in the “Master Page” button group.
- If you click this button when you have a two-page master page selected, Publisher warns you that all objects on the left master page will be deleted and replaced by the objects on the right master page.
- Then click the “OK” button in the confirmation dialog box to continue.
- To apply the currently selected master page to publication pages, click the “Apply To” drop-down button.
- To apply the selected master page to all current pages, select the “Apply to All Pages” command from the “Apply To” drop-down.
- If you want to apply the master page to only the currently selected publication page, select “Apply to Current Page” option from the “Apply To” drop-down.
- Alternatively, to open the “Apply Master Page” dialog box, select the “Apply Master Page…” command from the “Apply To” drop-down.
- This dialog box lets you apply the master page to all publication pages, the current page, or a page range.
- If you select the “Pages” option, then enter the page range into the adjacent fields.
- Then click the “OK” button to finish.
- To duplicate the currently selected master page, click the “Duplicate” button in the “Master Page” button group.
- Then enter an ID and description for the duplicate into the “Duplicate Master Page” dialog box that appears.
- Then click the “OK” button to finish.
- To enter a new ID and description for a selected master page, click the “Rename” button in the “Master Page” button group to open the “Rename Master Page” dialog box.
- Then enter the new information and click the “OK” button to rename the selected master page.
- To delete the currently selected master page, click the “Delete” button in this button group.
- If you do this, Publisher warns you that if the master page has been applied to any pages in your publication that the first master page will be applied in its place.
- If this is fine, then click the “Yes” button.
- To close the master page view after customizing the master pages in Publisher, click the “Close Master Page” button in the “Close” button group on the “Master Page” tab in the Ribbon.