Moving Photos in Photoshop Elements – Instructions
How to Create Moving Photos in Photoshop Elements: Video
This video lesson, titled “Moving Photos,” shows how to create moving photos in Photoshop Elements. This video lesson is from our complete Photoshop Elements tutorial, titled “Mastering Photoshop Elements Made Easy v.2022.”
Overview of How to Create Moving Photos in Photoshop Elements:
Moving photos in Photoshop Elements let you take a photo and add a simple pan, zoom, or rotate effect to create a moving photo you can export as an animated GIF. To create moving photos in Photoshop Elements, open the photo to turn into a moving photo in the Photoshop Elements editor. Then select “Enhance| Moving Photos…” from the Menu Bar to open the “Moving Photos” window.
You can use the “Zoom Tool” and the “Hand Tool” in the toolbar at the left side of the window to zoom and pan the preview image that appears, as needed. The motion effects you can apply appear in the scrollable pane at the right side of the window. You can hover over one of these effects to see a preview of the effect appear on the picture for the effect name. To toggle 3D effects on or off, click the “3D Effect” toggle button at the bottom of the pane.
To apply an effect to the preview image, double-click the effect to apply in the pane. The effect is then previewed in the image preview area. To replay the effect preview after applying an effect, click the “Play” button that appears below the preview image. To pause the effect playback, click the “Pause” button that then replaces the “Play” button at the bottom of the window.
If you choose to cancel creating the moving image, click the “Cancel” button in the lower-right corner to cancel your changes and close the window. Otherwise, to export the results as an animated GIF, click the “Export” button. Then, in the “Save As” dialog box that opens, choose the folder into which to save the animated GIF file and type a name for it into the “File name” field. Then click the “Save” button to finish and export the file as an animated GIF.
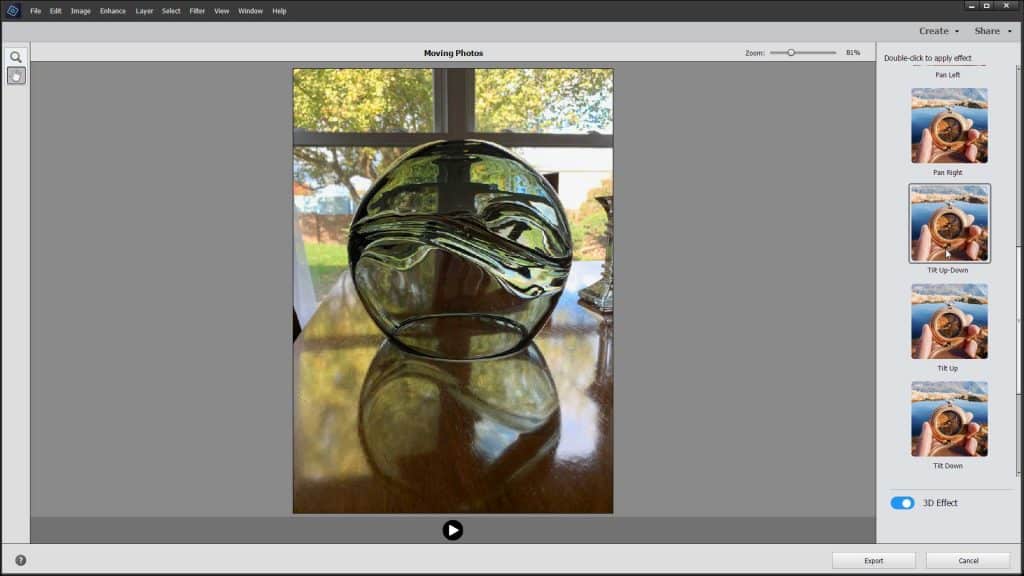
A picture that shows how to create moving photos in Photoshop Elements.
Instructions on How to Make Moving Photos in Photoshop Elements:
- To create moving photos in Photoshop Elements, open the photo to turn into a moving photo in the Photoshop Elements editor.
- Then select “Enhance| Moving Photos…” from the Menu Bar to open the “Moving Photos” window.
- To zoom and pan the preview image that appears, as needed, use the “Zoom Tool” and the “Hand Tool” in the toolbar at the left side of the window.
- The motion effects you can apply appear in the scrollable pane at the right side of the window.
- To see a preview of the effect appear on the picture for the effect name, hover over one of these effects in the pane.
- To toggle 3D effects on or off, click the “3D Effect” toggle button at the bottom of the pane.
- To apply an effect to the preview image, double-click the effect to apply in the pane.
- The effect is then previewed in the image preview area.
- To replay the effect preview after applying an effect, click the “Play” button that appears below the preview image.
- To pause the effect playback, click the “Pause” button that then replaces the “Play” button at the bottom of the window.
- If you choose to cancel creating the moving image, click the “Cancel” button in the lower-right corner to cancel your changes and close the window.
- Otherwise, to export the results as an animated GIF, click the “Export” button.
- Then, in the “Save As” dialog box that opens, choose the folder into which to save the animated GIF file and type a name for it into the “File name” field.
- Then click the “Save” button to finish and export the file as an animated GIF.

