Narrator Settings in Windows 10 – Instructions
Narrator Settings in Windows 10: Video Lesson
This video lesson, titled “Narrator Settings,” shows you how to change the Narrator settings in Windows 10. This video lesson is from our complete Windows training, titled “Mastering Windows Made Easy v.10.”
Narrator Settings in Windows 10: Overview
To manage Narrator settings in Windows 10, open the “Settings” window. Then click the “Ease of Access” button in the middle of the screen to display the ease of access settings. Then click the “Narrator” category at the left side of this window. The Narrator settings in Windows 10 appear in the area to the right.
Narrator is a utility that reads onscreen text aloud to the user. The settings under the “Hear text and controls on the screen” section enable or disable this feature. To enable the Narrator utility, click the “Narrator” toggle switch to set it to the “On” position. To make the Narrator start automatically, click the “Start Narrator automatically” toggle switch to set it to the “On” position.
In the “Voice” section, you can use the “Choose a voice” drop-down to select the voice of the Narrator. Then use the “Speed” and “Pitch” sliders to increase or decrease the speed and pitch of the voice.
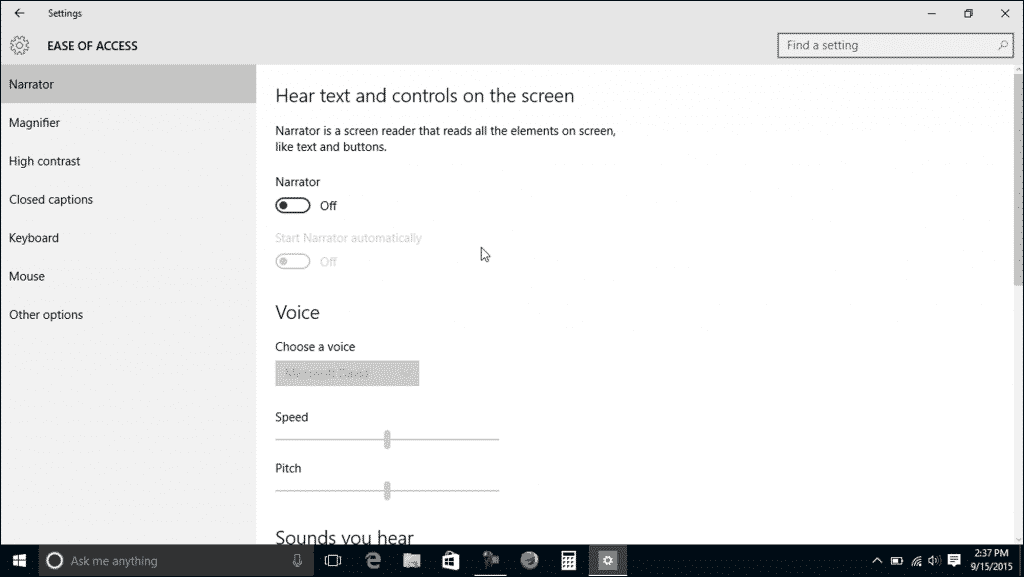
Narrator Settings in Windows 10: A picture of the Narrator settings in Windows 10.
Under the “Sounds you hear” and “Cursor and keys” sections you can click the toggle switches shown. This sets them to either the “On” or “Off” positions to enable or disable each setting. The settings shown in the “Sounds you hear” section are “Read hints for controls and buttons,” “Characters you type,” “Words you type,” “Lower the volume of other apps when Narrator is running,” and “Play audio cues.” In the “Cursor and keys” section, the settings are “Highlight the cursor,” “Have insertion point follow the Narrator,” and “Activate keys on touch keyboard when I lift my finger off the keyboard.”
Narrator Settings in Windows 10: Instructions
- To manage Narrator settings in Windows 10, open the “Settings” window.
- Then click the “Ease of Access” button in the middle of the screen.
- Click the “Narrator” category at the left side of this window to view narrator settings to the right. Narrator is a utility that reads onscreen text aloud to the user.
- To enable the Narrator utility, click the “Narrator” toggle switch under the “Hear text and controls on the screen” section to set it to the “On” position.
- To enable the Narrator to start automatically, click the “Start Narrator automatically” toggle switch to set it to the “On” position.
- You can select the voice of the Narrator by using the “Choose a voice” drop-down in the “Voice” section.
- Then use the “Speed” and “Pitch” sliders to increase or decrease the speed and pitch of the voice.
- Under the “Sounds you hear” and “Cursor and keys” sections, click the toggle switches shown to set them to either the “On” or “Off” positions to enable or disable each setting.
- The settings shown in the “Sounds you hear” section are “Read hints for controls and buttons,” “Characters you type,” “Words you type,” “Lower the volume of other apps when Narrator is running,” and “Play audio cues.”
- In the “Cursor and keys” section, the settings are “Highlight the cursor,” “Have insertion point follow the Narrator,” and “Activate keys on touch keyboard when I lift my finger off the keyboard.”
