TeachUcomp, Inc.

 MY CART
  • VIDEO COURSES
    • All-Access Subscriptions
    • Business Licensing
    • Course List
      • Accounting
      • Adobe
        • Acrobat
        • Lightroom Classic
        • Photoshop
        • Photoshop Elements
      • Crystal Reports
      • Employment Skills
        • Interview Skills
        • Resume Skills
      • For Lawyers
        • Excel for Lawyers
        • Outlook for Lawyers
        • QuickBooks for Lawyers
        • Word for Lawyers
      • HTML
      • JavaScript
      • Microsoft Office
        • Access
        • Excel
        • Microsoft Office Suite
        • OneNote
        • Outlook
        • Outlook on the Web
        • PowerPoint
        • Publisher
        • Word
      • Microsoft Project
      • Microsoft Teams
      • QuickBooks Online
      • QuickBooks Pro
      • Sage
        • Peachtree
        • Sage 50
      • SQL
      • Windows
    • Video Course Options
  • SUBSCRIPTIONS
  • MANUALS
    • Adobe
      • Acrobat
      • Lightroom Classic
      • Photoshop
      • Photoshop Elements
    • Crystal Reports
    • For Lawyers
      • Excel for Lawyers
      • Outlook for Lawyers
      • QuickBooks for Lawyers
      • Word for Lawyers
    • HTML
    • JavaScript
    • Microsoft Office
      • Access
      • Excel
      • OneNote
      • Outlook
      • Outlook on the Web
      • PowerPoint
      • Publisher
      • Word
    • Microsoft Project
    • Microsoft Teams
    • QuickBooks Online
    • QuickBooks Pro
    • Sage
      • Peachtree
      • Sage 50
    • SQL
    • Windows
  • REFERENCE CARDS
    • Adobe
      • Acrobat
      • Lightroom Classic
      • Photoshop
      • Photoshop Elements 2025
      • Photoshop Elements 2024
      • Photoshop Elements 2023
      • Photoshop Elements 2022
      • Photoshop Elements 2021
      • Photoshop Elements 2020
      • Photoshop Elements 2019
      • Photoshop Elements 2018
      • Photoshop Elements 15
    • Google
      • Google Classroom for Teachers
      • Google Docs
      • Google Drive
      • Google Forms
      • Google Sheets
      • Google Slides
    • Mac OS
      • Mac OS Keyboard Shortcuts
    • Microsoft Office
      • Excel Formulas and Functions
      • Excel Keyboard Shortcuts
      • Excel Tables PivotTables and Charts
      • Microsoft 365
        • Access for Microsoft 365
        • Excel for Microsoft 365
        • Microsoft Office 365
        • Outlook for Microsoft 365 Classic Edition
        • PowerPoint for Microsoft 365
        • Publisher for Microsoft 365
        • Word for Microsoft 365
      • Microsoft Office 2021
        • Access 2021
        • Excel 2021
        • Microsoft Office 2021
        • Outlook 2021
        • PowerPoint 2021
        • Publisher 2021
        • Word 2021
      • Microsoft Office 2019
        • Access 2019
        • Excel 2019
        • Microsoft Office 2019
        • Outlook 2019
        • PowerPoint 2019
        • Publisher 2019
        • Word 2019
      • Microsoft Office 2016
        • Access 2016
        • Excel 2016
        • Microsoft Office 2016
        • OneNote 2016
        • Outlook 2016
        • PowerPoint 2016
        • Publisher 2016
        • Word 2016
      • Microsoft Office 2013
        • Excel 2013
        • Microsoft Office 2013
        • OneNote 2013
        • Outlook 2013
        • PowerPoint 2013
        • Word 2013
      • Microsoft Office for iPad
        • Microsoft Office for iPad
      • Word Keyboard Shortcuts
    • Microsoft Teams
      • Microsoft Teams
    • QuickBooks Online
      • QuickBooks Online
    • QuickBooks Pro
      • QuickBooks Pro 2024
      • QuickBooks Pro 2023
      • QuickBooks Pro 2022
      • QuickBooks Pro 2021
      • QuickBooks Pro 2020
      • QuickBooks Pro 2019
      • QuickBooks Pro 2018
      • QuickBooks Pro 2017
      • QuickBooks Pro 2016
      • QuickBooks Pro 2015
      • QuickBooks Pro 2014
    • Sage
      • Sage 50 Accounting
    • SQL
      • SQL
    • Windows
      • Windows 11
      • Windows 11 and 10 Keyboard Shortcuts
      • Windows 10
  • STICKERS
    • Chrome OS
      • Chrome OS for Chromebooks
    • Mac OS
      • Mac OS
    • Microsoft Office
      • Word and Excel (Mac) 2022
      • Word and Excel (PC/Windows) 2021-2016 and 365
    • QuickBooks Desktop
      • QuickBooks Desktop (PC/Windows) 2024
      • QuickBooks Desktop (PC/Windows) 2023
      • QuickBooks Desktop (PC/Windows) 2022-2015
    • Windows
      • Windows 11 and 10
  • SUPPORT
    • Company
      • About Us
      • Blog
      • Contact Us
      • Our History
      • Our Philosophy
        • Customer Service
        • Mission
      • Policies
      • Testimonials
    • Contact Us
    • FAQ
    • Help
    • Lost Password
    • Register a Product
  • LOGIN
    • Manage My Account
    • Member Login
    • My Courses
Shop Now

Place Embedded and Place Linked in Photoshop

by Joseph Brownell / Tuesday, March 19 2024 / Published in Latest, Photoshop

How to Place Embedded and Place Linked Files in Photoshop:

          This video lesson, titled “Learn How to Place Embedded and Place Linked Files in Adobe Photoshop: A Training Tutorial,” shows you how to place embedded or place linked files in Photoshop. This video lesson is from our complete Photoshop tutorial, titled “Mastering Photoshop Made Easy.”

Overview:

            After you create a new blank Photoshop document, you can then place additional images into their own separate layers on top of the “Background” layer that appears by default within the Photoshop document, if desired. A document file in Photoshop can contain many layers. A layer is like a transparent sheet placed on top of the background layer.

            You place additional images and other items into their own separate layers within a Photoshop document so you can select a certain layer and then make changes to only the content in the selected layer. This helps you reduce the risk of accidentally editing image content within the other layers.

            When you use one of the “Place” commands in Photoshop to place an external file into an existing Photoshop document, Photoshop inserts the file into its own separate Smart Object layer. The advantage to placing the file into a Smart Object layer is that you can then perform many common image editing tasks on the Smart Object layer in the Photoshop document, like transforming it in various ways, without degrading the raster data in the file.

Editing Placed File Content in Photoshop:

            However, you cannot directly use the raster editing tools of Photoshop on a Smart Object layer in Photoshop. To edit a Smart Object layer that contains raster content using the raster editing tools in Photoshop, you must either rasterize the layer, which removes the advantages of the Smart Object layer, or use the “Edit Contents” command on the Smart Object layer to edit its raster content in a new window. You can then save the changes to the content and close it to update the content of the Smart Object layer.

Place Embedded versus Place Linked in Photoshop:

            You can place an external file into a Photoshop document as either an embedded file or a linked file. An embedded file is embedded within the Photoshop document, which increases its size. After it is embedded, any changes made to the external file’s contents are not reflected in the embedded copy.

            Alternatively, you can also place an external file into a Photoshop document as a linked file. In this case, Photoshop stores a link to the external file within the Photoshop document. If you change the content of the linked file, those changes also appear in the linked copy you placed.

How to Place a File into a Photoshop Document:

            To place a file in Photoshop as a Smart Object layer, first open the Photoshop document into which to place the file. If desired, select a blank layer in the Layers panel into which to insert the file. Photoshop converts the selected blank layer into a Smart Object layer when you then place the file. Alternatively, if you select a layer containing existing content, like the Background layer, Photoshop adds the file as a new Smart Object layer on top of the selected layer.

            To place an embedded file, then select “File| Place Embedded…” from the Menu Bar. Alternatively, to place a linked file, select “File| Place Linked…” from the Menu Bar. Photoshop then opens the “Place Embedded” or “Place Linked” dialog box, respectively. In either dialog box, you then navigate to the file to place into the Photoshop document, click it to select it, and then click the “Place” button in the dialog box to place the file into a layer as an embedded or linked Smart Object.

            Note that if you are placing a PDF with multiple pages into a Photoshop document, you must select which page to place within the “Open as Smart Object” dialog box that appears, set any other settings, as desired, and then click the “OK” button.

Applying Transforms to the Placed File:

            The selected file then appears within a bounding box in the center of the open Photoshop document. You can then apply any transforms to the placed file, if desired. If you want to change its location, click inside the bounding box and drag it to the desired location.

            To resize it, place your mouse pointer over one of the resizing handles around its border and then click and drag when your mouse pointer turns into a double-pointed arrow. To rotate it, place your mouse pointer outside the bounding box until your mouse pointer turns into a bent arrow icon. Then click and drag to rotate the file.

A picture of a user applying transforms to a placed file after using the "Place Embedded" command in Photoshop but before finalizing the file placement in the Photoshop document.

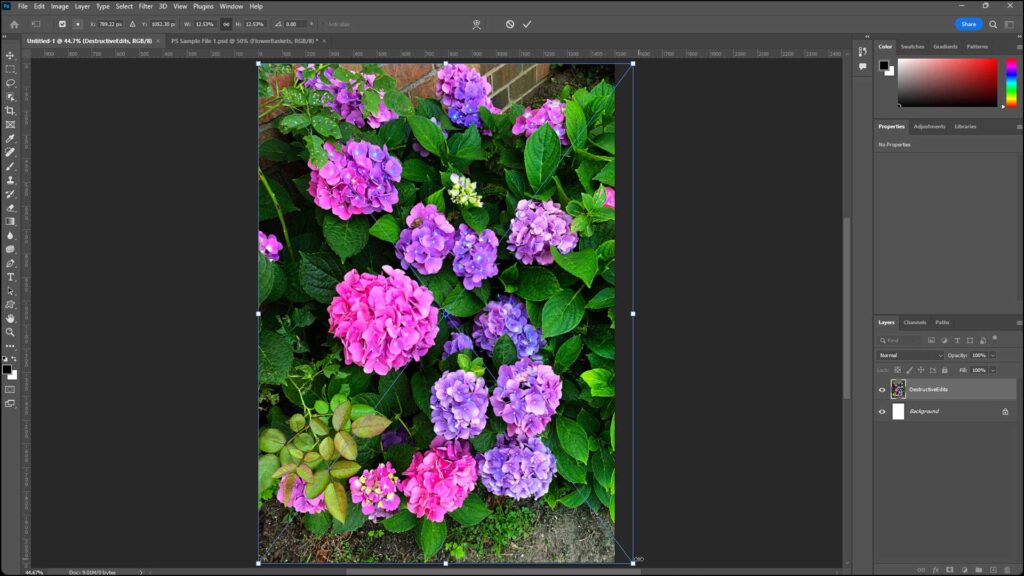
To Finish Placing the File:

            To finish placing the file, then click the “Commit transform” checkmark button in the Options Bar Control panel to commit to the changes. Alternatively, click the “Cancel transform” button in the Options Bar Control panel next to the checkmark button to cancel the entire file placement.

Tagged under: cancel transform, commit transform, course, edit a smart object layer, help, how-to, image, images, instructions, layers, learn, lesson, move, overview, photos, photoshop, place a file in photoshop, place embedded versus place linked, place file in photoshop, place linked, rotate, Smart Object layer, Smart Object layers, teach, training, transforms, tutorial, video

About Joseph Brownell

Joseph Brownell is founder and Vice President of TeachUcomp, Inc. He is the author of dozens of titles across the TeachUcomp, Inc. product line.
Save $150! One Year Online Entire Library $49. Click here for more info.


Photoshop Quick Reference Guide. Buy Now.
 

Categories

  • GET SOCIAL

© 2001-2025 Copyright TeachUcomp, Inc. All rights reserved.

TOP
SALE! $49 All-Access 2 Days 8 Hours 52 Minutes 38 Seconds      $199 $49 Entire Library!
See Deal