Power Settings in Windows 10 – Tutorial
Power Settings in Windows 10: Video Lesson
This video lesson, titled “Power and Sleep Settings in Windows 10,” shows how to set the power settings in Windows 10. This video is from our complete Windows 10 training, titled “Mastering Windows Made Easy v.10.”
Power Settings in Windows 10: Overview
You can easily manage your device’s power settings in Windows 10. These settings control both the power settings and sleep settings in Windows 10. To do this, open the “Settings” window and click the “System” button in the middle of the screen. Doing this then displays the system settings for your device. Then click the “Power & sleep” category at the left side of this window. Doing this then shows the power management and sleep options in the area to the right.
Under the “Screen” section, you can use the “On battery power, turn off after” and “When plugged in, turn off after” drop-downs to select the time increments that should elapse before the screen is turned off when using battery power or when plugged in. Under the “Sleep” section, you can use the “On battery power, PC goes to sleep after” and “When plugged in, PC goes to sleep after” drop-downs to select the time increments that should elapse before the PC goes to sleep when using battery power or when plugged in.
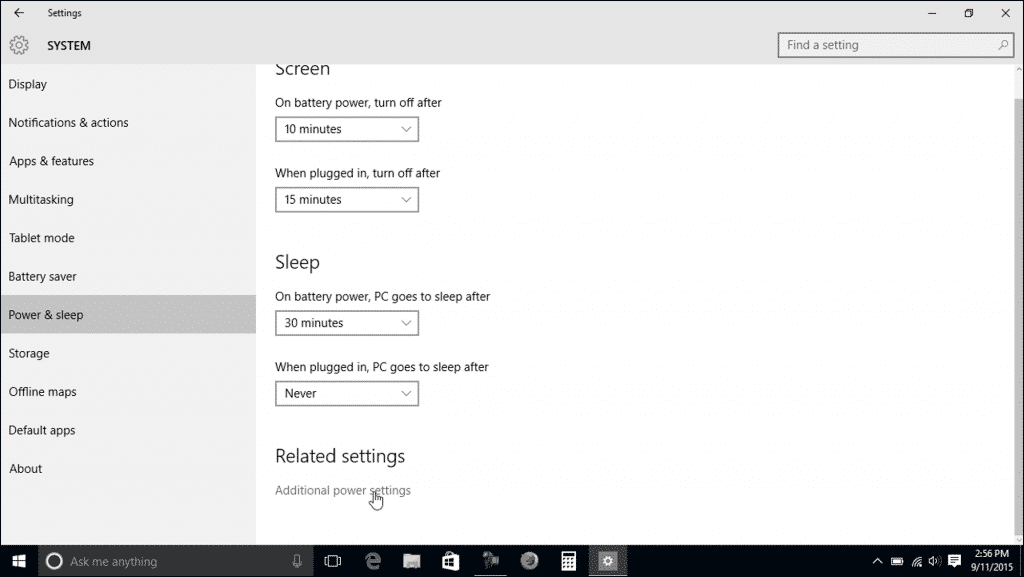
Power Settings in Windows 10 – Tutorial: A picture of the “Power & sleep” settings in Windows 10.
To select a power plan in the “Control Panel,” click the “Additional power settings” link under the “Related settings” section. Doing this then opens the “Power Options” window. You can close the “Power Options” window by clicking the “X” in the upper-right corner when finished. Doing this returns you to the “Power & sleep” settings window.
Power Settings in Windows 10: Instructions
- To manage power settings in Windows 10, open the “Settings” window.
- Then click the “System” button in the middle of the screen.
- Then click the “Power & sleep” category at the left side of this window.
- The power management and sleep options appear in the area to the right.
- To select the time increments that should elapse before the screen is turned off when using battery power or when plugged in, use the “On battery power, turn off after” and “When plugged in, turn off after” drop-downs under the “Screen” section.
- To select the time increments that should elapse before the PC goes to sleep when using battery power or when plugged in, use the “On battery power, PC goes to sleep after” and “When plugged in, PC goes to sleep after” drop-downs under the “Sleep” section.
- To select a power plan in the “Control Panel,” click the “Additional power settings” link under the “Related settings” section.
- The “Power Options” window opens and lets you select a power plan.
- To close the “Power Options” window in the Control Panel, click the “X” in the upper-right corner of the window.
