Remove a Color Cast in Photoshop Elements – Instructions
Remove a Color Cast in Photoshop Elements: Video
This video lesson, titled “Learn How to Remove Color Casts in Adobe Photoshop Elements 2023: A Training Tutorial,” shows how to remove a color cast from images in Photoshop Elements. This video lesson is from our complete Photoshop Elements tutorial, titled “Mastering Photoshop Elements Made Easy v.2023.”
Overview of How to Remove a Color Cast in Photoshop Elements:
You can easily remove a color cast in Photoshop Elements from an image. A color cast occurs when the color channels in an image are not in balance. The undesired effect is often an unusual tint of color and is a common result of improper lighting in a photograph. Fluorescent lights are one of the biggest culprits leading to a color cast in an image. The “Remove Color Cast” command is designed to balance the color in your image and remove the cast.
To remove a color cast in Photoshop Elements, select “Enhance| Adjust Color| Remove Color Cast…” from the Menu Bar. Doing this then launches the “Remove Color Cast” dialog box. The command works when you click the eye dropper tool into the image where it should be white, gray, or black. Elements uses that information to adjust the colors, accordingly. Click around until you get your desired results. If needed, click “Reset” to undo any changes you have made. Finally, click “OK” in the dialog box to save your changes.
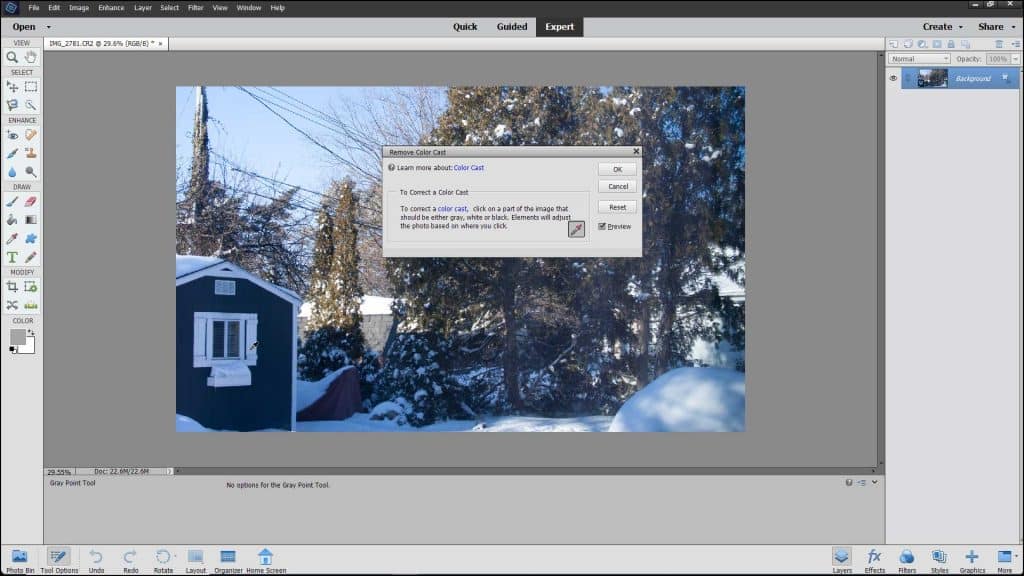
A picture showing how to remove a color cast from a photo in Photoshop Elements.
Instructions on How to Remove a Color Cast in Photoshop Elements:
- To remove a color cast in Photoshop Elements, open the image from which to remove the color cast in Photoshop Elements.
- Then select “Enhance| Adjust Color| Remove Color Cast…” from the Menu Bar to launch the “Remove Color Cast” dialog box.
- Then click the eyedropper tool into the image where it should be white, gray, or black.
- Keep clicking until you find your desired results.
- To undo any changes you have made, click the “Reset” button.
- To save your changes when finished, click “OK” in the dialog box.

