Remove Hidden Data in Acrobat – Instructions
Remove Hidden Data in Acrobat: Video Lesson
This video lesson, titled “Revealing and Clearing Hidden Information,” shows how to remove hidden data in Acrobat Pro DC. This video lesson is from our complete Acrobat tutorial, titled “Mastering Acrobat Made Easy v.Pro DC.”
Remove Hidden Data in Acrobat: Overview
You can remove hidden data in Acrobat Pro DC. To remove hidden data in Acrobat Pro DC, first open a PDF. Then select “Redact” from the Tools Center. Next, click the “Remove Hidden Information” button in the Redact Toolbar. The “Remove Hidden Information” panel then appears in the Navigation Pane. Acrobat also automatically searches the document for hidden information. The word “Done” appears in the “Status” section of the pane when the search operation finishes. Hidden data appears in the “Results” section at the bottom of the panel.
To permanently remove the hidden data listed in the “Results” panel, click the “Remove” button. An informational dialog box launches and displays information regarding the removal of hidden data. Click the “OK” button when finished reading this information. The “Status” section in the pane again shows Acrobat’s progress and displays the word “Done” when the operation is complete. You must save the document before the information is permanently removed.
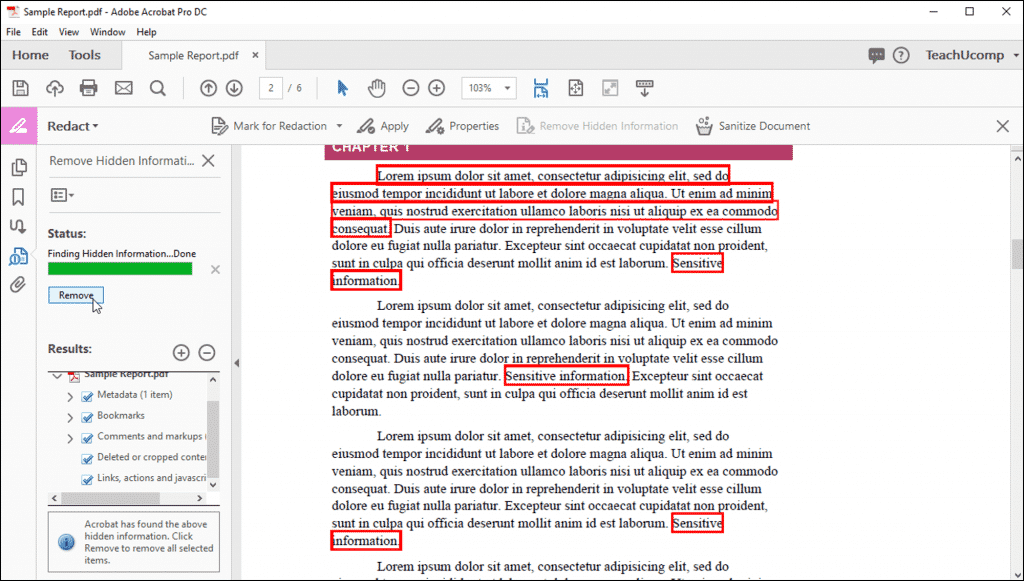
Remove Hidden Data in Acrobat – Instructions: A picture of the hidden data shown in the “Results” panel in Acrobat Pro DC.
The “Sanitize Document” tool works in a similar way, but it removes all sensitive information from a document, hidden or not. This includes markups, comments, links, actions, overlapping objects, and hidden information, as well as other data, such as form fields.
To sanitize a PDF, open the PDF to sanitize. Then click the “Sanitize Document” button in the Redact toolbar. Doing this then opens a message box that lists the types of information and data this tool removes. After reading this list, click the “OK” button to continue.
Doing this opens a “Save Sanitized Document” dialog box, where you can save the sanitized copy of the PDF. You can simply add the word “sanitized” to the end of the current PDF file name in the “File name” field to indicate it is the sanitized version of the PDF. After selecting a save location and entering a file name, click the “Save” button in the dialog box to save the PDF and automatically finish the sanitization process.
Remove Hidden Data in Acrobat: Instructions
- To remove hidden data in Acrobat XI, first open a PDF.
- Then select “Redact” from the Tools Center.
- Click the “Remove Hidden Information” button in the Redact Toolbar. The word “Done” appears in the “Status” section of the pane when the search operation is complete. Hidden data is displayed in the “Results” section at the bottom of the panel.
- To permanently remove the hidden data listed in the “Results” panel, click the “Remove” button.
- An informational dialog box launches and displays information regarding the removal of hidden data.
- Click the “OK” button when finished reading this information.
- The “Status” section in the pane again shows Acrobat’s progress and displays the word “Done” when the operation is complete.
- Save the document to permanently remove the information.
- To sanitize a PDF, open the PDF to sanitize.
- Then click the “Sanitize Document” button in the Redact toolbar to open a message box that lists the types of information and data this tool removes.
- After reading this list, click the “OK” button to continue sanitizing the PDF by opening a “Save Sanitized Document” dialog box.
- Save the sanitized copy of the PDF.
