Resize Columns and Rows in Excel – Instructions and Video Lesson
Resize Columns and Rows in Excel: Video Lesson
This video lesson, titled “Excel for Microsoft 365 Tutorial: How to Adjust Column Width and Row Height in Excel,” shows you how to resize columns and rows in Excel. This video lesson is from our complete Excel tutorial, titled Mastering Excel Made Easy™.
Overview:
You can adjust the width of columns in Excel to correct the display of longer cell entries. You can also adjust row height in Excel to accommodate larger fonts. To manually adjust the width of columns in Excel, select the columns to adjust. Then place your mouse cursor between the column headings, to the right of the selected column heading or column headings. The mouse pointer turns into a double-pointed arrow with a separator line when in the correct position. When it looks like that, then click and drag either right or left to adjust the width of the selected column or columns.
Alternatively, to adjust the width of selected columns in Excel, click the “Format” button in the “Cells” button group on the “Home” tab of the Ribbon and then select the “Column Width…” command from the drop-down menu. Then type the desired column width into the “Column Width” dialog box that opens and click the “OK” button to apply it. The default column width in Excel is 8.43.
To manually adjust the height of rows in Excel, select the rows to adjust. Then place your mouse cursor between the row headings, underneath the selected row heading or row headings. The mouse pointer turns into a double-pointed arrow with a separator line when in the correct position. When it looks like that, then click and drag either up or down to adjust the height of the selected row or rows.
Alternatively, to adjust the height of selected rows in Excel, click the “Format” button in the “Cells” button group on the “Home” tab of the Ribbon and then select the “Row Height…” command from the drop-down menu. Then type the desired row height into the “Row Height” dialog box that opens and click the “OK” button to apply it. The default row height in Excel is 15.
You can also use the “AutoFit” feature in Excel to automatically adjust the width of columns and the height of rows to fit the largest entry in each. To AutoFit the width of columns in Excel, select the columns to adjust. Then place your mouse pointer between the selected column headings, to the right of the selected column heading or column headings. The mouse pointer turns into a double-pointed arrow with a separator line when in the correct position. When it looks like that, then double-click that spot to automatically widen the selected columns to accommodate their largest entries.
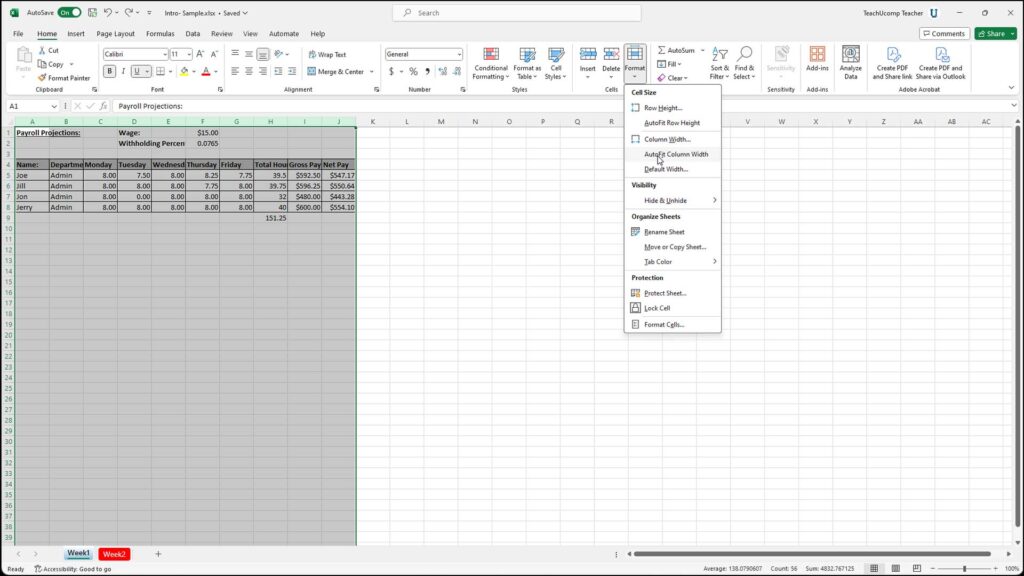
Alternatively, to AutoFit selected columns in Excel, click the “Format” button in the “Cells” button group on the “Home” tab of the Ribbon. Then select the “AutoFit Column Width” command from the drop-down menu.
To AutoFit the height of rows in Excel, select the rows to adjust. Then place your mouse cursor between the row headings, underneath the selected row heading or row headings. The mouse pointer turns into a double-pointed arrow with a separator line when you are in the correct position. When it looks like that, then double-click that spot to automatically heighten the selected rows to accommodate their tallest entries.
Alternatively, to AutoFit selected rows in Excel, click the “Format” button in the “Cells” button group on the “Home” tab of the Ribbon. Then select the “AutoFit Row Height” command in the drop-down menu.
Resize Columns and Rows in Excel: Instructions
- To manually adjust the width of columns in Excel, select the columns to adjust.
- Then place your mouse cursor between the column headings, to the right of the selected column heading or column headings.
- The mouse pointer turns into a double-pointed arrow with a separator line when in the correct position.
- Then click and drag either right or left to adjust the width of the selected column or columns.
- Alternatively, to adjust the width of selected columns in Excel, click the “Format” button in the “Cells” button group on the “Home” tab of the Ribbon and then select the “Column Width…” command from the drop-down menu.
- Then type the desired column width into the “Column Width” dialog box that opens and click the “OK” button to apply it.
- To manually adjust the height of rows in Excel, select the rows to adjust.
- Then place your mouse cursor between the row headings, underneath the selected row heading or row headings.
- The mouse pointer turns into a double-pointed arrow with a separator line when in the correct position.
- Then click and drag either up or down to adjust the height of the selected row or rows.
- Alternatively, to adjust the height of selected rows, click the “Format” button in the “Cells” button group on the “Home” tab of the Ribbon and then select the “Row Height…” command from the drop-down menu.
- Then type the desired row height into the “Row Height” dialog box that opens and click the “OK” button.
- To AutoFit the width of columns in Excel, select the columns to adjust.
- Then place your mouse pointer between the selected column headings, to the right of the selected column heading or column headings.
- The mouse pointer turns into a double-pointed arrow with a separator line when in the correct position.
- Double-click that spot to automatically widen the selected columns to accommodate their largest entries.
- Alternatively, to AutoFit selected columns in Excel, click the “Format” button in the “Cells” button group on the “Home” tab of the Ribbon.
- Then select the “AutoFit Column Width” command from the drop-down menu.
- To AutoFit the height of rows in Excel, select the rows to adjust.
- Then place your mouse cursor between the row headings, underneath the selected row heading or row headings.
- The mouse pointer turns into a double-pointed arrow with a separator line when in the correct position.
- Double-click that spot to automatically heighten the selected rows to accommodate their tallest entries.
- Alternatively, to AutoFit selected rows in Excel, click the “Format” button in the “Cells” button group on the “Home” tab of the Ribbon.
- Then select the “AutoFit Row Height” command in the drop-down menu.

