Save Custom Reports in QuickBooks Online – Instructions
Save Custom Reports in QuickBooks Online: Video Lesson
This video lesson, titled “How to Save Customized Reports in QuickBooks Online,” shows how to save custom reports in QuickBooks Online. This video lesson is from our complete QuickBooks Online tutorial, titled “Mastering QuickBooks Online Made Easy.”
Overview:
How to Save a Customized Report:
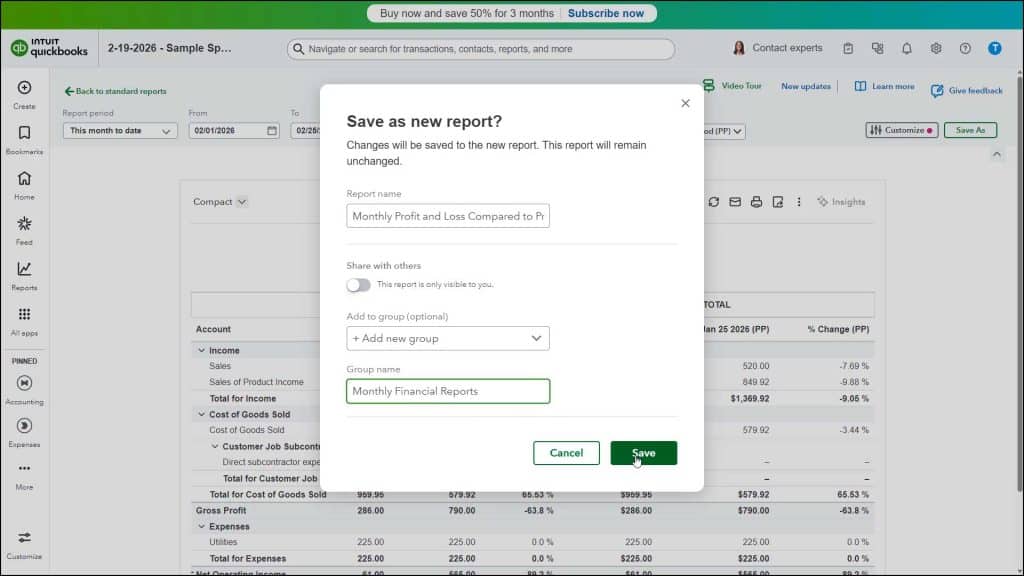
After customizing a standard report in QuickBooks Online, you can save the customizations, so you won’t need to recreate them again. To save a customized standard report in QuickBooks Online that you have run, click the “Save as” button in the upper-right corner of the report customization settings section to open a “Save as new report?” window.
In this window, type a custom report name into the “Report name” field. To share this report with others, click the “Share with others” toggle switch to set it to the “On” position.
Optionally, to add this report to an existing customized report group, use the “Add to group (optional)” drop-down to select the name of the report group. Alternatively, to create a new report group, if needed, select the “+ Add new group” choice in the drop-down and then type a name for the new report group into the “Group name” field that then appears in this window. When finished, click the “Save” button in this window to save the custom report.
How to Find and Run Custom Reports in QuickBooks Online:
To find saved customized reports in QuickBooks Online, click the “Custom reports” link in the “Reports & Analytics” bar to show the “Custom reports” page to the right. Your saved customized reports and, if created, report groups appear in a list on this page.
Reports saved into report groups appear indented below the name of the report group in this same list. To expand and collapse the listing of reports in the report group, click the report group’s name. To run one of these reports, click its name within the list.


