Section Groups in OneNote – Tutorial
Section Groups in OneNote: Video Lesson
This video lesson, titled “Section Groups,” shows you how to create and delete Section Groups in OneNote. This video on how to use Section Groups in OneNote is from our complete OneNote training, titled “Mastering OneNote Made Easy v.2016-2013.”
Section Groups in OneNote: Overview
Section Groups in OneNote let you create a group of sections that are kept separate from the rest of the notebook. Section Groups in OneNote appear in the Notebook Header along with other sections, but the icon looks like three small section tabs stacked upon one another.
To create Section Groups in OneNote, right-click anywhere in the Notebook Header and choose “New Section Group” from the menu that appears. Enter a name on the tab and press the “Enter” key on your keyboard. With the new Section Group created, you can now freely create new sections within the group or move existing sections into it by clicking and dragging those sections onto the group’s tab in the Notebook Header or through the Navigation Bar.
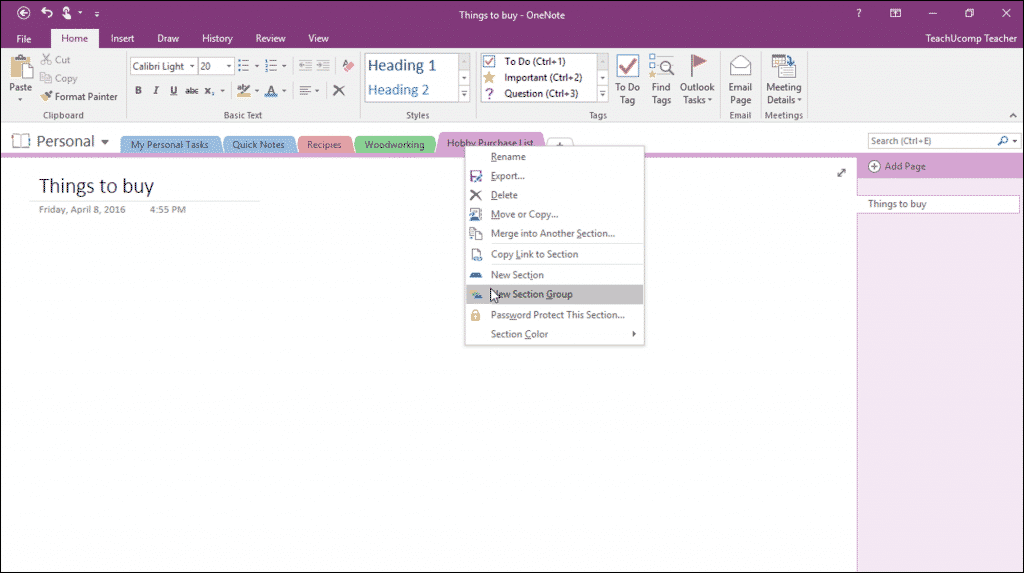
Section Groups in OneNote – Tutorial: A picture of a user creating a Section Group in OneNote 2016.
When you click on a Section Group in the Notebook Header, only the sections within that group will be displayed. You can easily go back to see all of your sections by clicking the “Navigate to parent section group,” which is the small green left-pointing arrow to the left of the Section Group’s name, in the Notebook Header. Keep in mind you can create groups within groups, if you wish, and clicking that same arrow will take you back one step to the current group’s “Parent” group.
To delete a section group, right-click the name in the tab of the group and click “Delete” from the menu that appears. You will need to confirm that you want to delete the section by clicking “Yes” when prompted by OneNote.
Section Groups in OneNote: Instructions
- To create Section Groups in OneNote, right-click anywhere in the Notebook Header and choose “New Section Group” from the menu that appears.
- Enter a name on the tab and press the “Enter” key on your keyboard.
- With the new Section Group created, you can now freely create new sections within the group or move existing sections into it by clicking and dragging those sections onto the group’s tab in the Notebook Header or through the Navigation Bar.
- When you click on a Section Group in the Notebook Header, only the sections within that group will be displayed.
- To go back to see all of your sections, click the “Navigate to parent section group,” which is the small green left-pointing arrow to the left of the Section Group’s name, in the Notebook Header.
- To delete a section group, right-click the name in the tab of the group and click “Delete” from the menu that appears.
- You will need to confirm that you want to delete the section by clicking “Yes” when prompted by OneNote.
