Set the Date and Time in Windows 8- Tutorial
Set the Date and Time in Windows 8: Video Lesson
This video lesson, titled “Setting the Date and Time Display,” shows you how to set the date and time in Windows 8.1. This video is from our introductory Windows 8.1 training, titled “Mastering Windows Made Easy v.8.1.”
Set the Date and Time in Windows 8: Overview
You can set the date and time in Windows 8, which is shown in the lower right corner of the Taskbar within the Desktop app window. To set the date and time in Windows 8, click the date/time display in the Taskbar to view the date and time settings for your computer in a small pop-up window. In this window, you can click the “Change date and time settings…” hyperlink to open the “Date and Time” dialog box where you can set the date and time in Windows 8.
You can click the “Change time zone…” button to open the “Time Zone Settings” dialog box where you can select the time zone for your computer. To also adjust the time for daylight savings changes, check that feature at the bottom of the dialog box to enable it. Then click the “OK” button.
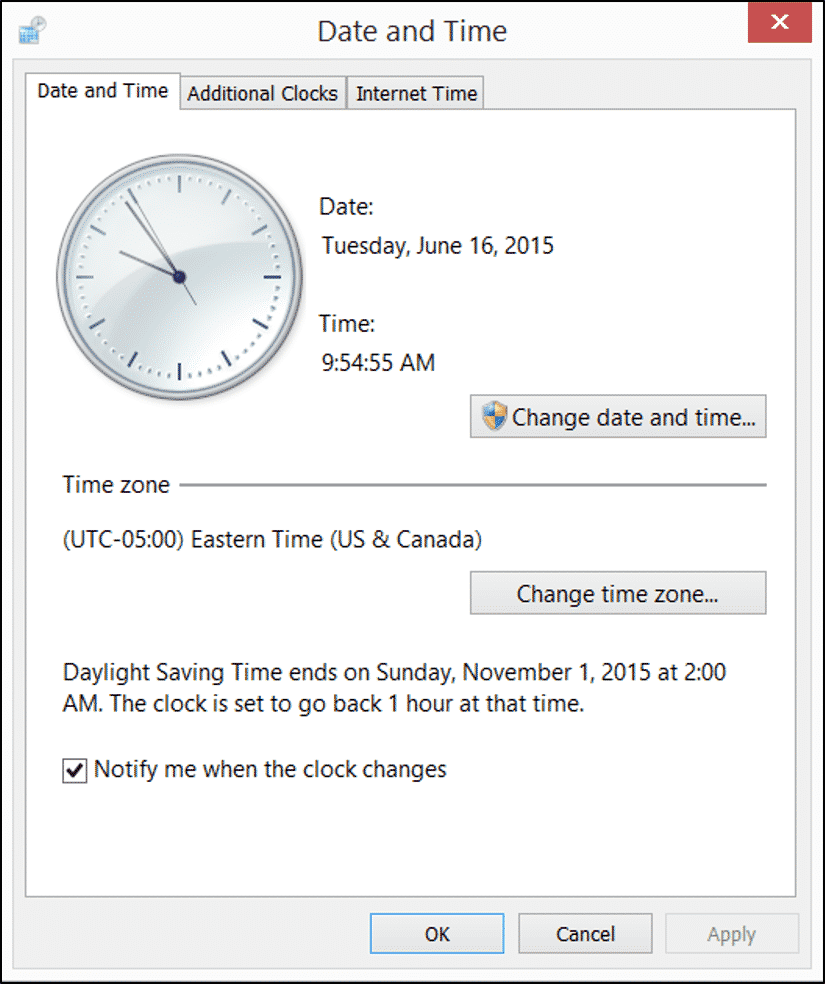
Set the Date and Time in Windows 8- Tutorial: A picture of the “Date and Time” dialog box in Windows 8.1.
To manually set the date and time in Windows 8, click the “Change date and time…” button to open the “Date and Time Settings” dialog box. Select the month and year from the “Date” calendar. Then in the “Time” area, enter the current time into the text box. Then click the “OK” button to apply the settings.
To automatically synchronize your computer’s time with an Internet server, click the “Internet Time” tab within the “Date and Time” dialog box. If your computer is set to synchronize with an Internet timeserver, it will be displayed at the top of this tab. You can click the “Change Settings…” button to open the “Internet Time Settings” dialog box where you can check the “Synchronize with an Internet time server” checkbox and then select a server to synchronize with from the “Server” drop-down. You can click the “Update now” button to update the time. You can then click the “OK” button to apply the change. When you are finished, click the “OK” button to apply any changes made and set the date and time in Windows 8.
Set the Date and Time in Windows 8: Instructions
- The date and time is displayed in the lower right corner of the Taskbar within the Desktop app window in Windows 8.
- To set the date and time in Windows 8, click the date/time display in the Taskbar to view the date and time settings for your computer in a small pop-up window.
- In this window, you can click the “Change date and time settings…” hyperlink to open the “Date and Time” dialog box where you can set the date and time.
- You can click the “Change time zone…” button to open the “Time Zone Settings” dialog box where you can select the time zone for your computer.
- To adjust the time for daylight savings changes, check that feature at the bottom of the dialog box to enable it.
- Click the “OK” button.
- To manually set the date and time in Windows 8, click the “Change date and time…” button to open the “Date and Time Settings” dialog box.
- Select the month and year from the “Date” calendar.
- In the “Time” area, enter the current time into the text box.
- Click the “OK” button to apply the settings.
- To automatically synchronize your computer’s time with an Internet server, click the “Internet Time” tab within the “Date and Time” dialog box.
- If your computer is set to synchronize with an Internet timeserver, it will be displayed at the top of this tab.
- You can click the “Change Settings…” button to open the “Internet Time Settings” dialog box where you can check the “Synchronize with an Internet time server” checkbox and then select a server to synchronize with from the “Server” drop-down.
- Click the “Update now” button to update the time.
- Click the “OK” button to apply the change.
- When you are finished, click the “OK” button to apply any changes made to the date and time settings.
