Show the Developer Tab in Word – Instructions
Show the Developer Tab in Word: Video Lesson
This video lesson, titled “Displaying the Developer Tab,” shows you how to show the Developer tab in Word. This video lesson is from our complete Word tutorial, titled “Mastering Word Made Easy v.2019 and 365.”
Show the Developer Tab in Word: Overview
The first step to create forms in Word you can send to others is to show the Developer tab in Word. Normally, this tab of the Ribbon is hidden in Word, as most users do not need access its features. However, advanced users who want to create forms or write macros using VBA must first show the Developer tab in Word.
How to Show the Developer Tab of the Ribbon in Word
To show the Developer tab in Word, click the “File” tab of the Ribbon. Then click the “Options” command at the left side of the Backstage view. Doing this then opens the “Word Options” dialog box.
In the “Word Options” dialog box, click the “Customize Ribbon” category at the left side of the dialog box. To the right, use the “Customize the Ribbon:” drop-down to select the “Main Tabs” category, if needed. Then check the checkmark next to the “Developer” tab category to enable its display. Then click the “OK” button in the lower-right corner of this dialog box to close it and show the Developer tab in Word.
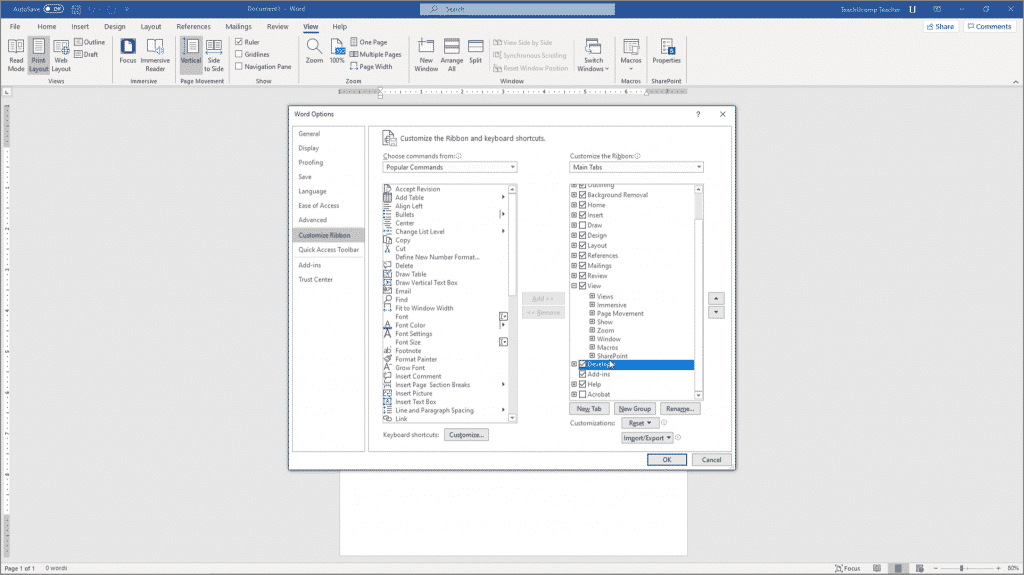
Show the Developer Tab in Word – Instructions: A picture of a user enabling the display of the Developer tab of the Ribbon in Word within the “Word Options” dialog box.
How to Hide the Developer Tab of the Ribbon in Word
To hide the display of the Developer tab in the future, repeat these same steps again. This time, un-check the checkmark next to the “Developer” tab category to hide its display in the Ribbon again.
Show the Developer Tab in Word: Instructions
Instructions on How to Show the Developer Tab of the Ribbon in Word
- To show the Developer tab in Word, click the “File” tab of the Ribbon.
- Then click the “Options” command at the left side of the Backstage view to open the “Word Options” dialog box.
- Click the “Customize Ribbon” category at the left side of the “Word Options” dialog box.
- To the right, use the “Customize the Ribbon:” drop-down to select the “Main Tabs” category, if needed.
- Check the checkmark next to the “Developer” tab category to enable its display.
- Then click the “OK” button in the lower-right corner of this dialog box to close it.
Instructions on How to Hide the Developer Tab of the Ribbon in Word
- To hide the display of the Developer tab of the Ribbon of Word, repeat the same steps listed above, again, but un-check the checkmark next to the “Developer” tab category in step #5, instead.

