Sign-in Options in Windows 11 – Instructions
How to Configure Sign-in Options in Windows 11: Video
This video lesson, titled “Sign-in Options in Windows 11,” shows you how to set additional sign-in options in Windows 11. This video lesson is from our complete Windows 11 tutorial, titled “Mastering Windows Made Easy v.11.”
Overview of the Sign-in Options in Windows 11:
You have additional Windows Hello sign-in options in Windows 11 for better security, so you won’t need to use a Microsoft account password to log in to your device. After you initially sign-in to your device, you can then create the other Windows Hello sign-in options you want and set Windows 11 to use them, instead.
The available sign-in options in Windows 11 depend on the hardware configuration of your computer. For example, computers without a compatible camera cannot use the “Facial recognition (Windows Hello)” sign-in option. The possible sign-in options in Windows 11 include “Facial recognition (Windows Hello),” “Fingerprint recognition (Windows Hello),” “PIN (Windows Hello),” and “Security key.”
To configure additional sign-in options in Windows 11 after initially signing-in to your device, right-click the Start button in the Windows taskbar to show a pop-up menu of choices. Then click the “Settings” command in this pop-up menu to open the “Settings” app window. In the “Settings” app, click the “Accounts” button at the left side of the app to show the “Accounts” settings to the right. Then click the “Sign-in options” button at the right side of the screen to display the current account’s sign-in options in the area to the right.
The different sign-in options appear under the “Ways to sign in” section at the top of the window. To configure your desired sign-in option, click it to expand it. Then click the “Set up” or “Manage” button in the expanded section to begin configuring the alternative sign-in method. Then follow the instructions shown onscreen until you finish setting up the desired sign-in option.
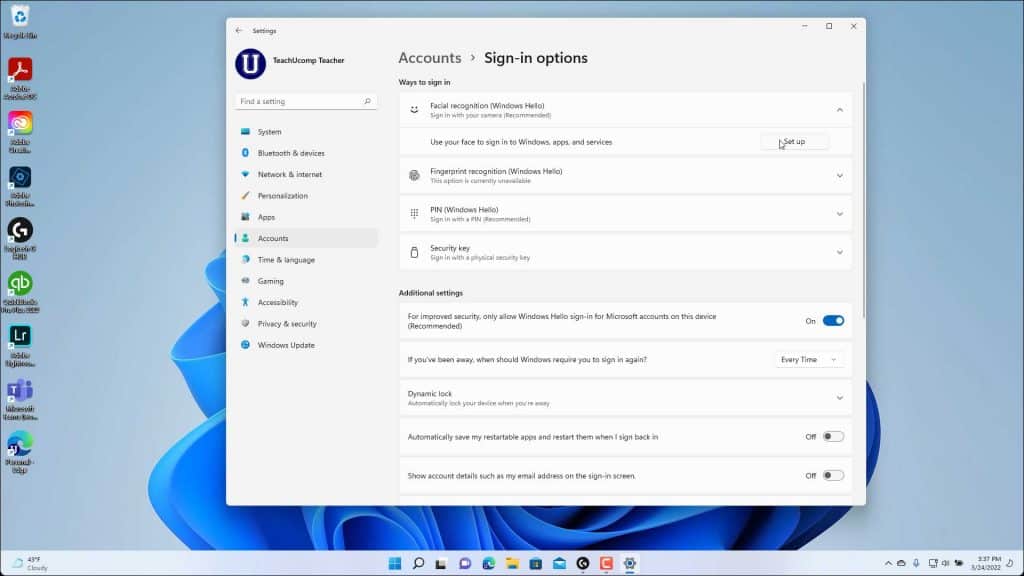
A picture showing the available sign-in options in Windows 11.
Instructions on How Configure Additional Sign-in Options in Windows 11:
- To configure additional sign-in options in Windows 11 after initially signing-in to your device, right-click the Start button in the Windows taskbar to show a pop-up menu of choices.
- Then click the “Settings” command in this pop-up menu to open the “Settings” app window.
- In the “Settings” app, click the “Accounts” button at the left side of the app to show the “Accounts” settings to the right.
- Then click the “Sign-in options” button at the right side of the screen to display the current account’s sign-in options in the area to the right.
- The different sign-in options appear under the “Ways to sign in” section at the top of the window.
- To configure your desired sign-in option, click it to expand it.
- Then click the “Set up” or “Manage” button in the expanded section to begin configuring the alternative sign-in method.
- Then follow the instructions shown onscreen until you finish setting up the desired sign-in option.