Slide Sorter View in PowerPoint- Instructions
How to Use Slide Sorter View in PowerPoint: Video
This video lesson, titled “Slide Sorter View,” shows you how to use Slide Sorter view in PowerPoint. This video lesson is from our complete PowerPoint tutorial, titled “Mastering PowerPoint Made Easy v.2019 and 365.”
Overview of Slide Sorter View in PowerPoint:
Slide Sorter view in PowerPoint lets you view and sort the presentation slides. To switch to Slide Sorter view, click the “Slide Sorter” button in the presentation view buttons in the Status Bar. Alternatively, click the “Slide Sorter” button in the “Presentation Views” button group on the “View” tab of the Ribbon.
You use Slide Sorter view to reorganize, insert, delete and copy the presentation slides. Slide Sorter view in PowerPoint also shows the presentation’s visual flow. You can also add and preview slide transition animation here, as well.
In Slide Sorter view in PowerPoint, all the presentation slides appear as thumbnails. You cannot modify the slide content in this view. However, many of the features you can do in Slide Sorter view in PowerPoint you can also do within the slide thumbnails pane in Normal view. To select a slide in Slide Sorter view, click a slide thumbnail. To reorganize the sequence of slides in your presentation, click and drag the slide thumbnails in this view and then release them in the desired position.
If you double-click a slide thumbnail in Slide Sorter view in PowerPoint or select a slide thumbnail and then press the “Enter” key on your keyboard, you open the selected slide in Normal View, where you can modify its content. To delete a slide in Slide Sorter view, click to select the desired slide thumbnail. Then press the “Delete” key on your keyboard. Alternatively, right-click the slide thumbnail to delete. Then select the “Delete Slide” command in the pop-up menu that appears.
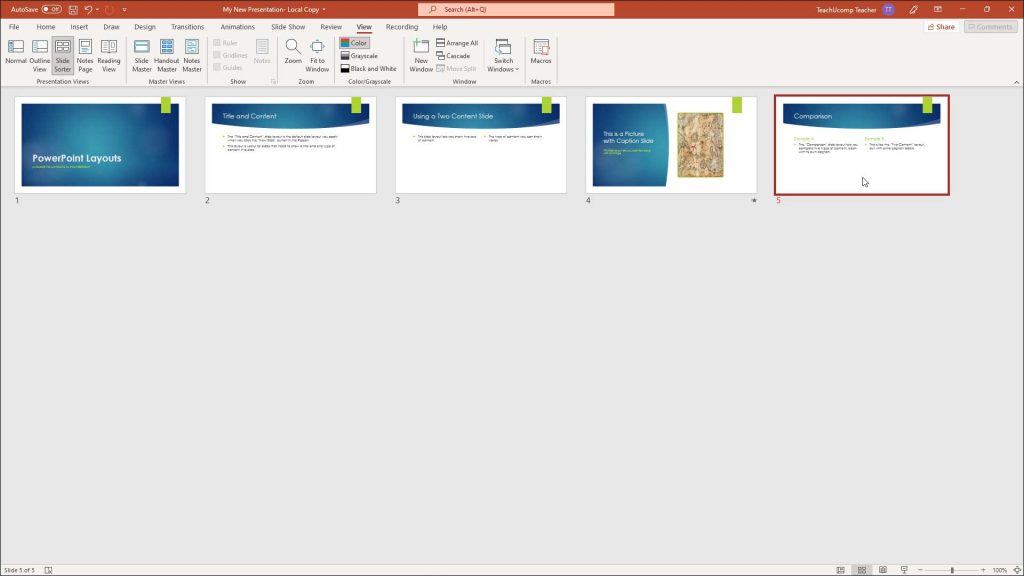
A picture of a presentation shown in Slide Sorter view in PowerPoint for Microsoft 365.
Instructions on Using Slide Sorter View in PowerPoint:
- To switch to Slide Sorter view, click the “Slide Sorter” button in the presentation view buttons on the Status Bar.
- Alternatively, click the “Slide Sorter” button in the “Presentation Views” button group on the “View” tab of the Ribbon.
- In Slide Sorter view, all the presentation slides appear as thumbnails. You cannot modify the slide content in this view. However, many of the features you can do in Slide Sorter view in PowerPoint you can also do within the slide thumbnails pane in Normal view.
- If you want to select a slide in Slide Sorter view, click a slide thumbnail.
- To reorganize the sequence of slides in your presentation, click and drag the slide thumbnails in this view and then release them in the desired position.
- To open a selected slide in Normal View to edit its content, double-click a slide thumbnail in Slide Sorter view in PowerPoint.
- Alternatively, select a slide thumbnail and then press the “Enter” key on your keyboard.
- To delete a slide in Slide Sorter view, click to select the desired slide thumbnail.
- Then press the “Delete” key on your keyboard.
- Alternatively, right-click the slide thumbnail to delete.
- Then select the “Delete Slide” command in the pop-up menu that appears.