How to Use Snapshots in Camera Raw in Photoshop:
This video lesson, titled “Learn How to Use Snapshots in Camera Raw in Adobe Photoshop: A Training Tutorial,” shows how to use snapshots in camera raw in Photoshop. This video lesson is from our complete Photoshop tutorial, titled “Mastering Photoshop Made Easy.”
Overview:
Snapshots in the “Camera Raw” dialog box in Photoshop let you save a camera raw photo’s image state and all its camera raw adjustments and edits as a snapshot. Snapshots let you easily see the effects of editing and adjustments you apply to camera raw images. To access the snapshots in the “Camera Raw” dialog box in Photoshop, click the “Snapshots” button in the toolbar at the right side of the “Camera Raw” dialog box. The Snapshots panel then appears to the left of the toolbar, which you use to create and manage the snapshots of the current camera raw file.
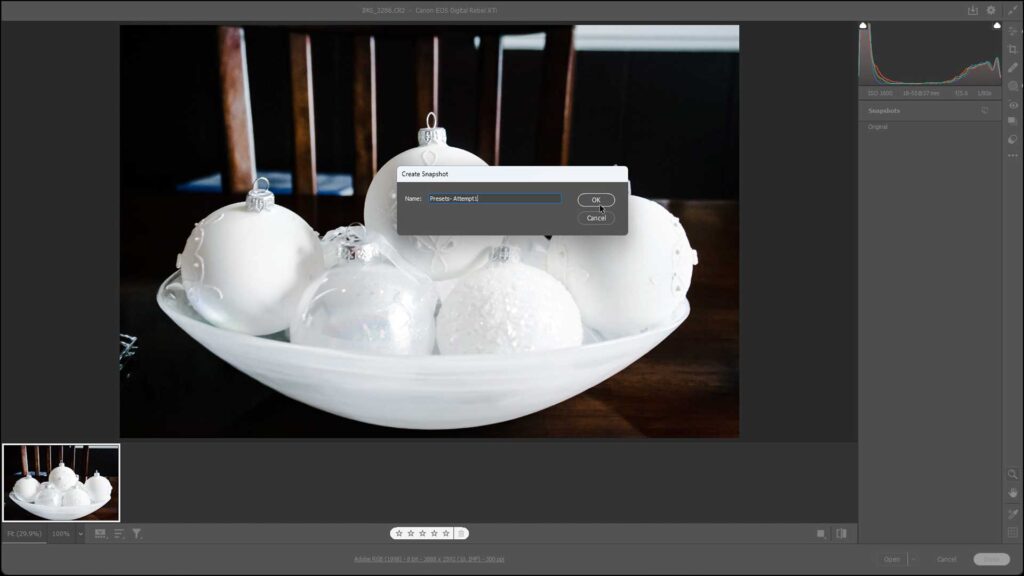
To create a new snapshot of the current camera raw photo and its adjustments and edits, click the “Create Snapshot” button at the top of the Snapshots panel. Then type a name for the snapshot into the “Name” field in the “Create Snapshot” dialog box that opens or leave it with its default date and time name value, if desired. Then click the “OK” button in the “Create Snapshot” dialog box to save the snapshot or click the “Cancel” button to cancel saving it.
After creating a snapshot for an image state, you can then make camera raw editing adjustments, as desired. You can then repeat the process to create another snapshot after applying the desired camera raw edits. If desired, to select a snapshot and apply its adjustments and edits to the current camera raw photo again, click the name of the snapshot to apply in the Snapshots panel. Alternatively, to preview the changes from a previous snapshot to the current preview image, hover over the name of the snapshot to which to compare the current version in the Snapshots panel.
To delete a snapshot in the Snapshots panel, hover your mouse pointer over the snapshot to delete. Then click the “Delete Snapshot” button that appears at its right end. Alternatively, right-click the snapshot to delete and then select the “Delete Snapshot” command in the pop-up menu. To rename a snapshot, right-click the snapshot to rename and then select the “Rename Snapshot…” command to open the “Rename Snapshot” dialog box. Edit the name in the “Name” field to rename it, as desired, and then click the “OK” button to finish.