Spell Check in PowerPoint – Instructions
How to Check Spelling in PowerPoint: Video
This video lesson, titled “Checking Spelling,” shows you how to check spelling in PowerPoint presentations. This video lesson is from our complete PowerPoint tutorial, titled “Mastering PowerPoint Made Easy v.2019 and 365.”
Overview of How to Use Spell Check in PowerPoint:
Spell Check in PowerPoint is a tool that can show you possible misspellings in slide text. To run Spell Check in PowerPoint, click the “Review” tab in the Ribbon. Then click the “Spelling” button in the “Proofing” button group to open the “Spelling” pane. This pane helps you find spelling errors in your presentation.
PowerPoint shows words it suspects may be misspelled in the “Spelling” pane. You can click the “Ignore Once,” “Ignore All,” “Add,” “Change,” or “Change All” buttons to ignore the word, add the word to PowerPoint’s internal dictionary, or change it to a selected word shown in the “Suggestions” list. When you select any of these options, PowerPoint will then move to the next word it thinks may be misspelled until it has completed checking the entire presentation.
To skip the word and move to the next, click “Ignore Once.” To ignore all instances of that word, as it is shown, within the presentation, click “Ignore All,” instead. Alternatively, to add that word to PowerPoint’s dictionary so it will never appear as a misspelling in any future presentations, click “Add.” Alternatively, to change it to the word currently selected in the “Suggestions” list, click “Change.” To change all instances of the word and replace it with the currently selected word in the “Suggestions” list, click “Change All,” instead.
Whenever you reach the end of the spelling check, a box appears to notify you that PowerPoint has finished checking the presentation. Click the “OK” button to close the confirmation box and complete the spelling check for your presentation.
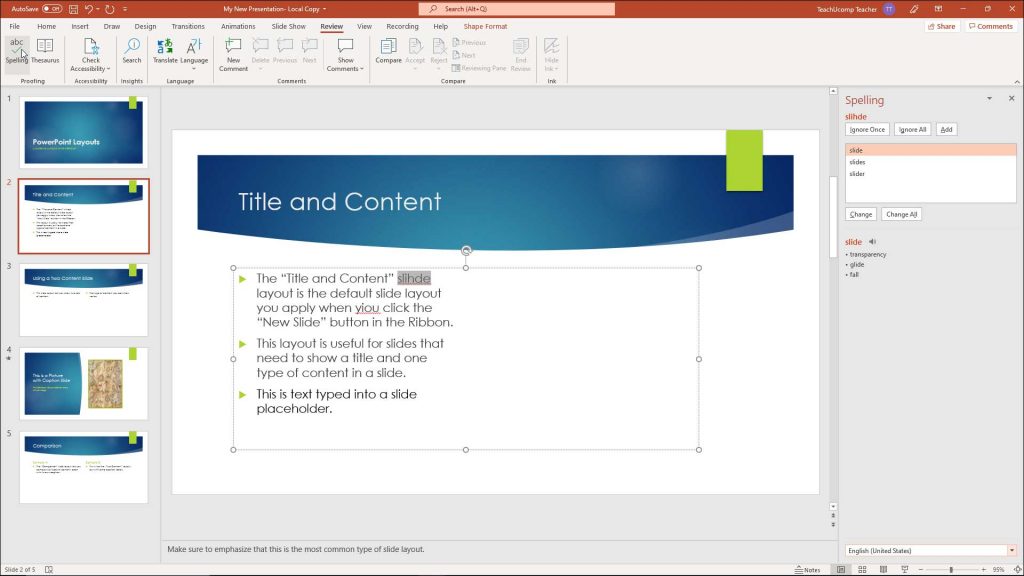
A picture showing how to Spell Check in PowerPoint for Microsoft 365.
Instructions on How to Spell Check in PowerPoint:
- To Spell Check in PowerPoint, click the “Spelling” button in the “Proofing” button group on the “Review” tab of the Ribbon to open the “Spelling” pane.
- PowerPoint shows words it suspects may be misspelled in the “Spelling” pane.
- You can click the “Ignore Once,” “Ignore All,” “Add,” “Change,” or “Change All” buttons to ignore the word, add the word to PowerPoint’s internal dictionary, or change it to a selected word shown in the “Suggestions” list.
- When you select any of these options, PowerPoint will then move to the next word it thinks may be misspelled until it has completed checking the entire presentation.
- To skip the word and move to the next, click “Ignore Once.”
- To ignore all instances of that word, as it is shown, within the presentation, click “Ignore All,” instead.
- Alternatively, to add that word to PowerPoint’s dictionary so it will never appear as a misspelling in any future presentations, click “Add.”
- Alternatively, to change it to the word currently selected in the “Suggestions” list, click “Change.”
- To change all instances of the word and replace it with the currently selected word in the “Suggestions” list, click “Change All,” instead.
- Whenever you reach the end of the spelling check, a box appears to notify you that PowerPoint has finished checking the presentation.
- Click the “OK” button to close the confirmation box and complete the spelling check for your presentation.