Start Settings in Windows 10- Tutorial
Start Settings in Windows 10: Video Lesson
This video lesson, titled “Start Settings,” shows you how to change the Start settings in Windows 10 for your device. This video lesson is from our complete Windows 10 training, titled “Mastering Windows Made Easy v.10.”
Start Settings in Windows 10: Overview
To change the start settings in Windows 10 for the start menu or start screen on your device, open the “Settings” window and click the “Personalization” button in the middle of the screen to display personalization settings for your device. Then click the “Start” category at the left side of the window to see the Start settings in Windows 10 for the Start menu or Start screen at the right side of the screen.
There are five setting switches that you can click or tap to set them to the “On” or “Off” positions in order to enable or disable each setting. The Start settings in Windows 10 are “Occasionally show suggestions in Start,” “Show most used apps,” “Show recently added apps,” “Use Start full screen,” and “Show recently opened items in Jump Lists on Start or the taskbar.”
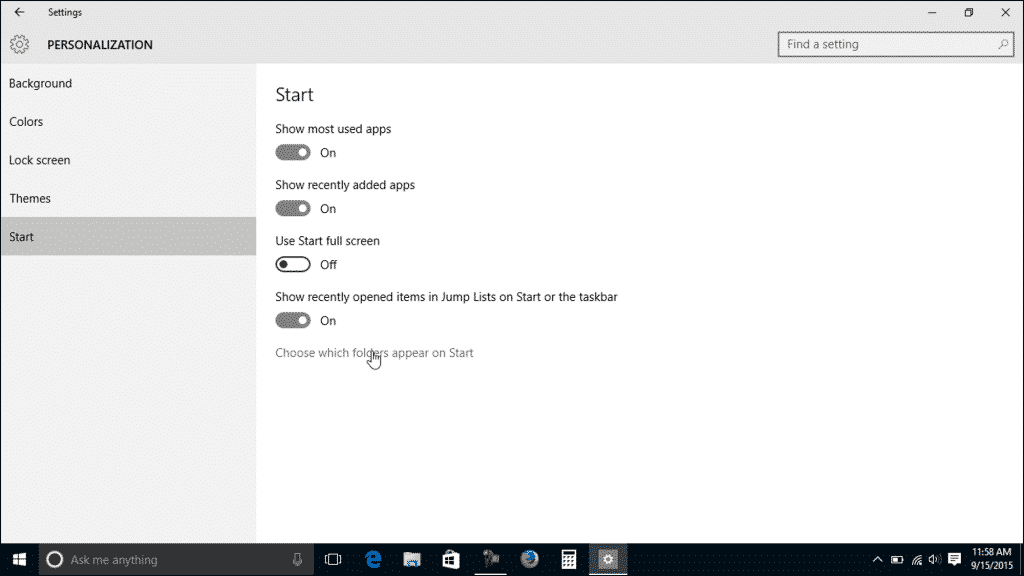
Start Settings in Windows 10- Tutorial: A picture of the Start settings screen in Windows 10.
You can click the “Choose which folders appear on Start” link to open a window of the same name. In this window, you can enable or disable the display of the listed folders within the Start menu or Start screen by clicking their associated switches to set them to either the “On” or “Off” position. The folders are “File Explorer,” “Settings,” “Documents,” “Downloads,” “Music,” “Pictures,” “Videos,” “HomeGroup,” “Network,” and “Personal folder.” When done, click the “Back” button in the upper-left corner to return to the Start settings in Windows 10 page.
Start Settings in Windows 10: Instructions
- To change the Start settings for the Start menu or Start screen on your device, open the “Settings” window and click the “Personalization” button in the middle of the screen.
- Click the “Start” category at the left side of the window to see Start menu and Start screen settings in the right side of the screen.
- There are five setting switches that you can click or tap to set them to the “On” or “Off” positions to enable or disable each setting. The settings are “Occasionally show suggestions in Start,” “Show most used apps,” “Show recently added apps,” “Use Start full screen,” and “Show recently opened items in Jump Lists on Start or the taskbar.”
- You can click the “Choose which folders appear on Start” link to open a window of the same name.
- In this window, you can enable or disable the display of the listed folders within the Start menu or Start screen by clicking their associated switches to set them to either the “On” or “Off” position. The folders are “File Explorer,” “Settings,” “Documents,” “Downloads,” “Music,” “Pictures,” “Videos,” “HomeGroup,” “Network,” and “Personal folder.”
- When done, click the “Back” button in the upper-left corner to return to the “Start” settings page.
